


Are you eager to embark on an exhilarating journey into mobile app development using React Native? This comprehensive tutorial is tailored for beginners, guiding you step-by-step in crafting your very first React Native application. Leveraging React Native, you have the unique opportunity to apply your web development expertise in the realm of native mobile applications, crafting sophisticated and high-performance apps with ZEGOCLOUD that seamlessly runs on both Android and iOS platforms.
Why Do the Largest Companies Use React Native?
React Native is highly valued by large companies for its ability to share one codebase across iOS and Android platforms, dramatically reducing development time and costs. This cross-platform compatibility ensures that updates are swiftly deployed across all devices, crucial for businesses that must adapt quickly to user feedback or market changes.
Furthermore, React Native’s reliance on JavaScript—a widely used programming language—facilitates the recruitment of skilled developers. It also boasts near-native performance, critical for managing large user bases. Supported by a robust community and characterized by a modular architecture, React Native is scalable and flexible, making it ideal for both simple and complex applications. These features combine to make React Native an optimal solution for companies aiming to streamline their mobile app development while maintaining high quality and performance.
Advantages Of Having A React Native App
React Native is a popular framework for building mobile applications that allows developers to use React along with native platform capabilities. Here are some significant advantages of using React Native for app development:
- Cross-Platform Compatibility: React Native enables developers to use the same codebase for both iOS and Android platforms. This significantly reduces development time and cost as compared to native development for each platform separately.
- Live and Hot Reloading: React Native supports live and hot reloading, which allows developers to immediately see the results of the latest changes they have made to the code. This feature enhances productivity by making it easier to iterate on the app’s design and functionality.
- Strong Performance for Mobile Environments: React Native interacts with the native components for both iOS and Android and leverages the device’s processing power. While not as fast as pure native apps, React Native provides sufficient performance for most use cases, especially when compared to other cross-platform frameworks or web applications.
- Vast Libraries and Pre-Built Components: There is a wide array of libraries and pre-built components available in the React Native ecosystem, which can accelerate development. Developers can easily find and implement functionalities that would otherwise take a lot of time to develop from scratch.
- Community and Ecosystem: Being an open-source framework, React Native has a strong and active community. Developers have access to a plethora of resources, tutorials, and third-party tools that continue to grow and evolve, making the platform richer and more robust.
- Ease of Integration with Third-Party Plugins: React Native allows for easy integration with popular third-party plugins, meaning developers can incorporate various functionalities like GPS, cameras, and other sensors without dealing with much native code.
Top 5 Examples of React Native Apps
React Native continues to underline its dominance in the app development sector by being the framework of choice for several leading companies. This cross-platform development tool enables the creation of native-like apps for both iOS and Android from a single codebase, offering efficiency, performance, and flexibility. Here are the top 3 examples of React Native apps:
1. Facebook

As the pioneer and primary contributor to the React Native framework, it’s no surprise that Facebook itself showcases one of the best implementations of this technology. The Facebook Ads Manager app, built with React Native, offers a seamless, intuitive user experience across both major mobile platforms. The choice to use React Native was driven by the need for a single development team to manage the app across platforms, significantly reducing development time and costs.
Why did Facebook choose React Native?
As the creators of React Native, Facebook adopted it to improve mobile app development efficiency. The framework allows them to share code between platforms, which speeds up development cycles and reduces costs. React Native’s ability to provide native-like performance on both iOS and Android made it an ideal choice for Facebook’s complex app structure.
2. Walmart
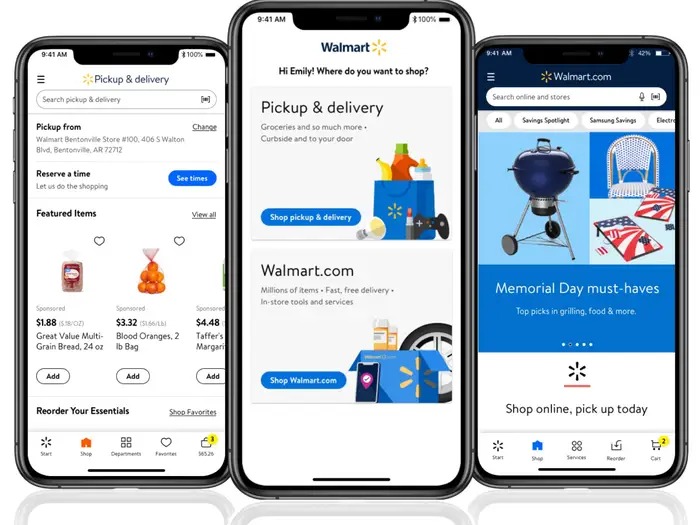
Walmart took its customer service to the next level by revamping its mobile app with React Native, achieving a near-native performance that significantly improved the shopping experience for its users. The decision to switch to React Native was part of Walmart’s strategy to improve efficiency and reduce costs, as it allowed them to use 95% of the codebase between iOS and Android, without sacrificing performance or user experience.
Why did they choose React Native?
Walmart adopted React Native to improve its app’s development speed while ensuring performance consistency across platforms. By using a single codebase, Walmart was able to quickly deploy updates and features while minimizing development costs, which helped them stay competitive in the e-commerce market.
3. Instagram

Instagram embraced React Native to facilitate the development of its app across different platforms. The move allowed for a more streamlined development process, with developers being able to push updates for both iOS and Android simultaneously. React Native was chosen for its ability to blend seamlessly into the existing native codebase, ensuring that Instagram could incrementally adopt React Native for new features without disrupting the app’s overall performance.
Why did they choose React Native?
Instagram chose React Native for its ability to reuse code across platforms, allowing them to roll out features faster and more efficiently. With Instagram’s growing user base, React Native helped them maintain a consistent user experience across both platforms while reducing development time.
4. Airbnb
Airbnb initially adopted React Native to streamline the development process for their mobile app, which helps users find short-term rentals and experiences. Although Airbnb eventually moved away from React Native, their early adoption highlighted the framework’s capability to deliver high-quality mobile app experiences.
Why did they choose React Native?
Airbnb opted for React Native to accelerate development while maintaining native-like performance. By reusing up to 90% of its code between iOS and Android, Airbnb was able to iterate faster and push updates more efficiently during its early mobile app development stages.
5. Uber Eats

Uber Eats is a food delivery app used globally to connect users with local restaurants. While the main Uber app is built with native technologies, the Uber Eats app dashboard uses React Native to handle various user interactions and ensure smooth performance across both platforms.
Why did they choose React Native?
Uber Eats chose React Native for its ability to provide a high-performance experience with real-time updates. The framework allowed them to optimize the app’s dashboard while sharing a significant portion of the codebase, reducing the time spent on developing and maintaining features for iOS and Android separately.
What Need to Consider to Create a React Native App
When considering creating an app with React Native, it’s essential to evaluate several key factors to ensure the success and efficiency of your project:
- Project Requirements: Evaluate if React Native aligns with your app’s performance needs and functionalities. For highly specialized native features, consider the necessity of custom native development.
- Development Skills: Ensure your team is proficient in JavaScript and familiar with React. Knowledge of native development for iOS and Android is also beneficial for integrating custom native modules.
- UI/UX Design: Plan for platform-specific design variations. React Native facilitates cross-platform development, but maintaining a native look and feel on both iOS and Android may require additional effort.
- Third-party Libraries: Investigate the libraries and tools available for React Native. Check their compatibility and maintenance status, as relying on outdated or poorly supported libraries can hinder your project.
- Maintenance and Updates: Factor in the ease of updating your app. React Native allows for over-the-air updates, which can streamline the process of pushing updates to users without app store approvals.
Best Practices for React Native Mobile App Development
React Native is a powerful framework for building cross-platform mobile applications. However, to ensure optimal performance, scalability, and maintainability, following best practices is essential. Below are key strategies for React Native mobile app development:
1. Optimize App Performance
To ensure your app runs smoothly, focus on minimizing re-renders, reducing unnecessary state updates, and using optimized tools like FlatList for handling large datasets. Managing memory efficiently by cleaning up unused components and listeners also helps avoid performance bottlenecks.
2. Use Native Modules When Necessary
While React Native allows for cross-platform development, sometimes native modules are necessary for performance-critical features like complex animations or hardware integrations. Creating custom native modules for iOS and Android can enhance functionality and speed in specific areas of your app.
3. Leverage Code Reusability
Maximize code sharing across platforms by designing modular, reusable components and utilizing libraries that work seamlessly with both iOS and Android. This ensures development efficiency and consistency, reducing the need for platform-specific code.
4. Implement Efficient State Management
Managing application state efficiently is crucial as apps grow more complex. Libraries like Redux or MobX are excellent for maintaining a global state and ensuring your app remains performant. This makes handling data and user interaction smoother and easier to debug.
By following these practices, you can build high-performing, scalable React Native apps that offer a seamless experience across devices.
How to Develop a React Native App with ZEGOCLOUD
Whether you are a seasoned developer or just getting started, this tutorial will provide the foundation to build your first React Native app using ZEGOCLOUD API.
Why ZEGOCLOUD API for React Native Apps
ZEGOCLOUD is a cloud-based platform that offers a range of tools and services for video chat, voice chat, app chat, and live streaming. With these tools, you can easily add real-time communication capabilities to your React Native app, whether for one-on-one video calls, group video conferences, live streaming events, or in-app messaging.
To create an app with React Native by using ZEGOCLOUD SDK, you’re leveraging a powerful platform known for its extensive features designed to enhance real-time communication experiences. ZEGOCLOUD’s key features include:
- Video conferencing: ZEGOCLOUD offers a range of video conferencing tools, including support for one-on-one and group calls, screen sharing, and whiteboarding.
- Voice calls: The platform includes tools for high-quality voice calls, including support for call forwarding and voicemail.
- Chat: ZEGOCLOUD offers in-app chat capabilities, including group chat and messaging support for React Native chat app.
- Live streaming: The platform includes tools for live streaming, including support for real-time interactions and engagement.
- SDKs and APIs: ZEGOCLOUD offers SDKs and APIs to seamlessly integrate its real-time communication tools into your applications.
- Customization options: The platform includes various customization options, including customizing branding and the user interface.
ZEGOCLOUD pricing typically starts at $0.99 per 1000 minutes, but don’t miss out on our special offer – sign up now and get 10,000 free minutes.
How to Build React Native Apps With ZEGOCLOUD SDK
Ready to start building your React Native application for video chat with ZEGOCLOUD? Here’s how to get your app credentials:
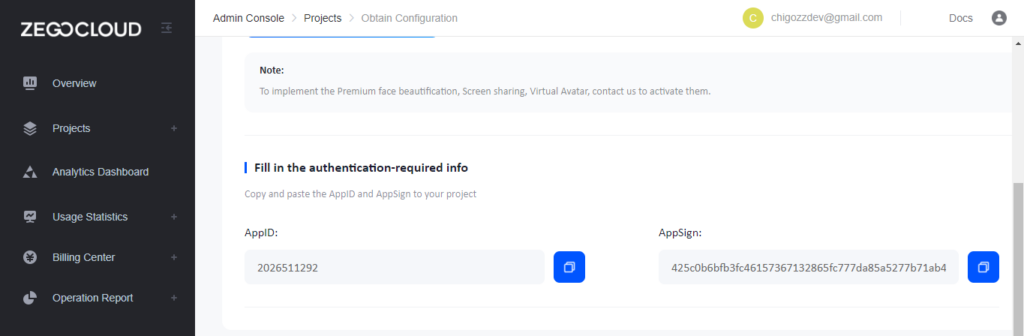
Getting app credentials:
1. First, sign up for a ZEGOCLOUD developer account.
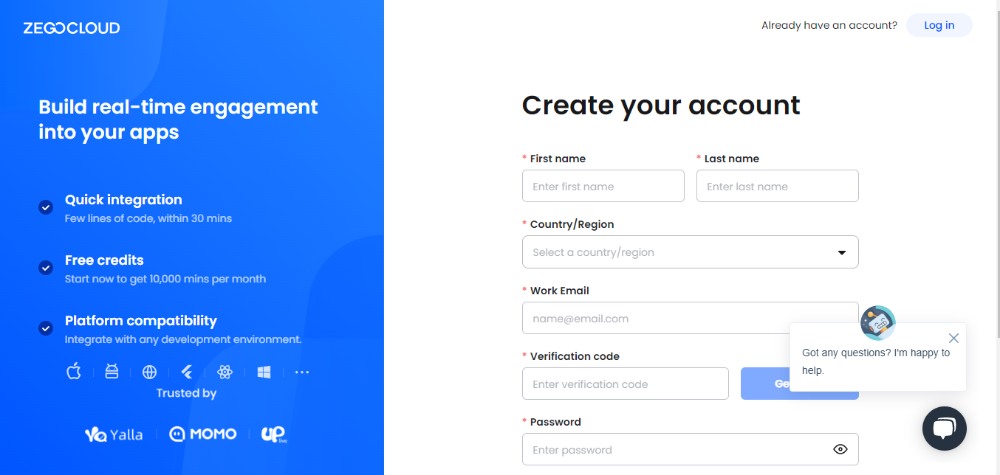
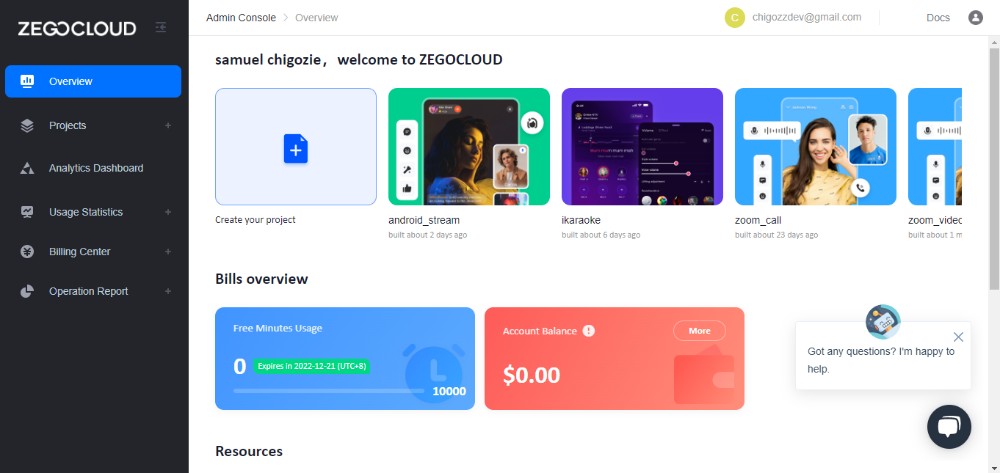
2. Once you’ve signed up, go to the ZEGOCLOUD admin console and create a new project.
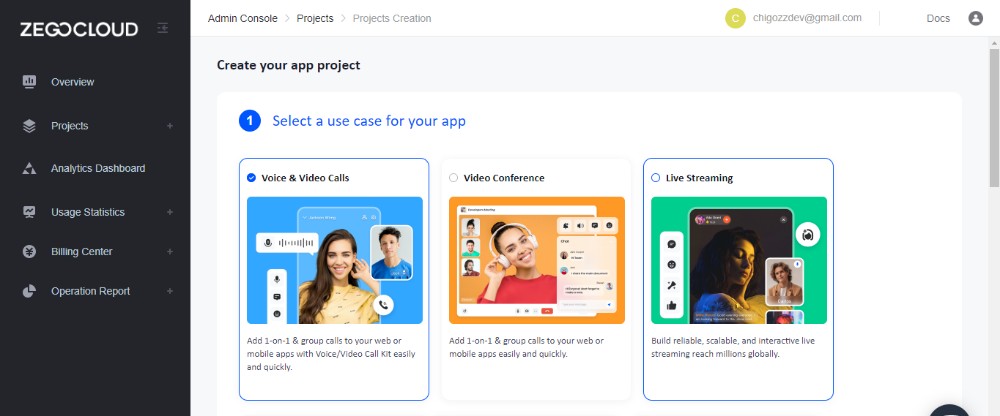
3. When creating your project, select the appropriate app use case – in this case, we recommend selecting “video and voice” for a video call app.
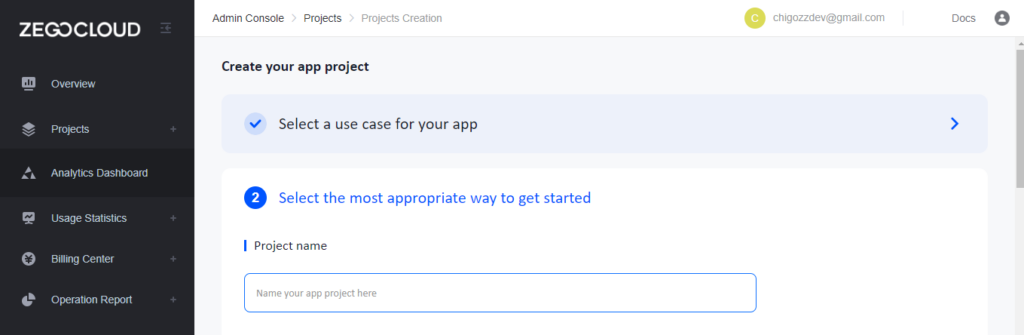
4. Enter a name for your project, choose UIKit, and wait for the build process to complete.

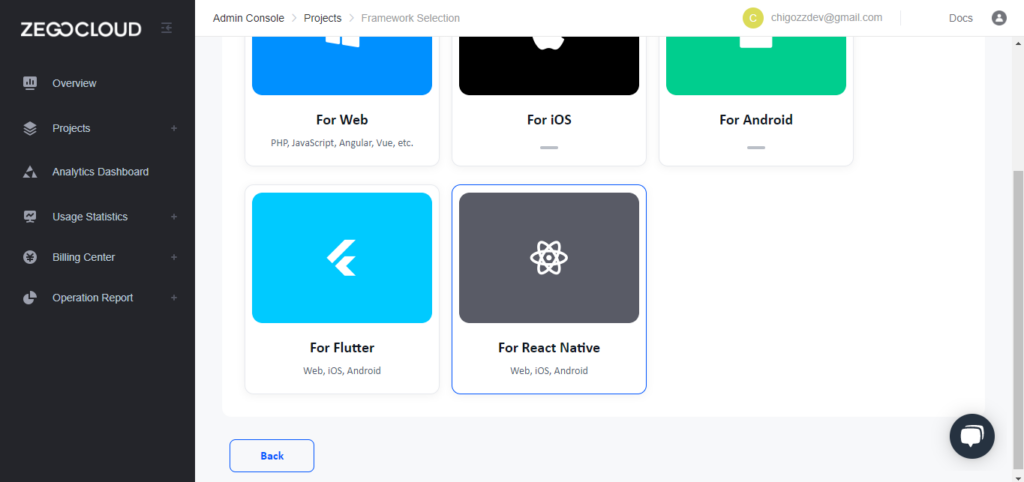
5. Next, select the platform for your app – if you’re building a React Native app, be sure to choose that option.
6. Finally, copy your credentials from the project files. With these credentials, you can integrate ZEGOCLOUD into your app.
Integrating and using ZEGOCLOUD:
- Install the package: You can install the package using either Yarn or npm. For Yarn, run the following command:
yarn add @zegocloud/zego-uikit-prebuilt-call-rnFor npm, run the following command:npm install @zegocloud/zego-uikit-prebuilt-call-rn- Install other dependencies: To ensure that
@zegocloud/zego-uikit-prebuilt-call-rncan work properly, you will need to install some additional dependencies.
yarn add @zegocloud/zego-uikit-rn react-delegate-component zego-express-engine-reactnativeFor npm, run the following command:npm install @zegocloud/zego-uikit-rn react-delegate-component zego-express-engine-reactnative- Locate the
app.jsfile add the following codes inside it, and replace theappIDandappSignparameters with the credentials we got initially.
// App.js
import React, { Component } from 'react';
import ZegoUIKitPrebuiltCall, { ONE_ON_ONE_VIDEO_CALL_CONFIG } from '@zegocloud/zego-uikit-prebuilt-call-rn'

export default function VoiceCallPage(props) {
    return (
        <View style={styles.container}>
            <ZegoUIKitPrebuiltCall
                appID={yourAppID}
                appSign={yourAppSign}
                userID={userID} // userID can be something like a phone number or the user id on your own user system.
                userName={userName}
                callID={callID} // callID can be any unique string.

                config={{
                    // You can also use ONE_ON_ONE_VOICE_CALL_CONFIG/GROUP_VIDEO_CALL_CONFIG/GROUP_VOICE_CALL_CONFIG to make more types of calls.
                    ...ONE_ON_ONE_VIDEO_CALL_CONFIG,
                    onOnlySelfInRoom: () => { props.navigation.navigate('HomePage') },
                    onHangUp: () => { props.navigation.navigate('HomePage') },
                }}
            />
        </View>
    );
}
Configure your project (Android):
- Add the following to the
[project]/android/app/src/main/AndroidManifest.xmlfile:
<uses-permission android:name="android.permission.RECORD_AUDIO" />
<uses-permission android:name="android.permission.CAMERA" />- Add the following to the
[project]/android/app/proguard-rules.profile:
-keep class **.zego.** { *; }Configure your project (iOS):
- Add the following to the
[projec]t/ios/my project/Info.plistfile:
<key>NSCameraUsageDescription</key>
<string>We need to use the camera</string>
<key>NSMicrophoneUsageDescription</key>
<string>We need to use the microphone</string>
Run a demo
Conclusion
Congratulations! You have successfully completed this tutorial on creating a React Native app. Now you have the skills and knowledge to build your mobile apps using this robust framework. Build great real-time React Native applications with ZEGOCLOUD by checking out our demo sample source code. If the need for support and inquiries arises, please contact our technical support team.
Read More:
FAQ
Q1: Is React Native enough for app development?
Yes, React Native is often enough for app development, especially if you need to build apps for both iOS and Android platforms without developing them separately. However, its suitability depends on the complexity of the app. For basic to moderately complex apps, React Native is a great choice. But for apps requiring deep native features or very high performance, you might need to use native code alongside React Native.
Q2: What is React Native app development?
React Native app development is the process of building mobile applications using React Native, a JavaScript framework. It allows developers to write code in JavaScript and React, which can then be used to create apps for both iOS and Android. Unlike traditional native app development, React Native lets you reuse most of the code across platforms, saving time and resources.
Q3: Is React Native still relevant in 2025?
Yes, React Native remains relevant in 2025. It is widely used by developers and companies because it allows for fast, cross-platform mobile app development, has a large community, and continues to receive updates from Facebook (Meta). However, newer frameworks like Flutter are also gaining traction, so the choice depends on specific project needs.
Q4: Can you make apps with React Native?
Yes, you can make fully functional apps with React Native. It supports building a wide range of apps, from simple apps to more complex ones. You can access device hardware features, integrate third-party libraries, and deploy the app to both iOS and Android using the same codebase.
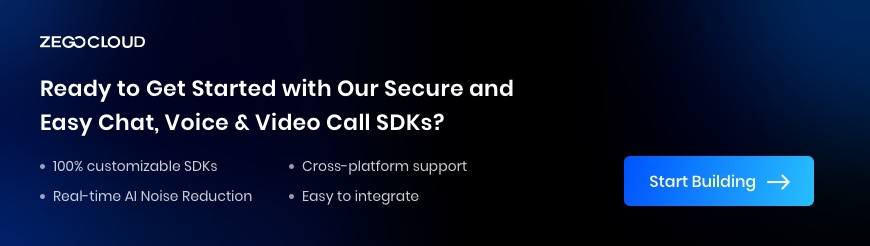
Let’s Build APP Together
Start building with real-time video, voice & chat SDK for apps today!
