


Want to learn how to build web applications? You’ve found the right guide! We’ll explain what web application development is, the different parts of it, what skills you’ll need, and how to get started. Even if you’re a development beginner, this guide will give you the basics to start making your own web apps. We’ll also share web application development tips and resources to help you learn.
What is a Web Application?
A web application is a software program that runs on a web server and is accessed through a web browser over a network such as the Internet or an intranet. Unlike traditional desktop applications, which are launched by your operating system, web apps must be accessed through a web browser. This approach means that web applications do not need to be downloaded or installed on the user’s device; instead, they are accessed and used directly in the browser, which makes them platform-independent and easily accessible from anywhere.
Web applications can range from simple tools like email services and online calculators to complex software systems such as project management tools, social media platforms, and e-commerce sites. They are developed using standard web technologies, including HTML, CSS, and JavaScript, and often involve both frontend and backend components. These components work together to manage the user interface, application logic, and data storage and retrieval. The convenience, ease of updates, and ability to support multiple users simultaneously are key reasons for the growing popularity of web applications.
What is Web Application Development?
Web application development is the process of making apps that you use in a web browser over the internet. Web apps are not installed on your computer like regular programs. Instead, they are hosted on remote servers and you access them through a website.
The main parts of a web app are:
- The front-end user interface is made with HTML, CSS, and JavaScript that runs in the browser. This is the part you see and interact with.
- The back-end code is made with languages like PHP, Ruby, Python, Java, etc. that run on the server. This handles the behind-the-scenes logic.
- The database that stores and manages data for the app.
To build web apps, web application developers need skills in:
- Front-end coding for the user interface
- Back-end coding for server-side logic
- Databases for storing and managing data
Frameworks like React, Angular, Django, Rails, Spring, and Laravel help speed up web app development. The goal is to build an interactive app that is useful to users over the web with a great experience.
Web apps are very common today – webmail, social networks, streaming, shopping sites, and more are web apps we use daily. With complex features and the need to handle many users, web app development today uses agile methodologies.

What is the Difference Between Web Apps and Mobile Apps?
When comparing web apps and mobile apps, there are several key differences to consider, such as accessibility, performance, development cost, and user experience.
| Comparison Aspect | Web Apps | Mobile Apps |
|---|---|---|
| Accessibility | Accessible via any browser, on multiple devices. | Must be downloaded and installed on specific platforms (iOS, Android). |
| Performance | Slower performance, dependent on internet and browser. | Faster performance, optimized for specific devices and platforms. |
| Development Cost | More cost-effective; one version for all platforms. | Higher cost; needs separate development for each platform (iOS, Android). |
| User Experience | May have less smooth experience; depends on browser capabilities. | Offers smoother, native user experience with full device integration. |
| Updates and Maintenance | Easy and quick updates via the web. | Updates require user action and go through app store approval processes. |
| Offline Usage | Generally requires internet; limited offline functionality. | Can offer offline access to certain features and content. |
Skills Required for Web App Development
Developing web applications requires a mix of technical and soft skills to build functional and user-friendly platforms. Here’s a streamlined overview:
Technical Skills:
- Frontend Development: Key skills include HTML/CSS for structure and style, JavaScript for interactivity, and frameworks like React or Angular for efficient UI development.
- Backend Development: Involves programming languages like Python (Django), JavaScript (Node.js), or Java, and understanding database management with SQL or NoSQL databases. Knowledge of creating and managing APIs using REST or GraphQL is also essential.
- Full-Stack Development: Combines both frontend and backend skills, requiring knowledge of web frameworks such as Django for Python or Express for Node.js, and version control tools like Git.
- Testing and Debugging: Skills in writing unit tests, performing integration testing, and debugging help ensure the reliability and functionality of the application.
- Security and Performance: Includes implementing security best practices, understanding authentication and authorization, and using strategies like caching and load balancing to optimize performance.
Soft Skills:
- Problem-Solving: Essential for diagnosing issues and devising effective solutions.
- Communication: Important for explaining complex ideas and collaborating with team members.
- Adaptability: Crucial for keeping up with evolving technologies and methodologies.
These competencies help developers create robust, scalable web applications that cater to diverse user needs and drive business success.
How Does the Web Application Work?
A web application works by utilizing a client-server architecture. When a user interacts with the web app through a browser, the client (which is the user’s device) sends a request to the server, typically using HTTP or HTTPS protocols.
The server, which hosts the web application, processes the request, retrieves the necessary data from databases, and then sends back the appropriate response to the client. The client then displays this information in the browser, allowing the user to interact with it.
Unlike traditional desktop applications, web apps do not require installation on the user’s device and can be accessed anytime, as long as the user has an internet connection.
This setup enables the app to be updated or maintained centrally, ensuring that all users have access to the latest version without needing to install updates manually.
Web Application Development Frameworks
Web application development frameworks are like toolkits for creating dynamic websites and apps. Here are some top picks:
Frontend
- React – This is a JavaScript library perfect for crafting user interfaces. It’s fast and comes with lots of tools.
- Vue.js – Known for being light and easy to get into. It’s awesome for creating interactive screens.
- Angular – Made by Google and uses TypeScript. It’s great for single-page apps and allows two-way data sharing.
- Ember – This one focuses on setting standards rather than making you decide everything. It uses modern JavaScript and handles common tasks well.
Backend
- Express – A no-fuss framework using Node.js. It’s ideal for making REST APIs and web apps.
- Django – A Python framework that comes with lots of features, like a database manager, right out of the box.
- Ruby on Rails – Uses Ruby and focuses on getting things done quickly and elegantly. It sets strong guidelines to follow.
- Laravel – Built on PHP and offers a clean, elegant way to code. It’s packed with robust features.
Full-stack frameworks such as ASP.NET and Spring Boot make it easy to create everything you need for a web app. This includes the user interface on the front end, the backend functions, and even the database.
They use a design approach called the Model-View-Controller pattern. This helps keep different parts of the app separate but well-organized, making the whole process of building a complete web app more straightforward.
5 Examples of Web Applications
Here are some real-world examples of web applications that you probably use every day. These apps make our lives easier, more fun, and more connected.
1. Google Docs
Google Docs is a web-based word-processing application that allows users to create, edit, and share documents online. It provides real-time collaboration, enabling multiple users to work on a document simultaneously. The platform supports various file formats and integrates seamlessly with other Google Workspace tools like Google Drive, Sheets, and Slides.
2. Trello
Trello is a web-based project management tool that uses boards, lists, and cards to help teams organize tasks and projects. It’s known for its intuitive drag-and-drop interface and visual approach to project management. Trello supports collaboration, allowing team members to assign tasks, set deadlines, and track progress in real time.
3. Slack
Slack is a web-based communication platform designed for teams. It offers real-time messaging, file sharing, and collaboration tools. Slack allows users to create channels for different topics or projects, making it easier to organize and manage communications. It also integrates with a wide range of third-party applications and services.
4. Canva
Canva is a web-based graphic design tool that enables users to create a variety of visual content, including social media graphics, presentations, posters, and more. It offers a drag-and-drop interface, a vast library of templates, and a wide range of design elements. Canva is suitable for both professional designers and beginners.
5. Spotify
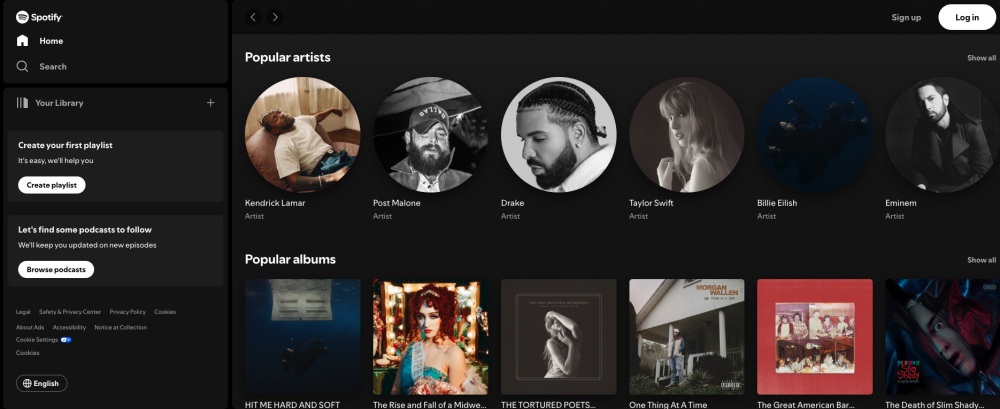
Spotify is a web-based music streaming service that provides access to millions of songs, podcasts, and videos from artists around the world. Users can create and share playlists, discover new music through personalized recommendations, and enjoy music offline with premium subscriptions. Spotify also offers social features, allowing users to follow friends and see what they are listening to.
Why Would You Develop a Web Application?
Developing a web application offers several advantages, primarily due to its accessibility and cross-platform compatibility. Web applications can be accessed from any device with an internet connection and a web browser, making them highly convenient for users who may switch between desktops, tablets, and smartphones. This eliminates the need for separate applications for different operating systems, thereby saving development and maintenance costs.
Web applications are easier to maintain and update since all changes can be deployed on the server side, ensuring that users always have access to the latest version without needing to manually install updates. They also allow for centralized data storage, enhancing security through more controlled access and simplified backup processes. Additionally, web applications can easily integrate with other web services and APIs, enhancing functionality and providing a comprehensive service to users.
Moreover, web applications are cost-effective and scalable. They often require a single codebase, reducing both development and maintenance expenses. Furthermore, web applications can scale to handle increasing user loads, leveraging cloud services to provide resources on demand, ensuring consistent performance even as the user base grows. This broad reach and ease of integration make web applications an attractive option for businesses looking to expand globally and improve user engagement.
Benefits of Web Application Development
Web application development offers numerous advantages that make it an attractive choice for businesses and developers. From accessibility to cost-effectiveness, web apps are becoming increasingly popular for delivering seamless user experiences. Here are the key benefits:
- Accessibility from Anywhere
Web applications can be accessed on any device with an internet connection, allowing users to interact with the app wherever they are, without the need for installations. - Cross-Platform Compatibility
Unlike native apps that are limited to specific platforms, web apps work across all devices and operating systems, ensuring a wider reach without extra development costs. - Cost-Effective
Developing a single web application that works across multiple platforms saves time and resources, compared to building separate native apps for different devices. - Easy Maintenance and Updates
Web apps are centrally managed, allowing for seamless updates and maintenance without requiring users to manually install updates or patches. - Scalability
Web applications can be easily scaled to accommodate increasing user demands, ensuring that performance remains steady even as the user base grows. - Security
Web apps benefit from centralized security measures, including encryption and authentication protocols, ensuring that data is secure and vulnerabilities are promptly addressed.
Web Application Development Process
The web application development process consists of several key steps: planning, designing, development, testing, deployment, and maintenance. Each step is crucial to building a successful, user-friendly web application that meets both user needs and business goals.
1. Planning and Requirement Analysis
The first step in web application development involves gathering requirements and conducting a feasibility study. Engage with stakeholders to understand their needs and define the application’s goals. Detailed specifications and project scope are determined during this phase. A feasibility study analyzes the technical, operational, and economic aspects to ensure the project’s viability and alignment with business objectives.
2. Designing
In the design phase, the overall structure of the application is established, including defining the architecture (e.g., client-server, microservices) and selecting appropriate technologies and frameworks. UI/UX design involves creating wireframes and prototypes to develop an intuitive, user-friendly interface that meets the needs of the target audience.
3. Development
The development phase consists of two main components: front-end and back-end development. Front-end development focuses on building responsive and interactive user interfaces using HTML, CSS, JavaScript, and frameworks like React, Angular, or Vue.js. Back-end development involves implementing server-side logic, databases, and APIs using languages and frameworks like Node.js, Python, Ruby on Rails, or Java, ensuring scalability and security. Integration of various components, including third-party services, APIs, and databases, is also completed in this phase.
4. Testing
Testing is crucial to ensure the application functions correctly and meets all requirements. Unit testing involves testing individual components or modules. Integration testing verifies that different components work together as intended. System testing conducts end-to-end testing of the complete application. User Acceptance Testing (UAT) involves end-users to validate functionality and usability from their perspective.
5. Deployment
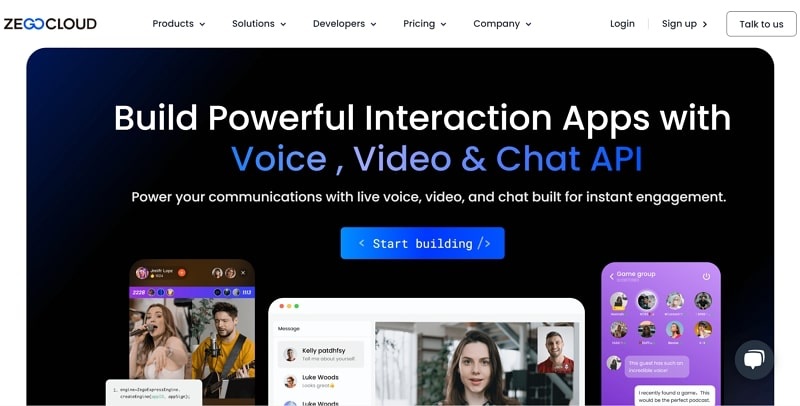
Deployment begins with deploying the application to a staging environment that mimics the production setup for final testing and adjustments. Once validated, the application is deployed to the live production environment, ensuring a smooth transition with minimal downtime and disruptions. For seamless deployment and reliable performance, consider using ZEGOCLOUD, which provides robust infrastructure and real-time communication solutions that enhance application functionality and user experience.
6. Maintenance and Updates
Post-deployment, the application is continuously monitored for performance, security, and user feedback using tools like Google Analytics, New Relic, or Datadog. Bug fixes and updates are implemented based on user feedback and evolving requirements, ensuring the application remains functional and up-to-date.
How to Become a Web Application Developer?
Becoming a web application developer involves mastering key technologies and gaining hands-on experience. Start by learning the basics: HTML, CSS, and JavaScript, which form the foundation of web development. Then, dive into front-end development using frameworks like React, Angular, or Vue.js to build interactive user interfaces.
On the back-end side, you’ll need to learn server-side languages like Node.js, Python, or PHP, and how to work with databases like MySQL or MongoDB. Developing APIs to connect the front-end and back-end is also essential.
To become a full-stack developer, combine both front-end and back-end skills. Learn responsive web design techniques to ensure your apps work on any device. Continuously practice by building projects and contributing to open-source work, and stay updated on new technologies.
Finally, create a strong portfolio showcasing your work, and apply for jobs or freelance projects. Continuous learning and real-world experience are key to advancing in this field.
How Can ZEGOCLOUD Help for Web Application Development
ZEGOCLOUD offers several tools and features that can significantly enhance web application development. With its powerful APIs and SDKs, ZEGOCLOUD enables developers to easily integrate real-time communication, live streaming, and video conferencing into web applications.
These solutions cater to a wide range of industries, including education, gaming, virtual events, and more, ensuring that applications meet modern user demands and business objectives. As a part of the web application development ecosystem, ZEGOCLOUD complements traditional web application development companies by offering essential services that boost application functionality and user experience.
Why ZEGOCLOUD SDK for Web Application Development
1. Real-Time Communication Solutions ZEGOCLOUD provides APIs for integrating real-time communication features such as voice and video calls, live streaming, and in-app chat. These features enhance user engagement and interactivity, crucial for applications that require real-time user interaction.
2. High-Quality Streaming ZEGOCLOUD ensures low latency and high-quality video and audio streaming, essential for applications involving live events and real-time interactions. This capability is particularly beneficial for sectors like education, gaming, and virtual events, where seamless communication is key.
3. Scalability Designed to scale effortlessly, ZEGOCLOUD’s infrastructure can handle varying user loads, from small user bases to rapidly growing audiences. This scalability ensures consistent performance and reliability as your application grows.
4. Security Security is a priority for ZEGOCLOUD, offering robust measures like end-to-end encryption and secure data storage solutions. These features help protect user information and ensure compliance with data protection regulations, providing peace of mind for both developers and users.
5. Easy Integration ZEGOCLOUD’s APIs and SDKs are designed for easy integration with various web development frameworks and platforms. This ease of integration allows developers to quickly add advanced features to their applications without extensive reworking of existing codebases.
Conclusion
If you’re new to web app development, 2024 is a great time to dive in. With user-friendly tools like ZEGOCLOUD SDK, you can easily add real-time messaging and more to your projects. This guide has given you the basics to get started. As you go along, remember that practice makes perfect. So, keep learning and building, and you’ll be a pro in no time!
Read more:
Web Application Development FAQ
Q1: What is a web development application?
A web development application refers to software used to create, manage, and maintain websites or web applications. These tools typically include code editors, frameworks, libraries, and content management systems (CMS) that assist developers in building the user interface, managing databases, and ensuring the smooth functioning of web applications.
Q2: What are three types of web development?
The three types of web development are front-end, back-end, and full-stack development. Front-end focuses on the user interface, back-end deals with server-side functionality, and full-stack combines both.
Q3: What are the 7 stages of web development?
The seven stages of web development are planning, design, content creation, development, testing, deployment, and maintenance. Each stage focuses on different aspects of building and maintaining a website or web application.
Q4: Is web application development easy?
Web application development is not necessarily easy, especially for beginners. It involves understanding various programming languages, frameworks, and technologies. The complexity increases with the scope of the project, such as building dynamic, data-driven applications. However, with practice, learning resources, and community support, developers can overcome challenges and improve their skills over time.
Let’s Build APP Together
Start building with real-time video, voice & chat SDK for apps today!
