


WebRTC Live Streaming is a technology that allows for real-time video broadcasting directly from one source to multiple viewers without the need for external plugins or software. Unlike traditional streaming methods, WebRTC uses peer-to-peer connections to ensure ultra-low latency, making it ideal for applications where real-time interaction is crucial, such as live events, gaming streams, and webinars. By utilizing WebRTC’s secure and efficient architecture, broadcasters can deliver seamless, high-quality live video to their audience, ensuring a smooth and interactive experience.
What is WebRTC?
WebRTC is an open-source project that enables real-time audio, video, and data transfer between browsers and devices without requiring plugins or external software. It supports peer-to-peer (P2P) connections, allowing developers to create applications for voice calls, video chats, and real-time data sharing directly in web browsers or mobile apps.
How Does WebRTC Work?
WebRTC works by enabling direct peer-to-peer communication between browsers or devices without the need for external plugins or software. It facilitates real-time audio, video, and data exchange over the Internet using several key components:
1. Signaling
WebRTC begins with a signaling process that establishes the connection between peers. While WebRTC does not mandate a specific signaling protocol, common methods like WebSockets or server-based protocols facilitate the exchange of metadata, including network details, codecs, and session information. This process enables peers to negotiate and agree on communication parameters.
2. NAT Traversal
To establish a direct connection between peers, even when they’re behind firewalls or NATs (Network Address Translators), WebRTC uses ICE (Interactive Connectivity Establishment). ICE identifies the best path for communication using STUN (Session Traversal Utilities for NAT) and TURN (Traversal Using Relays around NAT) servers to negotiate the connection.
3. Media and Data Channels
Once signaling is complete and the connection is established, WebRTC facilitates real-time exchange of audio, video, and data through two primary channels:
- RTP (Real-time Transport Protocol) for media (audio and video) streams.
- SCTP (Stream Control Transmission Protocol) for real-time data transfer.
By bypassing the need for intermediaries, WebRTC enables low-latency, high-quality communications for applications like video conferencing, live streaming, and peer-to-peer file sharing directly in web browsers.
Why Would You Use WebRTC?
You would use WebRTC for real-time communication of audio, video, and data, particularly in applications where low latency and high-quality interactions are critical. WebRTC allows for seamless, peer-to-peer communication directly in web browsers, eliminating the need for additional software or plugins. This makes it highly accessible and easy for users, as most modern browsers support WebRTC natively, offering a smooth experience for things like video calls, live streaming, and file sharing.
Another key reason to use WebRTC is its secure communication capabilities. WebRTC comes with built-in encryption (using SRTP for media and DTLS for data), ensuring that sensitive data remains protected. Additionally, since WebRTC establishes direct peer-to-peer connections, it minimizes the need for server infrastructure to relay media, reducing operational costs and improving performance by lowering latency. This makes it ideal for use cases like video conferencing, telemedicine, online gaming, and live broadcasting.
Can I Use WebRTC for Live Video Streaming?
WebRTC is a free and open-source technology enabling real-time communication between web browsers and mobile applications. It supports audio and video streaming as well as data channels for peer-to-peer communication. Developers can use WebRTC for various applications, including video conferencing, online education, remote work, and live video streaming. With WebRTC, you can achieve low-latency, high-quality video streaming without relying on plugins or third-party software.
What Sites Use WebRTC?
WebRTC is widely used by various websites and platforms to enable real-time communication. Some notable examples include:
- Google Meet and Microsoft Teams – For video conferencing and virtual meetings.
- Zoom – Incorporates WebRTC for browser-based meetings.
- Facebook Messenger – For voice and video calls within the browser.
- Discord – For real-time voice and video chat in communities.
- Whereby – A browser-based video meeting platform using WebRTC.
- Daily.co – For embedding real-time video and audio into applications.
- TokBox (Vonage) – A platform for building WebRTC-powered applications.
- Houseparty – A social video chat application utilizing WebRTC.
WebRTC is also integrated into various custom applications, streaming platforms, and educational tools for seamless real-time communication.
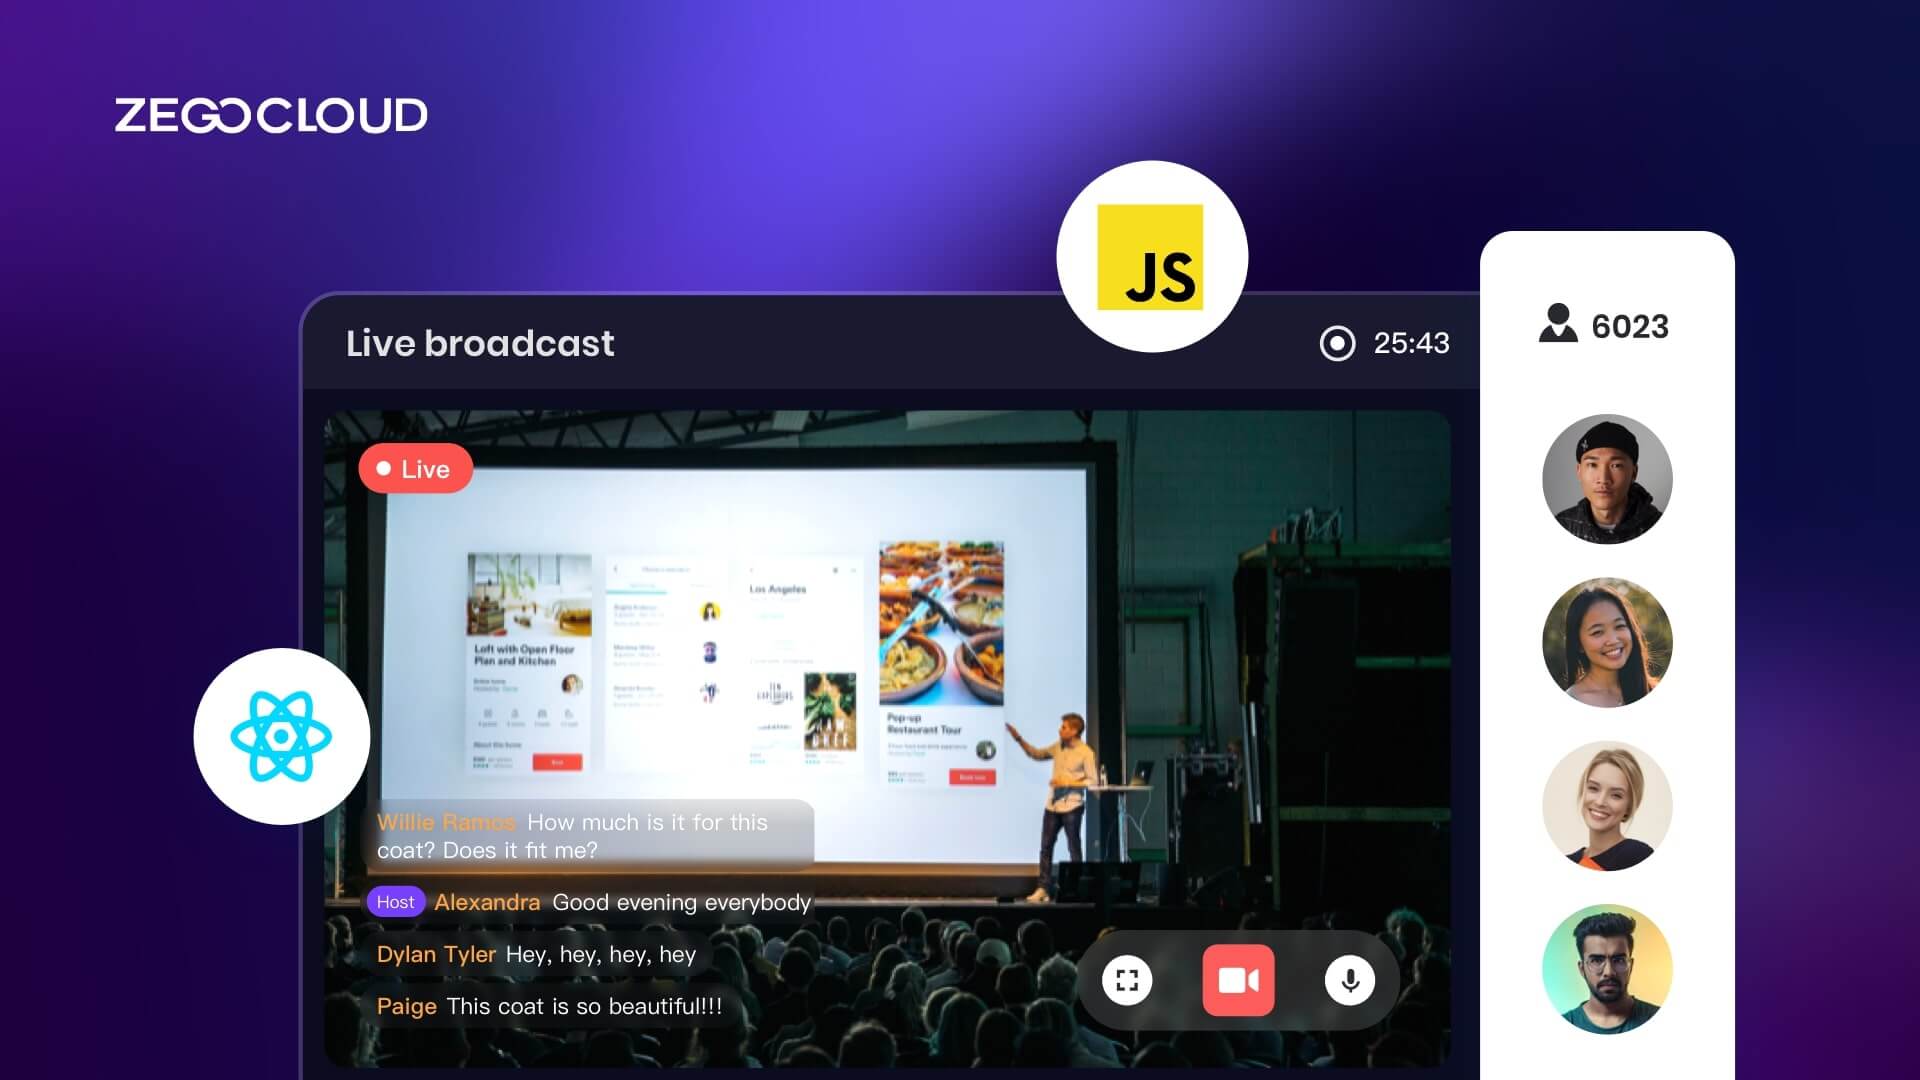
Get Started with ZEGOCLOUD WebRTC Live Streaming
Getting Started with ZEGOCLOUD WebRTC Live Streaming is a straightforward process that allows developers to build real-time live streaming applications quickly and efficiently. ZEGOCLOUD provides a powerful WebRTC SDK & API that simplifies the integration of live video, audio, and data streaming into web or mobile apps. Whether you’re developing a live event platform, a gaming stream, or an interactive video application, ZEGOCLOUD offers the tools you need to create seamless, low-latency live streaming experiences.
To begin, you can integrate the ZEGOCLOUD video streaming SDK into your project, configure the necessary WebRTC settings, and start streaming in a few simple steps. ZEGOCLOUD handles the complex aspects of WebRTC, including peer-to-peer connections, media transmission, and encryption, allowing you to focus on building your application. The platform also supports advanced features like multi-user video conferences, interactive live streaming, and scalable broadcasting, making it a comprehensive solution for real-time streaming needs.
Why Do You Need ZEGOCLOUD Webrtc Live Streaming SDK
One of the standout reasons to choose ZEGOCLOUD WebRTC Live Streaming SDK is the availability of its UIKits, which significantly streamline the development process. These UIKits provide pre-built, customizable components that help developers integrate real-time live streaming features into their applications quickly, without needing to build everything from scratch. With the UIKits, you can easily implement essential functionalities such as video layouts, user interfaces for streaming controls, and interactive features like chat and reactions, ensuring a smooth user experience.
Apart from the aforementioned advantages, the following are features of ZEGOCLOUD’s UIKits for live video streaming:
- Out-of-the-box live stream interface
- Livestream invitation
- Text chat
- Screen sharing
- Recording
- audience list
- Cross-browser compatibility
- Built-in bandwidth management
- Auto network reconnection
- Network analytics display
- Customizable branding LOGO
Preparation to Implement Live Stream SDK
- A ZEGOCLOUD developer account — Sign in
- VS Code or any other IDE/Editor.
- A decent computer with a camera (webcam)
- Basic understanding of web development.
Step by Steps for Live Streaming SDK Integration
Follow the steps below to get ZEGOCLOUD’s UIKits for Live Streaming up and running :
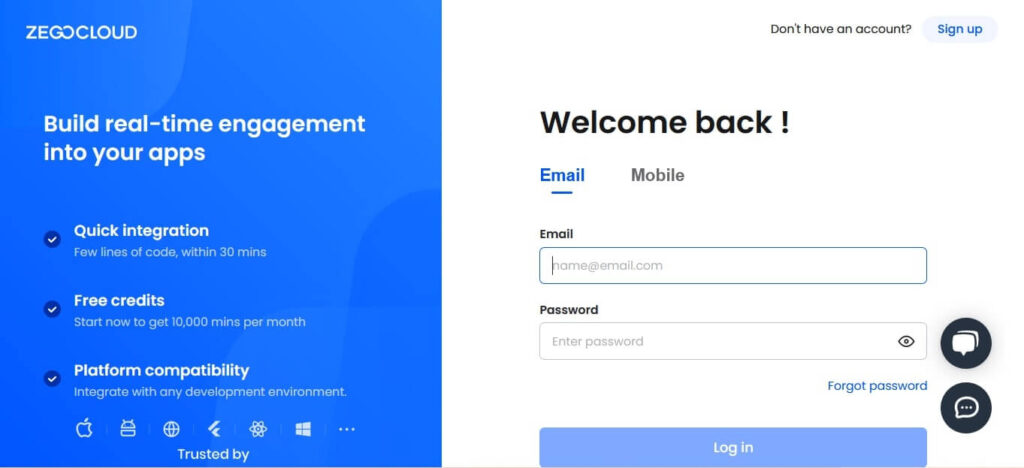
Step 1: Log in to the ZEGOCLOUD admin console
To make the whole process easier, ZEGOCLOUD has a powerful admin console where you can manage your projects. You can create projects through the ZEGOCLOUD admin console. And of course, the Live Streaming Kit is among the types of projects you can create. Pretty cool, right? Hit the login button to get started with the best live streaming kit.
Step 2: Add a new project
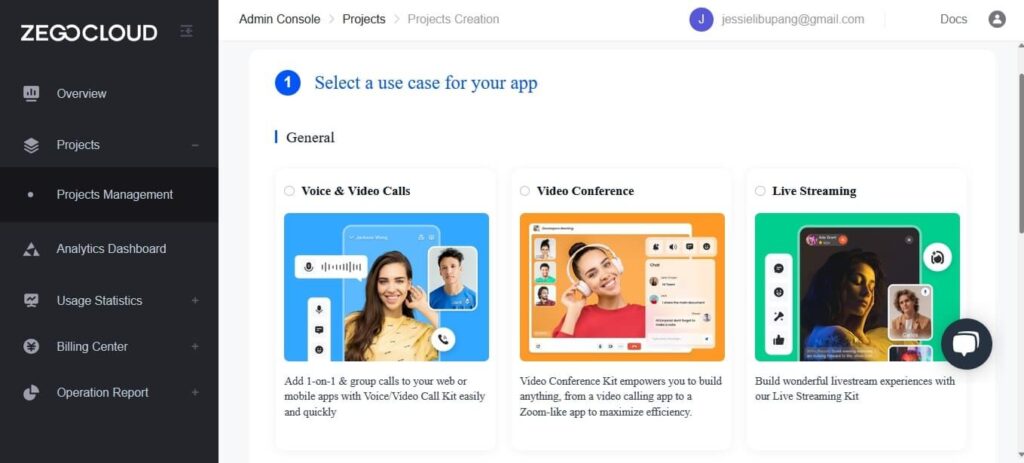
You’ll see the add button after logging in to your admin console. Click on it to get started with Live Streaming Kit integration.

After clicking the add button. You’ll be prompted to select the type of app we want to build. Select Live Streaming.
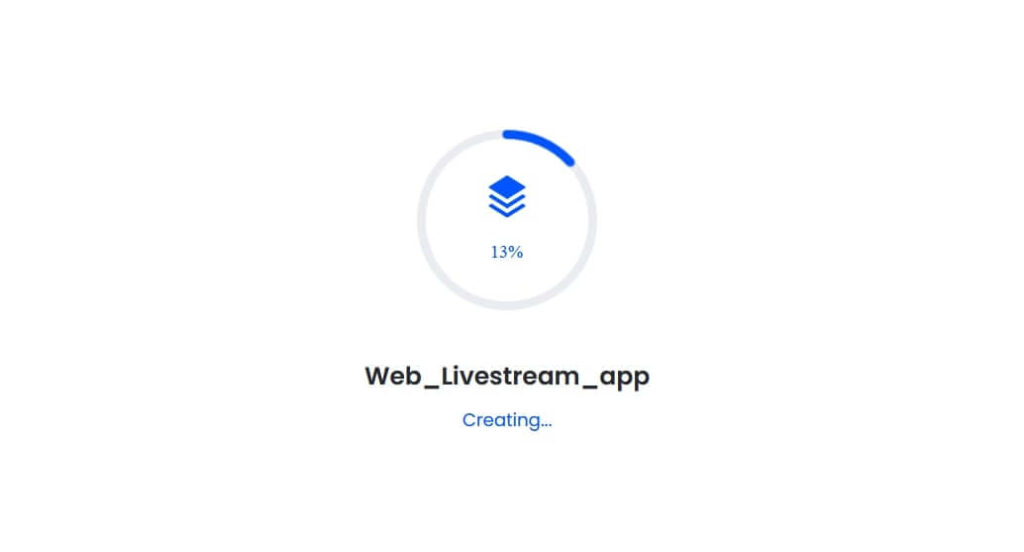
Step 3: Type in the project name.
From the steps so far, you can see that creating real-time applications with ZEGOCLOUD is very straightforward and simple.
Back to our Live Streaming Kit integration. At this point, we’re required to pick a name for our project.
Note: a project name will only contain numbers, letters, and underlines (_).
You can choose whatever name you like. Provided that you follow the rules.
Step 4: UI customization kits.
If you scroll down after entering the project name, you’ll see a window where you can select UI customization options. Two options exist. There are “Prebuilt UIkit” and “Custom UIkit”. The custom UIkit gives you advanced customization options and low-level SDK customization. I will be going with Prebuilt UIKit since we’re just testing our Live Streaming Kit
You can proceed with the building process. Wait for the project to be completed.
Step 5: Choose a platform and download configuration files.
At this point, All that you’re required to do is select the platform for our Live Streaming SDK. I will be using Web this as my platform for this project. Congratulations! We’ve successfully created our first web live streaming application with ZEGOCLOUD’s Live Streaming Kit.

Click on Get configuration and integration files to download project files.
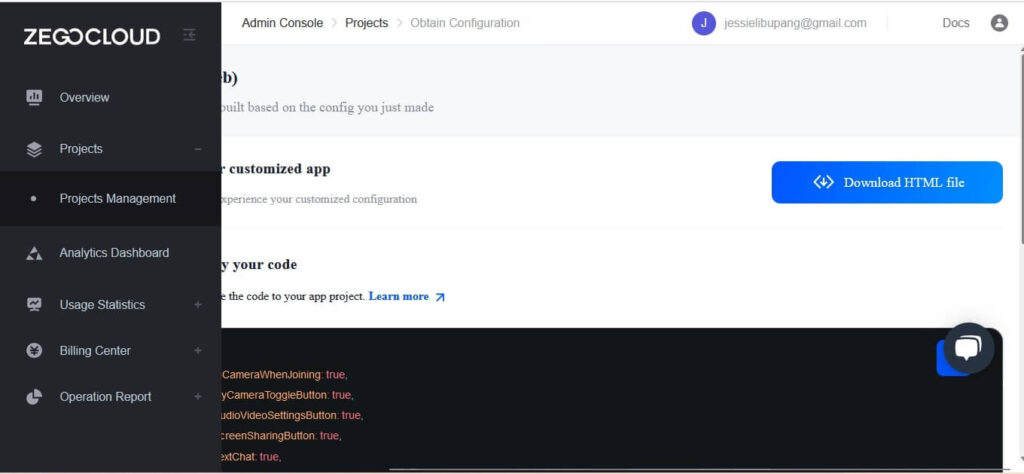
Opening the downloaded configuration and integration file reveals the following lines of code:
<html>
<head>
<style>
#root {
width: 100vw;
height: 100vh;
}
</style>
</head>
<body>
<div id="root"></div>
</body>
<script src="https://resource.ZEGOCLOUD.com/prebuilt/crypto-js.js"></script>
<script src="https://resource.ZEGOCLOUD.com/prebuilt/prebuiltToken.js"></script>
<script src="https://unpkg.com/@ZEGOCLOUD/zego-uikit-prebuilt/zego-uikit-prebuilt.js"></script>
<script>
window.onload = function () {
function getUrlParams(url) {
let urlStr = url.split('?')[1];
const urlSearchParams = new URLSearchParams(urlStr);
const result = Object.fromEntries(urlSearchParams.entries());
return result;
}
// Generate a Token by calling a method.
// @param 1: appID
// @param 2: serverSecret
// @param 3: Room ID
// @param 4: User ID
// @param 5: Username
const roomID = getUrlParams(window.location.href)['roomID'] || (Math.floor(Math.random() * 10000) + "");
const userID = Math.floor(Math.random() * 10000) + "";
const userName = "userName" + userID;
const appID = YourAppID;
const serverSecret = "YourServerSecret";
const TOKEN = generatePrebuiltToken(appID, serverSecret, roomID, userID, userName);
// You can assign different roles based on url parameters.
let role = getUrlParams(window.location.href)['role'] || 'Host';
role = role === 'Host' ? ZegoUIKitPrebuilt.Host : ZegoUIKitPrebuilt.Audience;
let config = {}
if(role === 'Host'){
config = {
turnOnCameraWhenJoining: true,
showMyCameraToggleButton: true,
showAudioVideoSettingsButton: true,
showScreenSharingButton: true,
showTextChat: true,
showUserList: true,
}
}
const zp = ZegoUIKitPrebuilt.create(TOKEN);
zp.joinRoom({
container: document.querySelector("#root"),
scenario: {
mode: ZegoUIKitPrebuilt.LiveStreaming,
config: {
role,
},
},
sharedLinks: [{
name: 'Join as an audience',
url:
window.location.origin +
window.location.pathname +
'?roomID=' +
roomID +
'&role=Audience',
}],
...config
});
}
</script>
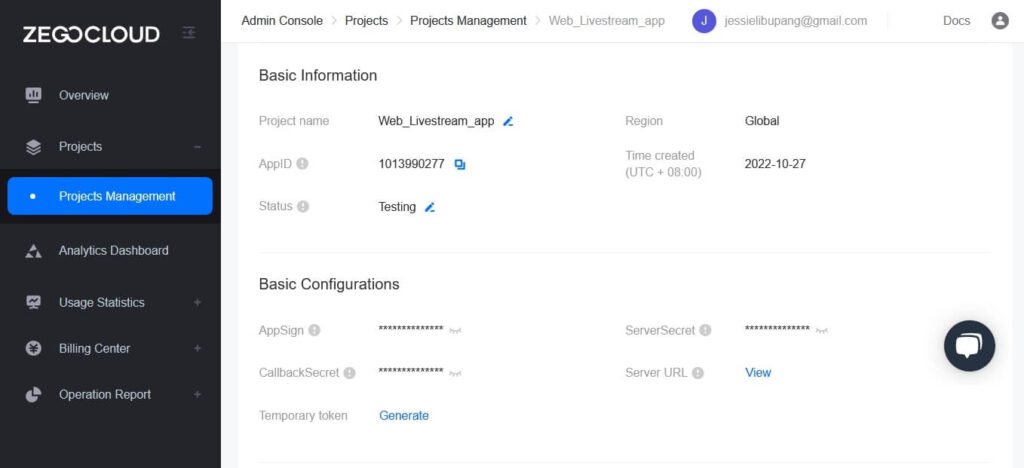
</html>You can click on projects to see information about them.
Run a Demo
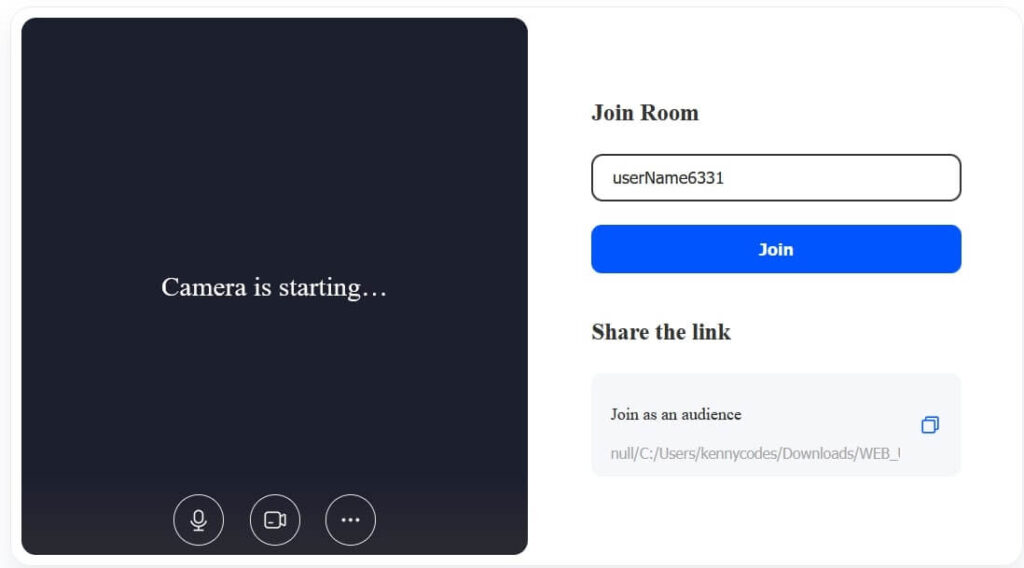
We’ve successfully created our first live streaming project. It is now time to test it out and see how it goes. Testing this project is very easy based on the fact that it is a web application. Hence, you can test it on any browser of your choice, irrespective of the platform.
Conclusion
In conclusion, WebRTC live streaming is a powerful technology that enables low-latency, real-time video communication for a wide range of applications, from live events to interactive webinars and gaming. By leveraging the peer-to-peer architecture of WebRTC, you can ensure high-quality streaming experiences without the need for extensive server infrastructure.
Tools like ZEGOCLOUD WebRTC SDK further simplify the process by providing pre-built UIKits and advanced features, allowing developers to integrate live streaming seamlessly into their apps. As live streaming continues to grow in demand, adopting WebRTC technology will ensure that your platform delivers engaging and real-time interactions for users.
Read more:
- 10 Best Live Streaming SDK Providers
- RTMP vs HLS vs WebRTC: Which is the Best Live Streaming Protocol?
FAQ
Q1: Can WebRTC be used for live streaming?
Yes, WebRTC is suitable for live streaming, especially when low latency is crucial. It enables real-time video and audio transmission directly between browsers or applications, making it ideal for interactive broadcasts, live events, and video conferencing. For instance, Cloudflare Stream supports live video streaming over WebRTC, allowing developers to build low-latency live streaming and playback into their websites or apps.
Q2: Is Netflix using WebRTC?
No, Netflix does not use WebRTC for its streaming services. Netflix primarily relies on HTTP Live Streaming (HLS) and Dynamic Adaptive Streaming over HTTP (DASH) protocols to deliver video content to users. These protocols are well-suited for delivering high-quality video at scale, which aligns with Netflix’s requirements.
Q3: Is WebRTC free or paid?
WebRTC is an open-source project, and its implementation is free to use. Developers can integrate WebRTC into their applications without licensing fees. However, deploying WebRTC solutions may involve costs related to infrastructure, such as servers for signaling, TURN servers for NAT traversal, and maintenance expenses.
Q4: Does YouTube Live use WebRTC?
YouTube Live does not use WebRTC for content delivery to viewers. It employs protocols like HLS and DASH for streaming. However, YouTube has utilized WebRTC for specific features, such as enabling users to broadcast live directly from their browsers without additional software. This approach simplifies the streaming process for content creators.
Let’s Build APP Together
Start building with real-time video, voice & chat SDK for apps today!
