


Google Whiteboard is a powerful tool for teams to work together seamlessly. Whether you’re brainstorming ideas, sharing visuals, or mapping out strategies, this innovative platform allows for real-time collaboration that is both effective and efficient. In this article, we’ll explore the ins and outs of using Google Whiteboard to foster collaboration and achieve your team’s goals.
What is Google Whiteboard
Google Whiteboard is a collaborative tool that allows teams to work together in real-time. This virtual whiteboard is designed to help users share ideas, make annotations, and collaborate on projects in a visually engaging way. The platform integrates with other Google Workspace tools, such as Google Drive and Google Meet, making it easy to access and use.
The Google Whiteboard interface is simple and intuitive, with a range of drawing and writing tools that enable users to create diagrams, flowcharts, and mind maps, as well as make annotations on uploaded images and documents. Users can also collaborate simultaneously on the same board, with changes visible to all team members in real-time.
One of the most significant advantages of Google Whiteboard is its accessibility. Anyone with a Google account can access the platform, regardless of whether they have a paid subscription to Google Workspace. Additionally, it can be used on any device with an internet connection, including smartphones, tablets, and laptops.
Google Whiteboard is an ideal tool for remote teams who need to work collaboratively, as well as for in-person meetings and brainstorming sessions. By allowing users to collaborate visually in real-time, Google Whiteboard helps to facilitate productive and engaging teamwork, making it a must-have for any modern workplace.
How to Use Google Whiteboard
It is an effective tool that allows teams to collaborate in real-time, making it ideal for remote working, brainstorming sessions, and in-person meetings. If you’re looking to use Google Whiteboard to its full potential, follow these simple steps:
1. Access Google Whiteboard
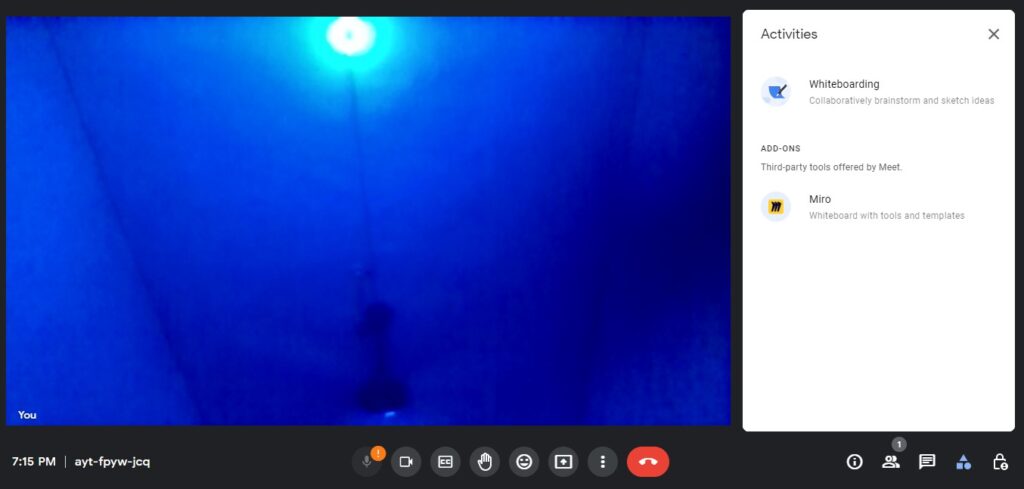
To access Google Whiteboard, simply login to your Google account, open Google Meet, and click on the ‘Whiteboard’ icon. Alternatively, you can access Google Whiteboard via Google Drive or directly from the Google Workspace app.
2. Create a new board
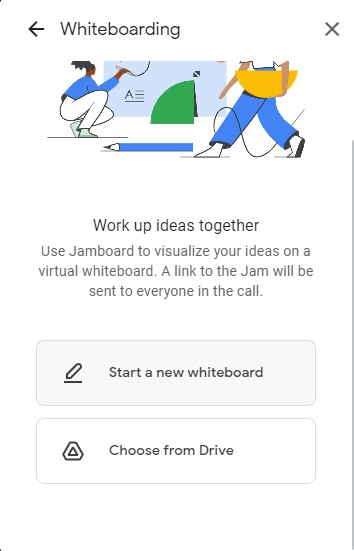
Once you’re in Google Whiteboard, click on ‘Create a new board’ and select your preferred size and orientation. You can also add a background image or color to your board.
3. Start collaborating
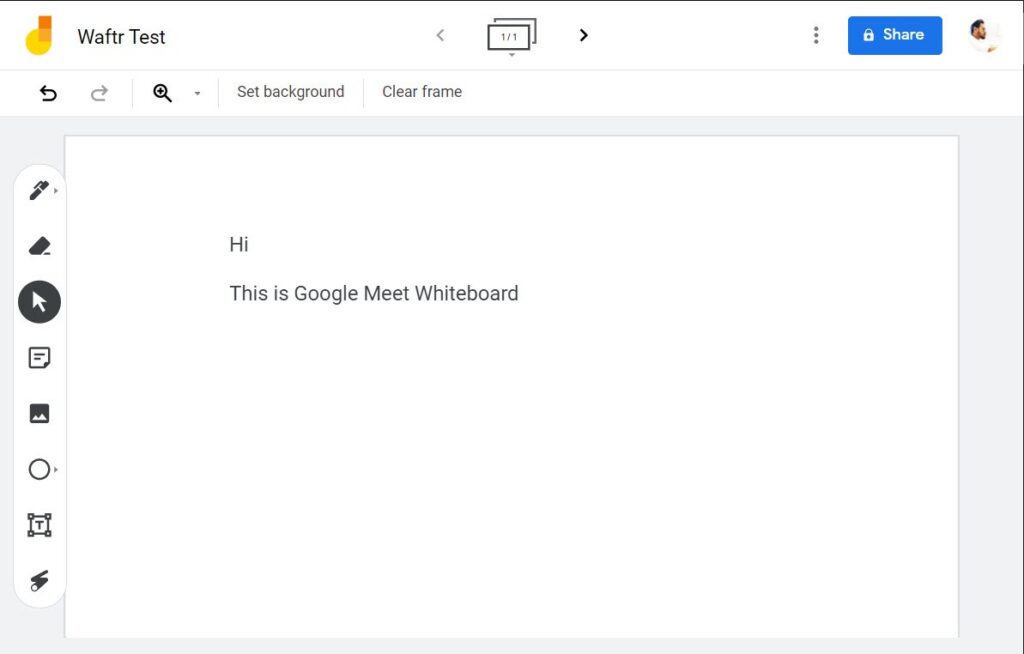
Use the drawing and writing tools to create diagrams, flowcharts, and mind maps, or add annotations to uploaded images and documents. Collaborate in real-time by inviting team members to join your board and make changes simultaneously.
4. Share your board
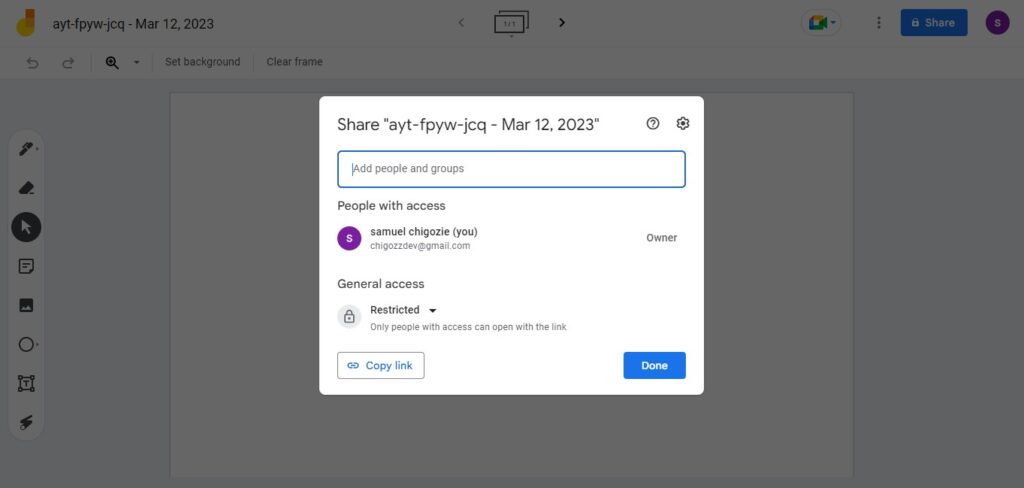
Once you’ve finished collaborating, share your board with others by clicking on the ‘Share’ button. You can choose to share it via a link, email, or directly with team members who have access to your Google Workspace.
5. Save your board
Google Whiteboard automatically saves your work, but you can also save a copy of your board by clicking on the ‘Save as image’ button. This is particularly useful if you want to share your work with people who don’t have access to Google Whiteboard.

6. Close your board
When you’re finished with your board, click on the ‘Close’ button. This will take you back to the main Google Whiteboard screen where you can create a new board or access your saved boards.
You may also like:
How to Make Google Whiteboard Alternative with ZEGOCLOUD SDK
If you’re looking for an alternative to Google Whiteboard, ZEGOCLOUD SDK offers a powerful solution. ZEGOCLOUD Whiteboard SDK allows developers to create custom whiteboard applications with real-time collaboration features. With this SDK, you can easily integrate a collaborative whiteboard into your existing application or build a new application from scratch.
The SDK offers a range of features such as drawing and annotation tools, real-time collaboration, and easy customization. ZEGOCLOUD Whiteboard SDK is a great option for developers who want to create a customized whiteboard solution that fits the specific needs of their organization.
Preparation
- A ZEGOCLOUD developer account – Sign up
- A computer with audio, video, and web support
- Basic understanding of web dev.
Steps on How to Make a Google Whiteboard Alternative with ZEGOCLOUD SDK
Get ready for the most anticipated section of this article! Follow these steps to create your own Google Whiteboard alternative using ZEGOCLOUD’s powerful Whiteboard SDK.
1. Install the SDKs
With the help of NPM, obtaining the ZegoSuperBoard SDK and ZegoExpress-Video SDK is a simple and stress-free process. To obtain these powerful SDKs, use the code below.
npm i zego-superboard-web

npm i zego-express-engine-webrtc
2. Integrate the SDK
Integrating ZEGOCLOUD’s Super Board SDK into your project is a breeze with this JS code. Quickly and effortlessly incorporate the SDK to enjoy its benefits.
import { ZegoSuperBoardManager } from 'zego-superboard-web';

import {ZegoExpressEngine} from 'zego-express-engine-webrtc'
3. Initialize the SDKs
In order to utilize the full capabilities of the two SDKs added, initialization is crucial. You can do so with the codes below:
ZegoExpress-Video SDK.
// Initialize the ZegoExpressEngine instance
const zg = new ZegoExpressEngine(appID, server);
ZegoSuperBoard SDK
<!-- Parent container to be mounted to -->
<div id="parentDomID"></div>
// Obtain the ZegoSuperBoard instance.
zegoSuperBoard = ZegoSuperBoardManager.getInstance();
// Initialize ZegoSuperBoard.
const result = await zegoSuperBoard.init(zg, {
parentDomID: 'parentDomID', // D of the parent container to be mounted to.
appID: 0, // The AppID you get.
userID: '', // User-defined ID
token: '' // The Token you get that is used for validating the user identity.
});4. Check event callbacks
After SuperBoard initialization, keep track of error messages, remote adds and removals, and file switching to adjust event callbacks to your app’s needs.
// Callback of the listening-for error.

zegoSuperBoard.on('error', function(errorData) {

// Error code, error prompt
        conosole.log(errorData.code, errorData.message)
    });

// Monitor paging and scrolling in the whiteboard via event listeners.

zegoSuperBoard.on('superBoardSubViewScrollChanged', function(uniqueID, page, step) {

    });
// You can listen for the remote operation of zooming in or out on a whiteboard.

zegoSuperBoard.on('superBoardSubViewScaleChanged', function(uniqueID, scale) {

    });

// Remote whiteboard addition event listener.

zegoSuperBoard.on('remoteSuperBoardSubViewAdded', function(uniqueID) {

    });

// Monitor the remote whiteboard destruction operation.

zegoSuperBoard.on('remoteSuperBoardSubViewRemoved', function(uniqueID) {

    });

// Listen for remote whiteboard switching.

zegoSuperBoard.on('remoteSuperBoardSubViewSwitched', function(uniqueID) {

    });
// Listen for remote Excel sheet switching.

zegoSuperBoard.on('remoteSuperBoardSubViewExcelSwitched', function(uniqueID, sheetIndex) {

    });

// Listen for remote whiteboard permission changes.

zegoSuperBoard.on('remoteSuperBoardAuthChanged', function(data) {
        console.log(data.scale, data.scroll)
    });

// Listen for remote whiteboard element permission changes.

zegoSuperBoard.on('remoteSuperBoardGraphicAuthChanged', function(data) {
        console.log(data.create, data.delete, data.move, data.update, data.clear)
    });
5. Log in to a room
To access a room, simply execute the loginRoom function and provide the necessary parameters such as the roomID, token, userID, and userName. Additionally, you can pass in a configuration object if required. If the specified roomID doesn’t exist, the function will automatically create a new room and log you in.
const result = await zg.loginRoom(roomID, token, {userID, userName}, {userUpdate: true});6. Create a whiteboard
Within the Super Board SDK, you can choose from two types of whiteboards: common and file-based. In order to create a whiteboard, it’s necessary to first log in to your account. Common whiteboards can be generated by specifying the desired dimensions and number of pages, while file-based whiteboards can be created from pre-existing files. Please keep in mind that each room has a limit of 50 whiteboards, and you can verify the current number of whiteboards using the querySuperBoardSubViewList function.
Create a common whiteboard
const model = await zegoSuperBoard.createWhiteboardView({
    name: '', // Whiteboard name
    perPageWidth: 1600, // Whiteboard page width
    perPageHeight: 900, // Whiteboard page height
    pageCount: // Page count of a whiteboard
});
Create a file whiteboard
// Before creating a file-based whiteboard, obtain the fileID of the file. Please refer to Shared File Management for instructions on how to upload a file.

const model = await zegoSuperBoard.createFileView({
    fileID
});
7. Attach the present whiteboard
Once you’ve logged into a room and accessed an existing whiteboard, you can connect it to the main container by utilizing the querySuperBoardSubViewList and switchSuperBoardSubView. This will enable you to seamlessly incorporate the whiteboard into your work environment, providing a more streamlined and efficient workflow.
// Obtain SuperBoardSubViewList.
const superBoardSubViewList = await zegoSuperBoard.querySuperBoardSubViewList();

// Obtain SuperBoardView.
const superBoardView = zegoSuperBoard.getSuperBoardView();

// Obtain the current SuperBoardSubView.
const zegoSuperBoardSubView = superBoardView.getCurrentSuperBoardSubView()

// Obtain the model corresponding to SuperBoardSubView.
const model = zegoSuperBoardSubView.getModel();

// Obtain a uniqueID of the whiteboard to be mounted.
const uniqueID = model.uniqueID;

// Get the file type and obtain sheetIndex for Excel whiteboard.

let sheetIndex;
const fileType = model.fileType;
if (fileType === 4) {
    // Excel whiteboard
    const sheetName = zegoSuperBoardSubView.getCurrentSheetName();
    // Retrieve the list of sheets for the current Excel file.
    const zegoExcelSheetNameList = zegoSuperBoardSubView.getExcelSheetNameList();
    // To get the sheetIndex from zegoExcelSheetNameList, use the corresponding sheetName.
    sheetIndex = zegoExcelSheetNameList.findIndex(function(element, index) {
        return element === sheetName;
    });
}

// Mount the current whiteboard.
const result = await superBoardView.switchSuperBoardSubView(uniqueID, sheetIndex);
8. Verify whiteboard creation
To confirm the stability and effectiveness of your project, it’s important to conduct a comprehensive evaluation by logging into the same room ID from multiple devices. Once you’ve established multiple connections, try using the ZegoSuperBoardView feature on one device to draw and create content. Then, observe how these actions are mirrored and displayed on the ZegoSuperBoardView of the other device. This process will help ensure that your project is functioning optimally across a range of devices and settings.
9. Destroy a whiteboard
By utilizing the code snippet provided below and specifying the uniqueID of the whiteboard in question, it’s possible to permanently delete the corresponding whiteboard instance.
const result = await zegoSuperBoard.destroySuperBoardSubView(uniqueID)Run a Demo
If you want to build customized whiteboard functionality into your apps, you can take advantage of the ZEGOCLOUD Whiteboard SDK. you can check out the features of this powerful tool using the sample demo.
Conclusion
With the help of Google Whiteboard, teams can come together to brainstorm, share ideas, and create compelling content in real time. By following the simple steps outlined in this guide, you can unlock the full potential of Google Whiteboard and take your collaborative efforts to the next level.
Read more:
FAQ about Google Whiteboard
Q1: Can I use Google Whiteboard for free?
It is available as part of Google Workspace, which may require a subscription. However, some basic functionalities might be accessible for free with a Google account.
Q2: How do I access Google Whiteboard on different devices?
It can be accessed through the Jamboard app on tablets and smartphones or through a web browser on computers. It’s also available as a physical interactive display.
Q3: Can I integrate Google Whiteboard with other Google services?
Yes, Google Whiteboard integrates seamlessly with other Google services like Google Drive, Google Meet, and Google Classroom, enhancing collaboration and sharing.
Q4: Is my content secure on Google Whiteboard?
It adheres to Google’s security protocols, including encryption and access controls. Content can be private or shared with specific individuals or groups.
Let’s Build APP Together
Start building with real-time video, voice & chat SDK for apps today!
