


Technology has reformed the method of communication, where we use tech devices and apps to communicate. So, apps need to devise a way for businesses to chat conveniently with their customers without needing another source. That’s where in-app messaging comes in, like texting right inside the app. In this article, we’ll discuss why in-app chat is necessary and how it improves our mobile app experiences.
What is In-App Messaging?
In-app messaging lets you send and get messages without leaving while using a mobile app. It makes the app more engaging by allowing you to talk with your customers in real time, using text or other interactive content.
This feature is found in various apps, like social media or work tools, helping users stay connected or collaborate. Besides that, this feature allows sending specific messages, updates, or personalized content for an interactive experience.
5 Key Benefits of In-App Messaging You Should Know
Now that we’ve acknowledged the crucial role of in-app messaging, let’s turn our attention to the practical advantages it offers to developers. These benefits have a positive influence on user engagement and interaction within the app. In the following section, you’ll find a few potential advantages to improving communication and making the user experience even more enriched.
- Direct Communication: In-app messaging enhances engagement by facilitating direct communication. It not only provides essential details but also incorporates features like read receipts and read-aloud capability to build trust. In addition, it contributes to app stickiness to ensure users consistently use the app for increased brand memorability.
- Opt-In Free Engagement: Users can experience seamless communication without the need for opt-ins. The message is effortlessly displayed within your app and establishes an independent marketing and communication channel. Moreover, this convenience contributes to its high desirability in the digital landscape.
- Targeted Communication: In-app messaging platforms allow precise targeting based on user preferences and behavior. Marketers and developers can customize their messages to specific user segments. Moreover, they can ensure that the delivered information is valuable and relevant to the recipients.
- Increased Conversion Rates: In comparison to any other marketing forms, the messages in the app prove to have higher conversion rates. Additionally, you can drive sales and increase revenue for your business by using these messages to promote services or products.
- Seamless Brand Integration: Integrating in-app messaging seamlessly into your application enhances the user experience. In contrast to external applications such as Facebook Messenger, it offers the advantage of customization. Other than that, you can tailor the interface to mirror your unique brand image.
What are the Different Types of In-App Messages?
It’s important to acknowledge the significance of the role that in-app messages play in improving user engagement and communication in mobile applications. In-app chats serve as a direct means for app developers and marketers to engage with users in real-time.
Furthermore, it offers timely information, personalized suggestions, and valuable updates. So, let’s explore the distinct types of in-app messaging that enhance the creation of a more captivating user experience.
1. Pop-Ups
Pop-ups are small UI elements that capture a user’s attention upon entering a website. They are also known as modal windows and prove helpful in prompting immediate action. Additionally, it features elements like cookie consents, location service opt-ins, and push notification permissions. However, it’s crucial to be cautious as poorly placed pop-ups can disrupt user experience, which leads to frustration.
2. Task Lists
Task lists enable organizations to create in-app chat or checklists and serve as user roadmaps for specific flows or tasks. Commonly used in onboarding processes, these checklists guide new users through essential actions required for a comprehensive onboarding experience. For instance, tasks like uploading the profile picture and bio or completing a product tour are included in these user onboarding flows.
3. Live Chat
Chatbots and live chat tools establish direct user connections and remove barriers. Also, it enhances customer satisfaction and provides in-app support for issue resolution and answering queries. Furthermore, live chat tools cater to users preferring human interaction to address complex questions not within the chatbots’ scope.
4. Tooltips
Tooltips serve as concise, informative messages in the app triggered when users hover over a screen element. Plus, it is effective for onboarding and addressing FAQs, offering additional context about new product features. Moreover, this unique method engages users and highlights crucial interface points. It is widely adopted in user onboarding experiences and product tours to enhance product adoption.
Push Notification vs In-App Message
Push notifications and in-app messages play pivotal yet distinct roles in engaging users. This discussion delves into the nuances of these two communication strategies, comparing their effectiveness, user experience, and user cases in various scenarios. Understanding the differences between push notifications versus in-app messages is crucial for developers and marketers seeking to optimize user engagement and enhance the overall app experience.
| Criteria | Push Notification | In-App Message |
|---|---|---|
| Delivery | Sent to the device’s home screen, even if the app is closed. | Displayed only when the user is actively using the app. |
| Personalization | Limited personalization options based on user preferences or behavior. | It can be highly personalized based on in-app behavior and user data. |
| Engagement | Higher potential for engagement due to broader reach and instant visibility. | Effective for in-the-moment engagement, especially for targeted or specific interactions. |
| User Experience | It can sometimes be perceived as uncomfortable, depending on timing and content. | Integrated into the app experience, providing a more seamless interaction. |
| Use Cases | Alerts, promotions, updates, re-engagement efforts. | Onboarding messages, feature tutorials, announcements, and personalized content. |
| Permission Required | Requires user permission to send notifications. | Displayed within the app, usually doesn’t require specific permission for in-app messaging. |
How Does In-App Messaging Work?
In-app messaging works by letting brands or developers share information with their customers within a mobile app. When you’re using the app, you can see messages with text, pictures, or interactive stuff. It helps with giving guidance, making announcements, or showing personalized content.
Notably, firebase in-app messaging pops up as part of the app, so it doesn’t interrupt what you’re doing. Developers set it up to show targeted messages based on what you’re doing in the app, making the communication more helpful and relevant for users.
Other than that, you could send users a message when they try out a new tool in the product or guide them through a series of steps. This way, you can familiarize them with the features or make their experience smoother.
Common Use Cases of In-app Messaging
Here are 4-5 common use cases of in-app messaging, explained in more detail:
1. Customer Support
In-app messaging allows users to connect with customer support directly within the app. This provides real-time assistance, helping resolve issues quickly without the need to switch to another communication platform. For example, in banking apps, users can chat with support representatives about account issues or transaction queries directly within the app.
2. User Onboarding
In-app messaging can guide new users through the onboarding process by offering tips, tutorials, and personalized messages. For instance, a fitness app might use in-app messaging to welcome new users and provide them with personalized workout plans or reminders, helping them get started and stay engaged.
3. Engagement and Retention
Apps can use in-app messaging to send personalized notifications, reminders, or special offers to keep users engaged. For example, a shopping app might send in-app messages about exclusive discounts or cart reminders to encourage users to complete a purchase, enhancing user retention and driving sales.
4. Social Interaction
In social or gaming apps, in-app messaging enables users to communicate with friends, share updates, or collaborate in real time. For example, multiplayer games often include chat features that allow players to strategize or celebrate wins together, enhancing the social experience within the app.
5. Transaction Confirmation
In-app messaging is often used to confirm transactions, such as purchases or bookings, providing users with instant feedback and reassurance. For example, a ride-hailing app might use in-app messages to confirm ride details, including driver information and estimated arrival time, ensuring the user feels informed and secure throughout the transaction process.
Inspiring In-app Messaging Examples for Effective Communication
In-app messaging holds diverse applications across industries to elevate user experiences and communication. The examples discussed in this section underscore the adaptability of in-app messaging and demonstrate its usefulness in onboarding and personalized interactions. Therefore, explore these examples to extract valuable insights for optimizing in-app messaging for your application and requirements.
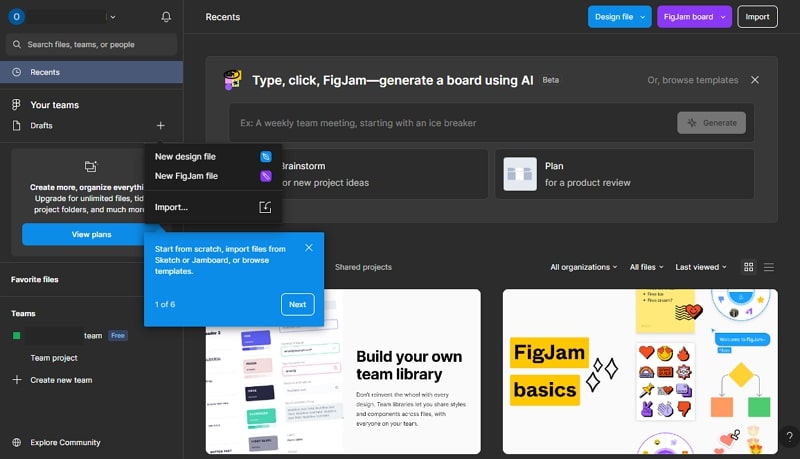
1. Figma
Figma is one of the in-app messaging examples for feature announcements and feature adoption. It utilizes a collaborative approach between graphic design and product marketing teams. Besides, Figma ensures that their in-app messages are brief yet impactful by focusing on clarity and conciseness. The short and clear messages, along with concise headlines, distinguish its approach to avoid any potential user overwhelm.
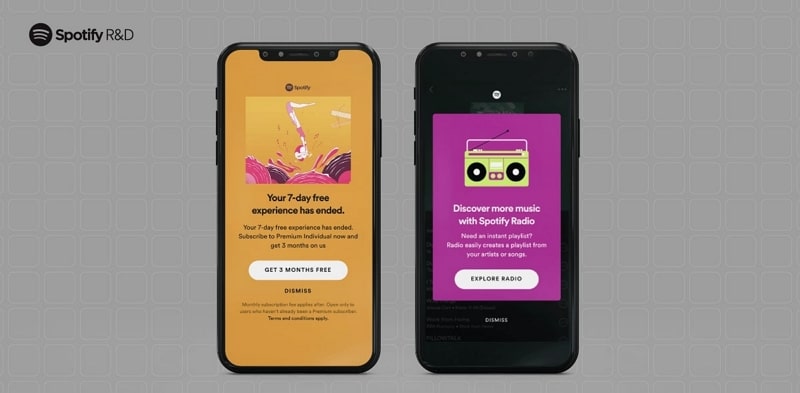
2. Spotify
Spotify prioritizes delivering a personalized app experience that can be seen in features like song suggestions. Additionally, you can experience it in annual “Spotify Wrapped” recaps and user onboarding flows. Beyond the surface, Spotify uses in-app messaging for upselling and driving account expansion to convert its vast freemium user base. Plus, these messages focus on assistance rather than a sales pitch, achieving a higher conversion rate.
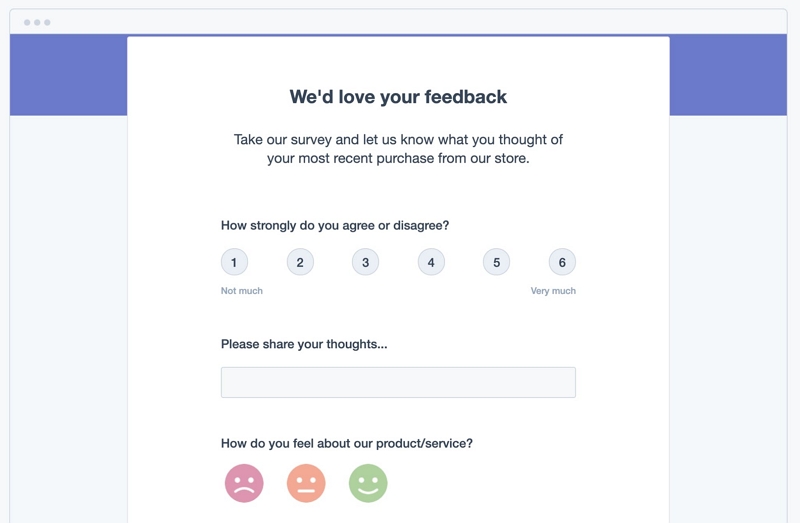
3. HubSpot
HubSpot places a strong emphasis on enhancing user experience, which is evident in its use of messages in the app for collecting user feedback. Users regularly receive in-app messages seeking their satisfaction to measure and optimize the user journey. Furthermore, its CSAT surveys are thoughtfully designed, employing simple colors and ample white space for user comfort.
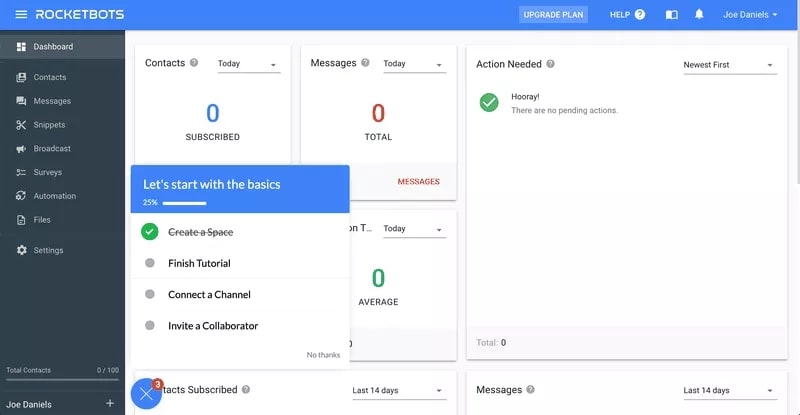
4. Rocketbots
Rocketbots employs in-app messaging strategically for user onboarding to enhance the experience for newcomers. Also, the onboarding process is made more user-friendly with the inclusion of various UI elements, such as tooltips. So, it ensures a smoother introduction to the Rocketbots interface. Additionally, they serve as effective CTAs for starting the customer journey.
Implementing the Best In-App Message Strategies for Success
To excel in in-app messaging, it is essential to follow best practices for successful communication and engaging users. By integrating these practices, in-app chats become a powerful way to satisfy user experiences.
- Strategic Tool Selection: First, you should invest time in choosing optimal mobile analytics tools that align with your app’s needs and marketing strategy. Additionally, look for tools that enable personalized messages through user segmentation and support two-way in-app chat functionalities.
- Unified Brand Strategy: You can excel in the market by developing a cohesive strategy. Next, align your in-app messages with your brand’s tone of voice and design. Furthermore, you should maintain consistency across platforms for concise messages that resonate with your audience.
- Data-Driven A/B Testing: One of the best practices includes conducting A/B testing before organizing widespread in-app messages. Businesses should learn what resonates with their audience and avoid sending unwanted messages. Moreover, continuously test different messaging formats to optimize your approach over time.
- Personalized Engagement: Marketers can customize their in-app messages for specific audiences. It can be done by leveraging personalization to increase engagement. For instance, gaming apps can reward valuable users with in-game currency for brand loyalty and engagement.
- Strategic Timing and Analytics: You should consider measuring the success of your in-app messaging strategy by identifying the best timing. For this purpose, use after specific in-app actions or upon app opening. Also, you can utilize analytics to make data-driven decisions to refine the approach over time.
In-app Messaging Best Practices
Here are some best practices for implementing in-app messaging:
1. Personalize Communication
Tailor messages based on user behavior, preferences, and demographics. Personalized messages are more likely to engage users and feel relevant, improving the overall user experience.
2. Keep Messages Concise and Clear
In-app messages should be brief and to the point. Users typically engage with these messages while using the app, so clarity and brevity are essential to avoid disrupting their experience.
3. Time Messages Appropriately
Send messages at the right moment to maximize their impact. For example, deliver onboarding tips when users first explore a feature or send promotional messages when users show interest in a related product or service.
4. Offer Value
Ensure that each message provides value to the user, whether it’s a useful tip, a special offer, or important information. Avoid sending irrelevant or repetitive messages that could lead to user frustration or app abandonment.
5. Allow for User Control
Give users the option to mute or manage in-app messaging settings. Respecting user preferences helps maintain a positive relationship and reduces the risk of users disabling notifications or uninstalling the app.
6. Test and Optimize
Regularly test different messages, formats, and timing to see what works best for your audience. Use analytics to track the performance of in-app messages and continuously refine your approach based on user feedback and behavior.
7. Ensure Consistency Across Channels
If your app communicates with users via multiple channels (e.g., push notifications, email), ensure that the messaging is consistent across all touchpoints. This consistency helps reinforce your brand and prevents confusion.
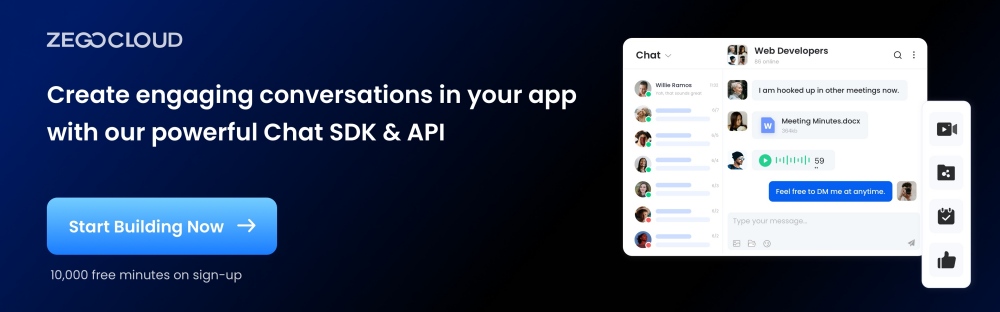
Enhance In-App Engagement with ZEGOCLOUD Chat API
ZEGOCLOUD is the go-to in-app messaging platform with the best app-building services. Furthermore, with this platform’s chat SDK, you can deliver a seamless messaging experience within mobile applications. There are various messaging services such as read receipts, group chat, one-to-one chat, media attachments, and more.
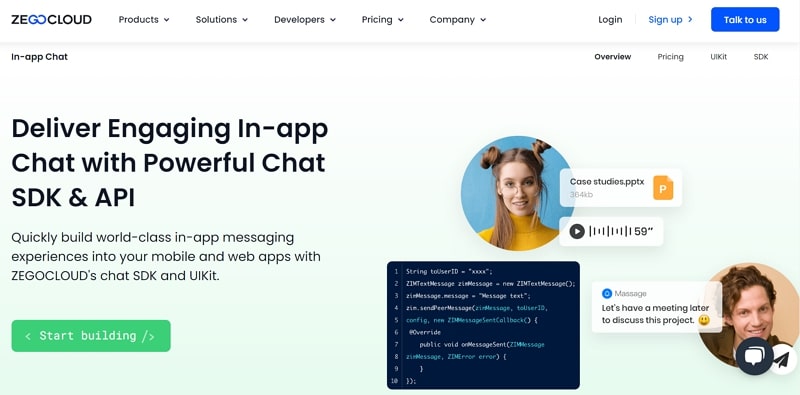
Also, you can build Flutter in-app messaging, React Native in-app messaging, and Android in-app messaging with ZEGOCLOUD developer-friendly chat API/SDK. You can share images, videos, GIFs, and files with your customers with this in-app message app. Other than that, your messages stay secure with its TLS and AES-256 encryption technology.
Key Features
- Moreover, this chat API also saves and stores your messaging history and can retrieve up to one year of messages.
- You can create a beautiful app in a few minutes with this in-app chat API UIKits feature. Also, the app built with UIKits of ZEGOCLOUD gives you a feature-rich chat experience.
- Additionally, this in-app chat SDK does not process or store customer privacy data or information on what they are messaging.
How to Build App Chat with ZEGOCLOUD API/SDK
Integrating real-time chat in apps boosts engagement, and ZEGOCLOUD API/SDK simplifies this process. This guide covers the essentials of embedding ZEGOCLOUD’s chat functionalities into your app, offering users seamless communication and enhancing the overall experience.
Preparation
- A developer account on ZEGOCLOUD — Register now
- Make a project, obtain the AppID, and obtain the AppSign.
- Android Studio 2.1 or later is required.
- an Android device or emulator that supports video and audio
- Basic understanding of Android app development
ZEGOCLOUD Chat SDK Integration
So far, we’ve discussed what the in-app chat SDK is and how it can help us easily integrate chat functionality into our app. This section will teach you how to make a chat app with Android Studio and the In-App Chat SDK.
To integrate the In-App Chat SDK into your project, follow the steps below:
Create a new project.
- Launch Android Studio and choose File → New Project.
- Enter the name of the application and select the project location.
- It is best to leave all other settings at their defaults. Click “Next”, followed by “Finish”.
Import the SDK
- Get the most recent version of the SDK from SDK downloads.
- Place SDK files in your project directory, such as
app/libs. - Open
app/build.gradleand add the following content:
- To specify the supported ABIs, add the
ndknode inside thedefaultConfignode.
ndk {
abiFilters 'armeabi-v7a', 'arm64-v8a', 'x86_64', 'x86'
}- Inside the android node, add the sourceSets node to specify the directory containing the SDK files.
sourceSets {
    main {
        jniLibs.srcDirs = ['libs']
    }
}- In the dependencies node, paste the following code:
implementation fileTree(dir: 'libs', include: ['*.jar'])Adding permissions
We require permission to access some Android operating system resources. For example, we need permission to use the camera and microphone.
This permission can be granted by following the steps outlined below:
- Open the
AndroidManifest.xmlfile in theapp/src/maindirectory and add the following code:
<!-- Permissions required by the SDK -->
<uses-permission android:name="android.permission.ACCESS_WIFI_STATE" />
<uses-permission android:name="android.permission.INTERNET" />
<uses-permission android:name="android.permission.ACCESS_NETWORK_STATE" />- Avoid obfuscation of class names by including the following codes in
proguard-rules.pro:
-keep class **.zego.**{*;}Implementation steps
To create a basic in-app Android chat app, follow the steps below:
Import class file.
import im.zego.zim.ZIMInitialize Zim SDK.
The first step is to set up a ZIM instance. An instance is the same as a user logging into the system as a client.
Assuming we have two clients, A and B, who want to send and receive messages from and to each other, both of them will need to call the create method with the AppID in the previous prerequisite steps to create their own ZIM SDK instance:
// Create a ZIM SDK object and pass the AppID, AppSign, and Application in Android.
ZIMAppConfig appConfig = new ZIMAppConfig();
appConfig.appID = 12345;
appConfig.appSign = "appSign";
zim = ZIM.create(appConfig, application);
Create a handler object for an event.
Before starting the user’s login, you must call the setEventHandler method to create an event handler object and customize the event callbacks so that you can receive callback notifications when SDK errors occur or message-related callback notifications.
zim.setEventHandler(new ZIMEventHandler() {
    @Override
    public void onReceivePeerMessage(ZIM zim, ArrayList<ZIMMessage> messageList, String fromUserID) {
        // Implement the callback for receiving the one-to-one messages.
    }
});
Log in to ZIM SDK.
Clients A and B must log in to the ZIM SDK after creating the ZIM SDK instance in order to send and receive messages.
To access the ZIM SDK, follow the steps below:
- To create a user object, use the
ZIMUserInfomethod. - Then, using their own user information, call the
loginmethod.
// userID and userName must be within 32 bytes, and can only contain numbers, letters and the following special characters: '~', '!', '@', '#', '$', '%', '^', '&', '*', '(', ')', '_', '+', '=', '-', '`', ';', ''', ',', '.', '<', '>', '/', '\'。
ZIMUserInfo zimUserInfo = new ZIMUserInfo();
zimUserInfo.userID = userID;
zimUserInfo.userName = userName;
zim.login(zimUserInfo, new ZIMLoggedInCallback() {
    @Override
    public void onLoggedIn(ZIMError error) {
          // You can know whether the login is successful according to the ZIMError.
    }
 });
Send one-to-one messages.
A and B can easily send messages to each other after logging into the SDK by invoking the sendPeerMessage method with client B’s userID, message content, and other information. The onMessageSent callback can be used to determine the status of a sent message. A will send a message to B in this scenario.
// Send one-to-one messages.

String toUserID = "xxxx";

ZIMTextMessage zimMessage = new ZIMTextMessage();
zimMessage.message = "Message content";

ZIMMessageSendConfig config = new ZIMMessageSendConfig();
// Set message priority. 1: Low (by default). 2: Medium. 3: High.
config.priority = ZIMMessagePriority.LOW;
// Set up the configuration of offline notification.
ZIMPushConfig pushConfig = new ZIMPushConfig();
pushConfig.title = "Offline notification title";
pushConfig.content= "Offline notification content";
pushConfig.extendedData = "Extend information of the offline notification";
config.pushConfig = pushConfig;

zim.sendPeerMessage(zimMessage, toUserID, config, new ZIMMessageSentCallback() {
    @Override
    public void onMessageSent(ZIMMessage zimMessage, ZIMError error) {
        //  You can implement the event callback for sending messages here.
    }
});
Receive one-to-one messages.
After logging in, Client B can now receive the message from Client A via the callback onReceivePeerMessage, which is already set in the setEventHandler method.
zim.setEventHandler(new ZIMEventHandler() {
    @Override
    public void onReceivePeerMessage(ZIM zim, ArrayList<ZIMMessage> messageList, String fromUserID) {

      for (ZIMMessage zimMessage : messageList) {
          if (zimMessage instanceof ZIMTextMessage)
          {
            ZIMTextMessage zimTextMessage = (ZIMTextMessage) zimMessage;
            Log.e(TAG, "Received message:"+ zimTextMessage.message);
          }
      }
   }
});
Log out
Simply calling the logout method will log you out of the ZIM SDK.
zim.logout()Destroy the ZIM SDK instance.
Call the destroy method to destroy the ZIM SDK instance.
zim.destroy();Run a demo
You can get this article’s demo source code by downloading it.
Conclusion
Wrapping up, in-app messaging significantly boosts user engagement. ZEGOCLOUD API/SDK for In-App Messaging simplifies its integration, offering a robust platform for developers. By utilizing ZEGOCLOUD, you can easily enhance your app’s communication capabilities, setting your project apart and fostering a vibrant user community. Embrace ZEGOCLOUD to unlock the power of in-app messaging.
Read more:
FAQ
Q1: How do in-app messages improve user retention?
In-app messages improve user retention by providing timely and relevant content, reminders, or offers that encourage users to continue engaging with the app, thus reducing churn.
Q2: Can in-app messaging be used for customer support?
Yes, in-app messaging is an effective tool for customer support, allowing users to get help and resolve issues in real-time without leaving the app.
Q3: How do you measure the effectiveness of in-app messaging?
The effectiveness of in-app messaging can be measured through metrics like open rates, click-through rates, user engagement levels, conversion rates, and overall impact on user retention.
Let’s Build APP Together
Start building with real-time video, voice & chat SDK for apps today!
