


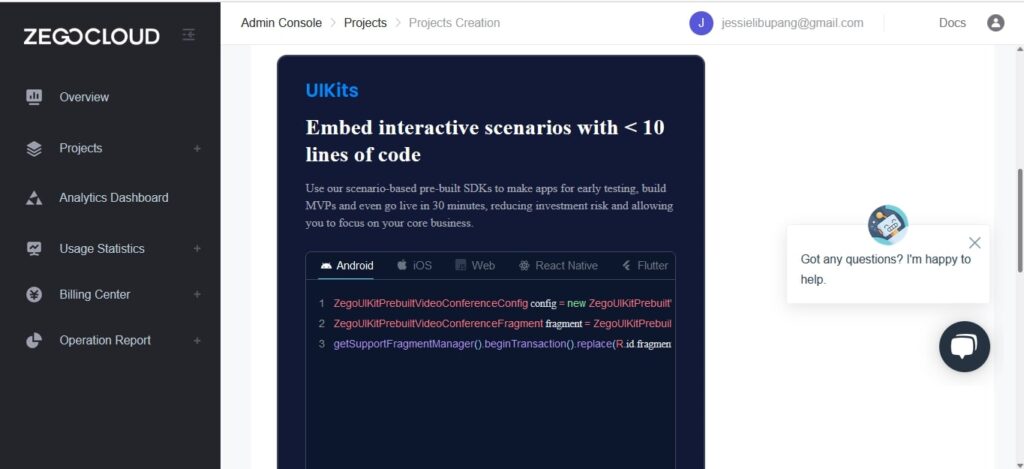
We all know that every problem has a corresponding solution or anecdote, so what then is the solution to building the UI of our applications faster and more efficiently? The solution is UIKit. A UIKit is basically a tool that can help you bring your UIs to life out of the box without putting much load on your creative energy. We’ll learn more about UIKits in the next section.
What is a UIKit?
A UIKit is a collection of assets containing a set of design elements such as UI components and styles. UI components provide the functionality to users. Some examples of UI components include input forms, navigation menus, and buttons.
With UIKit, you can easily implement complex UIs without worrying much about how to wrap everything or assemble the UI.
Many UIKit tools exist in the market today because of the tremendous benefits of these tools. Some app development tools now ship with UIKits. For instance, we have UIKit Flutter and React Native UIKit, which help with the development of cross-platform app UIs using Dart and JavaScript, respectively. Android Flutter is also used to build native Android UI with Dart.
Most of these UIKit tools make building tough as you’re forced to build in their native language. This is totally different from ZEGOCLOUD UIKits.
ZEGOCLOUD UIKits supports a wide range of platforms. Hence, you can build the user interface of your application on many platforms with ease. With it, you can launch your application to market faster with pre-built UIKits and UI Components. Instead of building from the ground up, build engaging apps in the shortest possible time.
In the following sections, we’ll explore and implement basic UIs with some of the popular UIKits in ZEGOCLOUD’s UIKits. Without further ado, let’s get started!
Call Kits
Call Kit is a richly featured flagship voice and video component. which can be used to implement high-fidelity one-on-one and group calls with just a few lines of code.
This UIKit helps you build video call features into any application without worrying much about complex programming concepts. You can embed the Call Kits module into any website or app and customize the in-call features by modifying its parameters or going “under the hood” with Call Kit open source code.
Features of Call Kits
Call Kits have a lot of benefits. The most important one is removing the complexity of coding everything from scratch by providing all the components that you could ever need out of the box. Apart from that, Call Kits has many other features that make it stand out from the crowd.
Below are some of the features:
- The out-of-the-box video chat interface
- Customizable UI
- Meeting invitation
- Text chat
- Screen sharing
- Recording
- Participant list
- Cross-browser compatibility
- Built-in bandwidth management
- Auto network reconnection
- Network analytics display
- Customizable branding logo
How to Build a Video Call App with the Call Kit
In this section, we will learn how to build video call applications with ZEGOCLOUD’s Call Kit. I believe you’ll fall in love with Call Kit after seeing how easy it is to build one-on-one calls and group calls into an application.
Preparation (same for other kits in this article)
- A ZEGOCLOUD developer account —Sign up
- VS Code or any IDE or text editor of choice.
- computer with audio and video support.
- Basic understanding of web development
Call Kit SDK Integration
Follow the steps below to integrate the Call Kit SDK into your project:
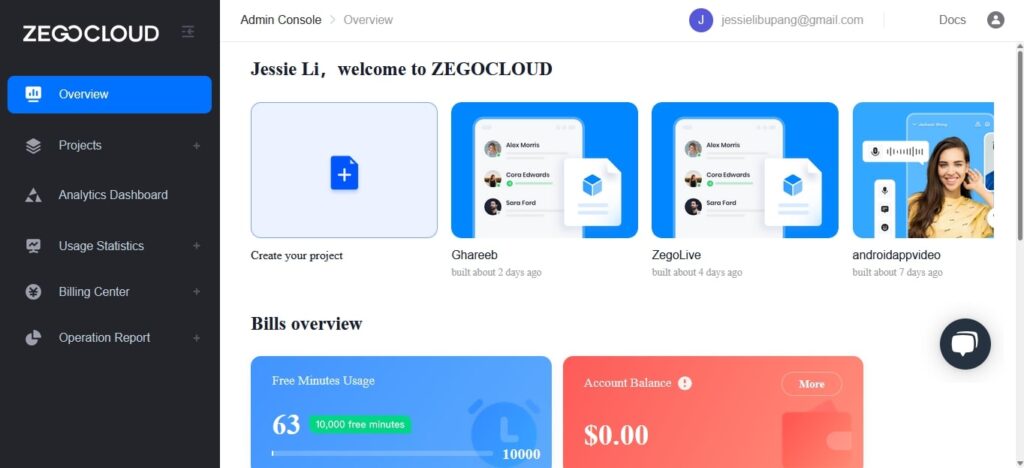
Step 1: Log in to the Zegocloud admin console.
ZegoCloud offers a powerful developer console where you can create your apps easily. The first step to integrating the Call Kit SDK is logging in to ZegoCloud’s admin console, or signing up if you don’t have an account.

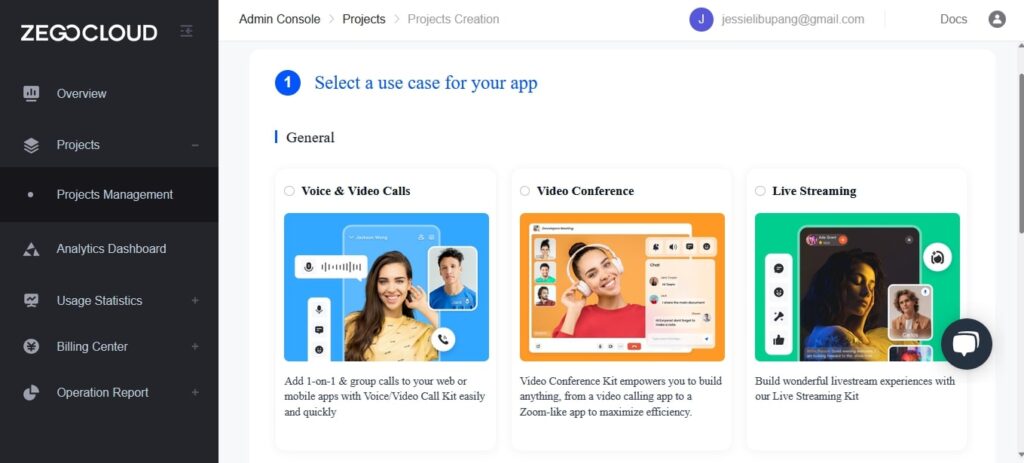
Step 2: Add a new project
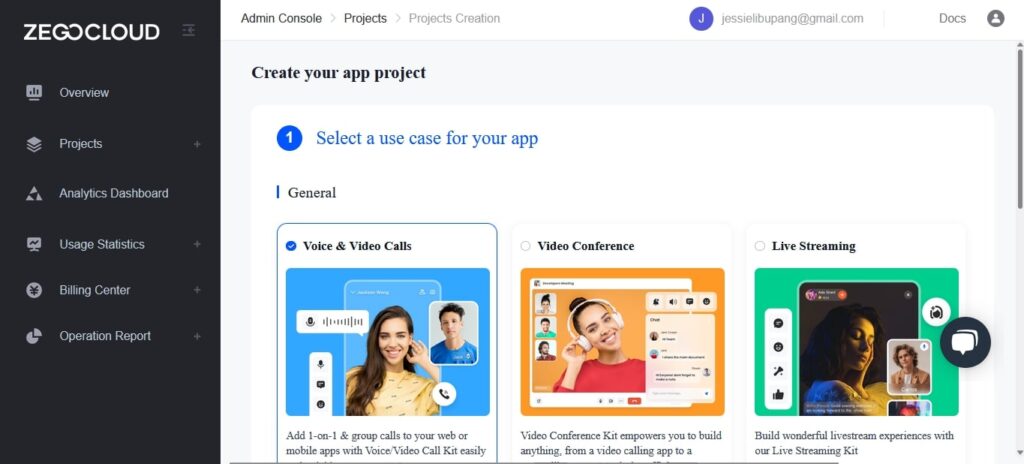
Click on “Create new project” to get started with Call Kit project creation.

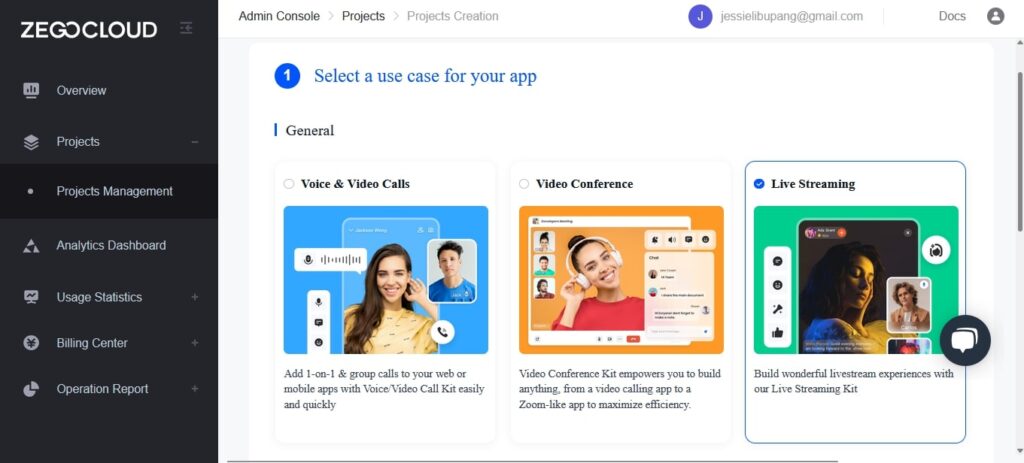
After clicking the “Create new project” button, you’ll be prompted to select the type of app we want to build. Select “Video and voice” since we are making use of the Call Kit, and click on “Next.“
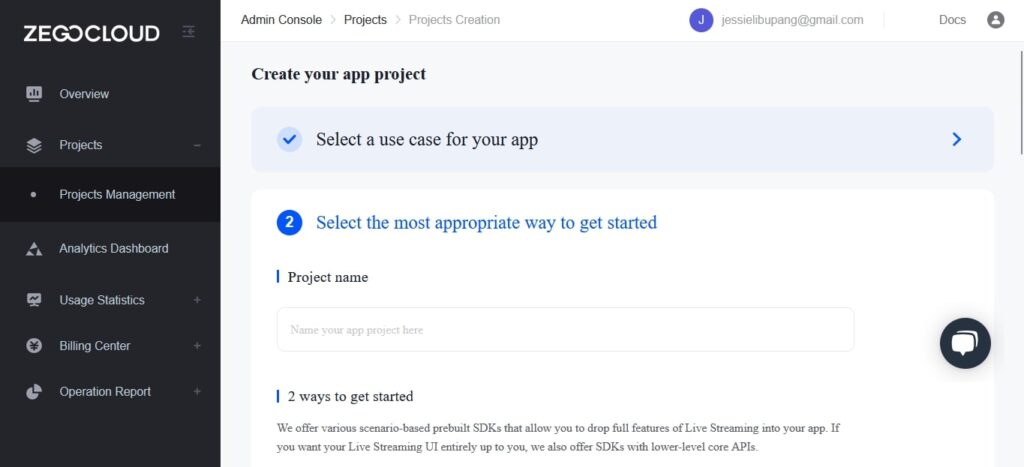
Step 3: Enter the project name.
After creating a project in step (2), the next phase will be naming our application.
Note: You can only name a project with numbers, letters, and underlines (_).

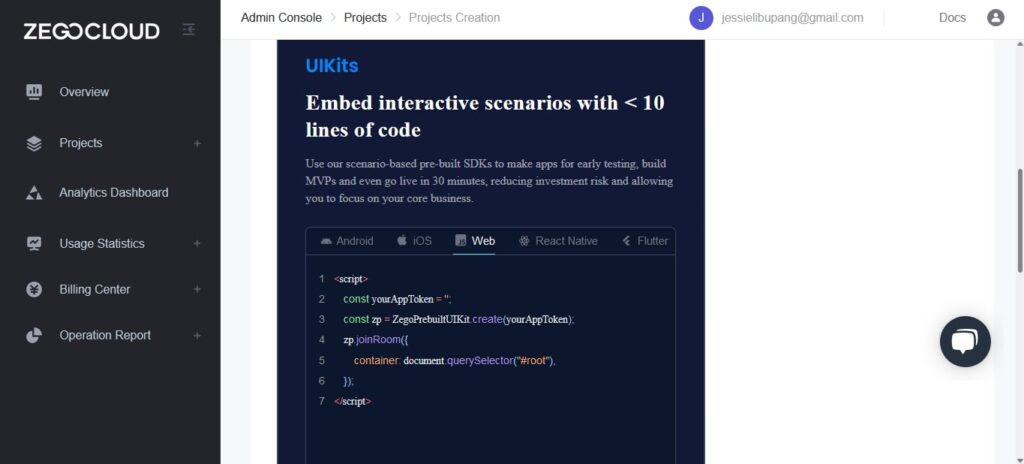
Step 4: Choose a UI build method.
This is where our topic comes into play. In this phase, you have the option to build with UIKit or go with the option that offers more customization. We will use the UIKit option as we can build our video call applications without worrying about the layout. ZEGOCLOUD’s prebuilt UIKit will take care of our layout.
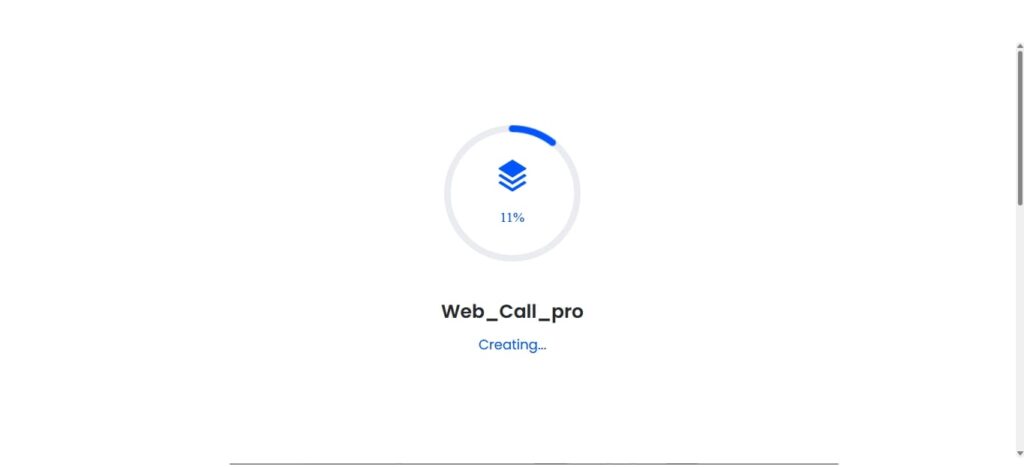
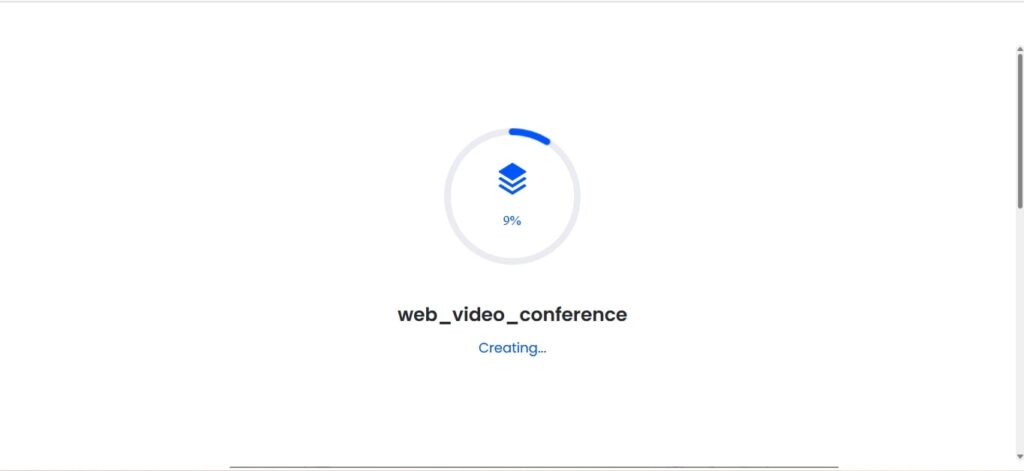
You can proceed with the building process. Wait for the project to be completed.
Step 5: Choose a platform and download configuration files.
I will choose “Web” as the platform I’m building for. You can also choose other platforms as needed.

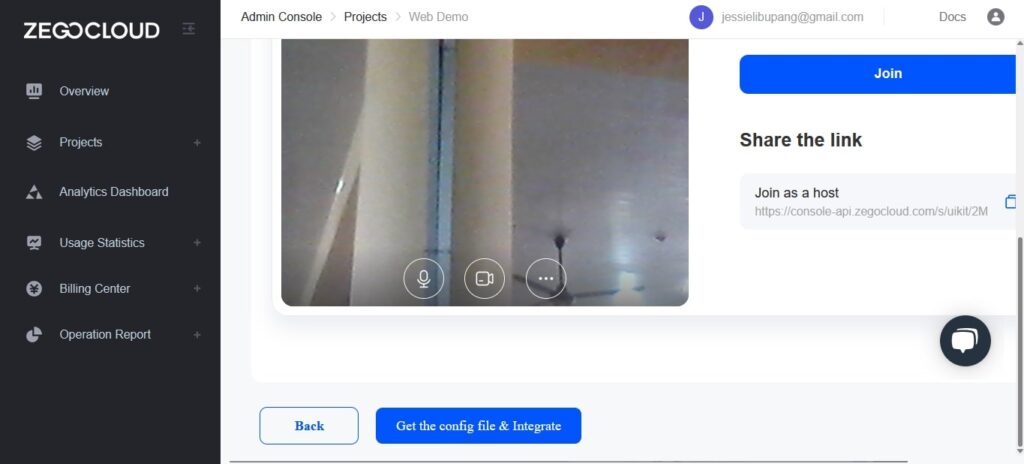
Step 6: Download the project.
Click on “Get configuration and integration files” to download project files.

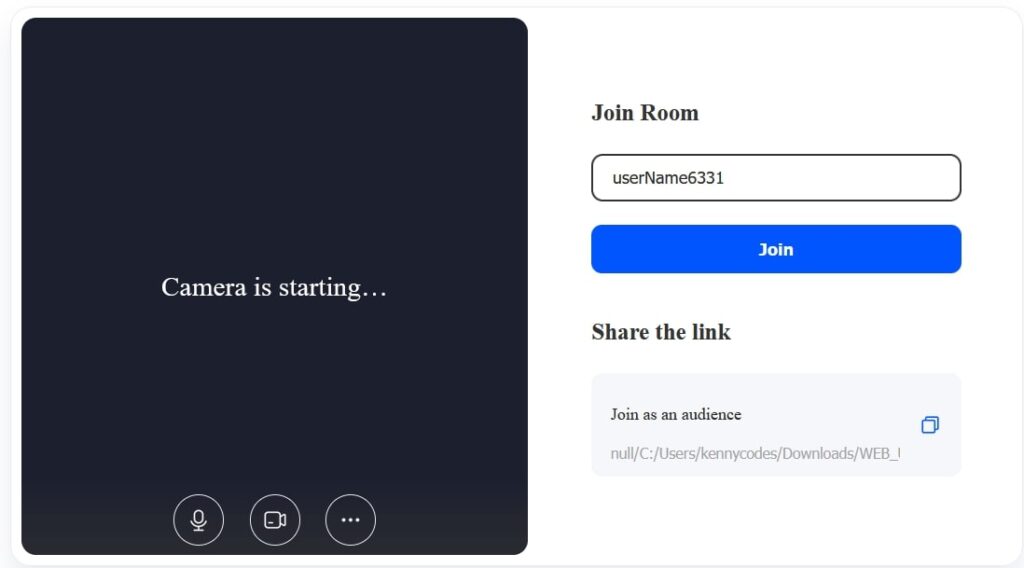
Opening the application with development tools like an IDE or text editor reveals the following lines of code:
<html>
<head>
<style>
#root {
width: 100vw;
height: 100vh;
}
<style>
</head>
<body>
<div id="root"></div>
</body>
<script src="https://resource.zegocloud.com/prebuilt/crypto-js.js"></script>
<script src="https://resource.zegocloud.com/prebuilt/prebuiltToken.js"></script>
<script src="https://unpkg.com/@zegocloud/zego-uikit-prebuilt/zego-uikit-prebuilt.js"></script>
<script>
window.onload = function () {
function getUrlParams(url) {
let urlStr = url.split('?')[1];
const urlSearchParams = new URLSearchParams(urlStr);
const result = Object.fromEntries(urlSearchParams.entries());
return result;
}
// Generate a Token by calling a method.
// @param 1: appID
// @param 2: serverSecret
// @param 3: Room ID
// @param 4: User ID
// @param 5: Username
const roomID = getUrlParams(window.location.href)['roomID'] || (Math.floor(Math.random() * 10000) + "");
const userID = Math.floor(Math.random() * 10000) + "";
const userName = "userName" + userID;
const appID = 839236438;
const serverSecret = "235c98d0ee06c5ce99a590abe9cf72f9";
const TOKEN = generatePrebuiltToken(appID, serverSecret, roomID, userID, userName);
const zp = ZegoUIKitPrebuilt.create(TOKEN);
zp.joinRoom({
container: document.querySelector("#root"),
sharedLinks: [{
name: 'Join as a host',
url: window.location.origin + window.location.pathname + '?roomID=' + roomID,
}],
scenario: {
mode: ZegoUIKitPrebuilt.VideoConference,
},
turnOnMicrophoneWhenJoining: true,
turnOnCameraWhenJoining: true,
showMyCameraToggleButton: true,
showMyMicrophoneToggleButton: true,
showAudioVideoSettingsButton: true,
showScreenSharingButton: true,
showTextChat: true,
showUserList: true,
maxUsers: 2,
layout: "Auto",
showLayoutButton: false,
});
}
</script>
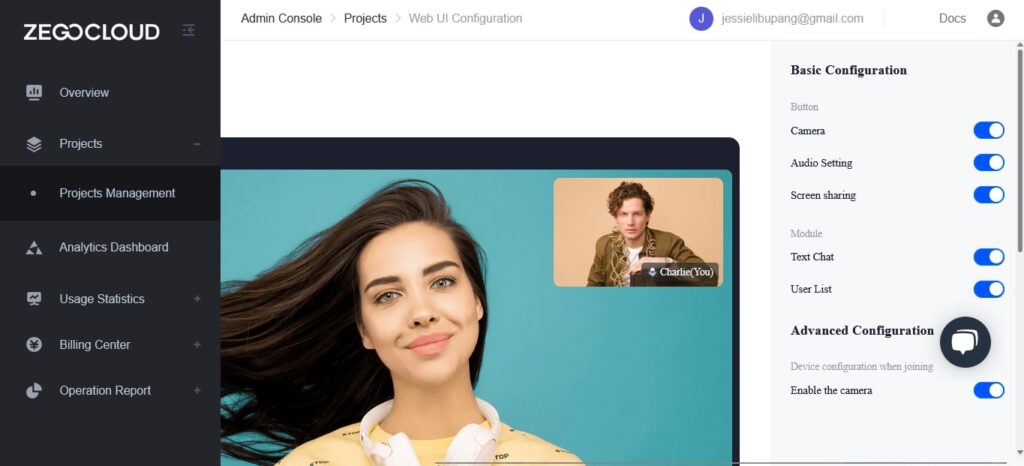
</html>One-on-one video call UI configuration
Like I said earlier, you can easily customize UIKit’s layout by modifying its configuration file.
Below is the configuration file for a one-on-one video call with Call Kit:
{
           turnOnMicrophoneWhenJoining: true,
           turnOnCameraWhenJoining: true,
           showMyCameraToggleButton: true,
           showMyMicrophoneToggleButton: true,
           showAudioVideoSettingsButton: true,
           showScreenSharingButton: true,
           showTextChat: true,
           showUserList: true,
           maxUsers: 2,
           layout: "Auto",
           showLayoutButton: false,
           scenario: {
               mode: "OneONoneCall",
           }
}
To test the application, open the file we downloaded in step 6 with any browser of your choice.
Group video call UI configuration
Below is the configuration file for group calls with Call Kit:
{
           turnOnMicrophoneWhenJoining: true,
           turnOnCameraWhenJoining: true,
           showMyCameraToggleButton: true,
           showMyMicrophoneToggleButton: true,
           showAudioVideoSettingsButton: true,
           showScreenSharingButton: true,
           showTextChat: true,
           showUserList: true,
           maxUsers: 50,
           layout: "Auto",
           showLayoutButton: true,
           scenario: {
               mode: "GroupCall",
           }
}
2. Video Conference Kit
The Video Conference Kit is a prebuilt, feature-rich component. It enables you to build powerful and reliable video conferences into your web and mobile apps in minutes. Coding a video conference application from scratch can take days. The story is completely different when you use the Video Conference Kit.
If you want more customization on your video conference app UI, you can make your customization based on the provided Video Conference Kit open source code.
Features of the Video Conference Kit
The Video Conference Kit offers many features out of the box with the help of a prebuilt UIKit. The ease with which these features are made available is just mind-blowing.
The list of features this kit offers is extensive. Below are some cool features of the Video Conference Kit:
- Out-of-the-box video conference
- Customizable UI
- Conference Invitation
- Text chat
- Screen sharing
- Recording
- Participant list
- Built-in bandwidth management
- Cross-browser compatibility
- Network analytics display
- Auto network reconnection
- Customizable branding logo
How to Build a Video Conference App with the Video Conference Kit
from the aforementioned features. You can see that the Video Conference SDK is indeed powerful. In this section, we’ll be building a video conferencing web app using the Video Conference Kit SDK and UIKit. The process is almost the same as the process we used when building a video call application using Call Kit. So you can make reference to the steps there if you need more details.
Video Conference SDK Integration
Follow the steps below to integrate video conferencing into your project:
Step 1: Login to the Zegocloud admin console.
Step 2: Add a new project
After clicking the “Create new project” button, you’ll be prompted to select the type of app we want to build. Select “Video Conferencing” since we are making use of the Video Conferencing Kit and click on “Next.“
Step 3: Enter the project name.
Step 4: Choose a UI build method.
After choosing the UI build method, you can proceed with the building process. Wait for the project to be completed.
Step 5: Choose a platform and download configuration files.
I will choose “Web” as the platform I’m building for. You can also choose other platforms as needed.

Step 6: Download the project

3. Live Streaming Kit
The ZEGOCLOUD Live Streaming Kit is a full-featured and modular live streaming component. It helps you build custom live streaming features into web and mobile apps with just a few lines of code. It’s by far the best live-streaming kit out there. It’s user-friendly, powerful, and highly compact, as it’s built with modularity in mind.
Features of the Live Streaming Kit
Just like other UIKits here, the core aim of the Live Streaming Kit is the ease of integration and implementation. You can easily set up a powerful live streaming application in a few minutes using ZEGOCLOUD’s Live Streaming Kit.
If you need advanced features or more customization in your live streaming apps with Live Streaming Kit, you can tweak the open source code of Live Streaming Kit to meet your purpose.
Apart from the above features, below are other Live Streaming Kit features you should know about.
- Out-of-the-box live stream interface
- Customizable UI
- Livestream invitation
- Text chat
- Screen sharing
- Recording
- Audience list
- Cross-browser compatibility
- Built-in bandwidth management
- Auto network reconnection
- Network analytics display
- Customizable branding logo
How to Build a Live Streaming Web App with the Live Streaming Kit
Building live streaming applications with live streaming UIKit is not a difficult task to accomplish. It can be done in less than 10 minutes if you follow the steps well. I know you’re already pumped and ready to build your first live-streaming app with Live Streaming Kit. We’ll be doing just that in the next section!
Live Streaming SDK Integration
Follow the steps below to integrate Live Streaming into your project:
Step 1: Login to the Zegocloud admin console.

Step 2: Add a new project

After clicking the “Create new project” button, you’ll be prompted to select the type of app we want to build. Select “Live Streaming” since we are making use of the Live Streaming Kit. Click Next to proceed.
Step 3: Enter the project name.

Step 4: Choose a UI build method.
After choosing the UI build method, you can proceed with the building process. Wait for the project to be completed.

Step 5: Choose a platform and download configuration files.
I will choose “Web” as the platform I’m building for. You can also choose other platforms as needed.

Step 6: Download the project.

Conclusion
We have so far covered what UIKits, Call Kits, Video Conference Kits, and Live Streaming Kits are. and how to integrate their features into our applications. From what we’ve done so far, you can see that ZEGOCLOUD’s UIKits and its components are awesome and fully featured. It does everything behind the scenes, so you don’t have to worry about complex stuff. Cool, isn’t it?
Read More
FAQ
Q1. What are ZEGOCLOUD UIKits?
ZEGOCLOUD UIKits are prebuilt UI components that help developers quickly integrate real-time audio, video, and chat features into their apps. They come with ready-to-use layouts and logic, so you can launch interactive features without building from scratch.
Q2. How do UIKits simplify app development?
UIKits handle most of the front-end design and interaction logic for you. Instead of coding call interfaces or chat layouts manually, you can import the UIKits, configure them, and focus on customizing your product experience.
Q3. Which platforms do ZEGOCLOUD UIKits support?
They support Web, Android, iOS, Flutter, React Native, and Unity, making it easy to create consistent cross-platform user experiences.
Q4. What is the difference between ZEGOCLOUD SDK and UIKits?
The SDK provides the core RTC engine and APIs for maximum flexibility. UIKits, on the other hand, are built on top of the SDK to give you a fully functional, plug-and-play UI for faster deployment.
Q5. Are ZEGOCLOUD UIKits open source?
Yes. Many of ZEGOCLOUD’s UIKits are open source on GitHub, so developers can explore the implementation, contribute, or fork the project to fit specific needs.
Let’s Build APP Together
Start building with real-time video, voice & chat SDK for apps today!
