


How to build a video conferencing app for iOS? A vital component of many organizations today is video conferencing. Through the use of mobile and online random video chat apps, people may now easily interact with one another from various locations, hold in-person meetings, and make significant decisions. As a result of this technology’s increasing acceptance across a variety of industries, numerous service providers have emerged.
While there are many sources that provide video conferencing technology in various ways, successful businesses need a dependable and secure option — video conferencing integration.
In this article, I will walk you step-by-step through building the best video conferencing using the ZEGOCLOUD UIKits.
Features of Best Video Conferencing Apps in the Market
As remote work and virtual collaborations become the new norm, the demand for reliable and feature-rich video conferencing apps has skyrocketed. These platforms not only bridge geographical divides but also foster real-time communication and collaboration. Let’s delve into some of the standout features that the best video conferencing apps in the market offer today:
1. High-Definition Audio and Video
Leveraging advanced codec technologies, these apps ensure crystal clear audio and video quality. This feature ensures that every participant, regardless of their location, experiences a lifelike meeting environment, making virtual interactions feel as genuine as face-to-face conversations.
2. Screen Sharing
This feature allows users to share their screens in real time, facilitating collaborative presentations and discussions. Whether it’s a PowerPoint presentation, a software demo, or a spreadsheet, screen sharing enhances the collaborative experience.
3. Real-time Chat
Integrated chat functions enable participants to send messages instantly during meetings. This ensures that side conversations or clarifications can occur without interrupting the main discussion. It’s especially useful for sharing links, documents, or quick notes.
4. Meeting Recording
For those who might miss the meeting or for documentation purposes, the ability to record and store meetings is invaluable. This feature allows users to revisit discussions, ensuring that no detail is overlooked.
5. Security Features
In today’s digital age, security is paramount. Top video conferencing apps offer end-to-end encryption, ensuring that all communications remain confidential. This feature protects businesses from potential eavesdropping or data breaches.
6. Cross-Platform Compatibility
The best apps ensure seamless functionality across various devices and operating systems. Whether you’re using an iPhone, Android, or desktop, these apps provide a consistent and user-friendly experience, ensuring that no participant is left out due to device limitations.
How to Develop an iOS Video Conferencing App
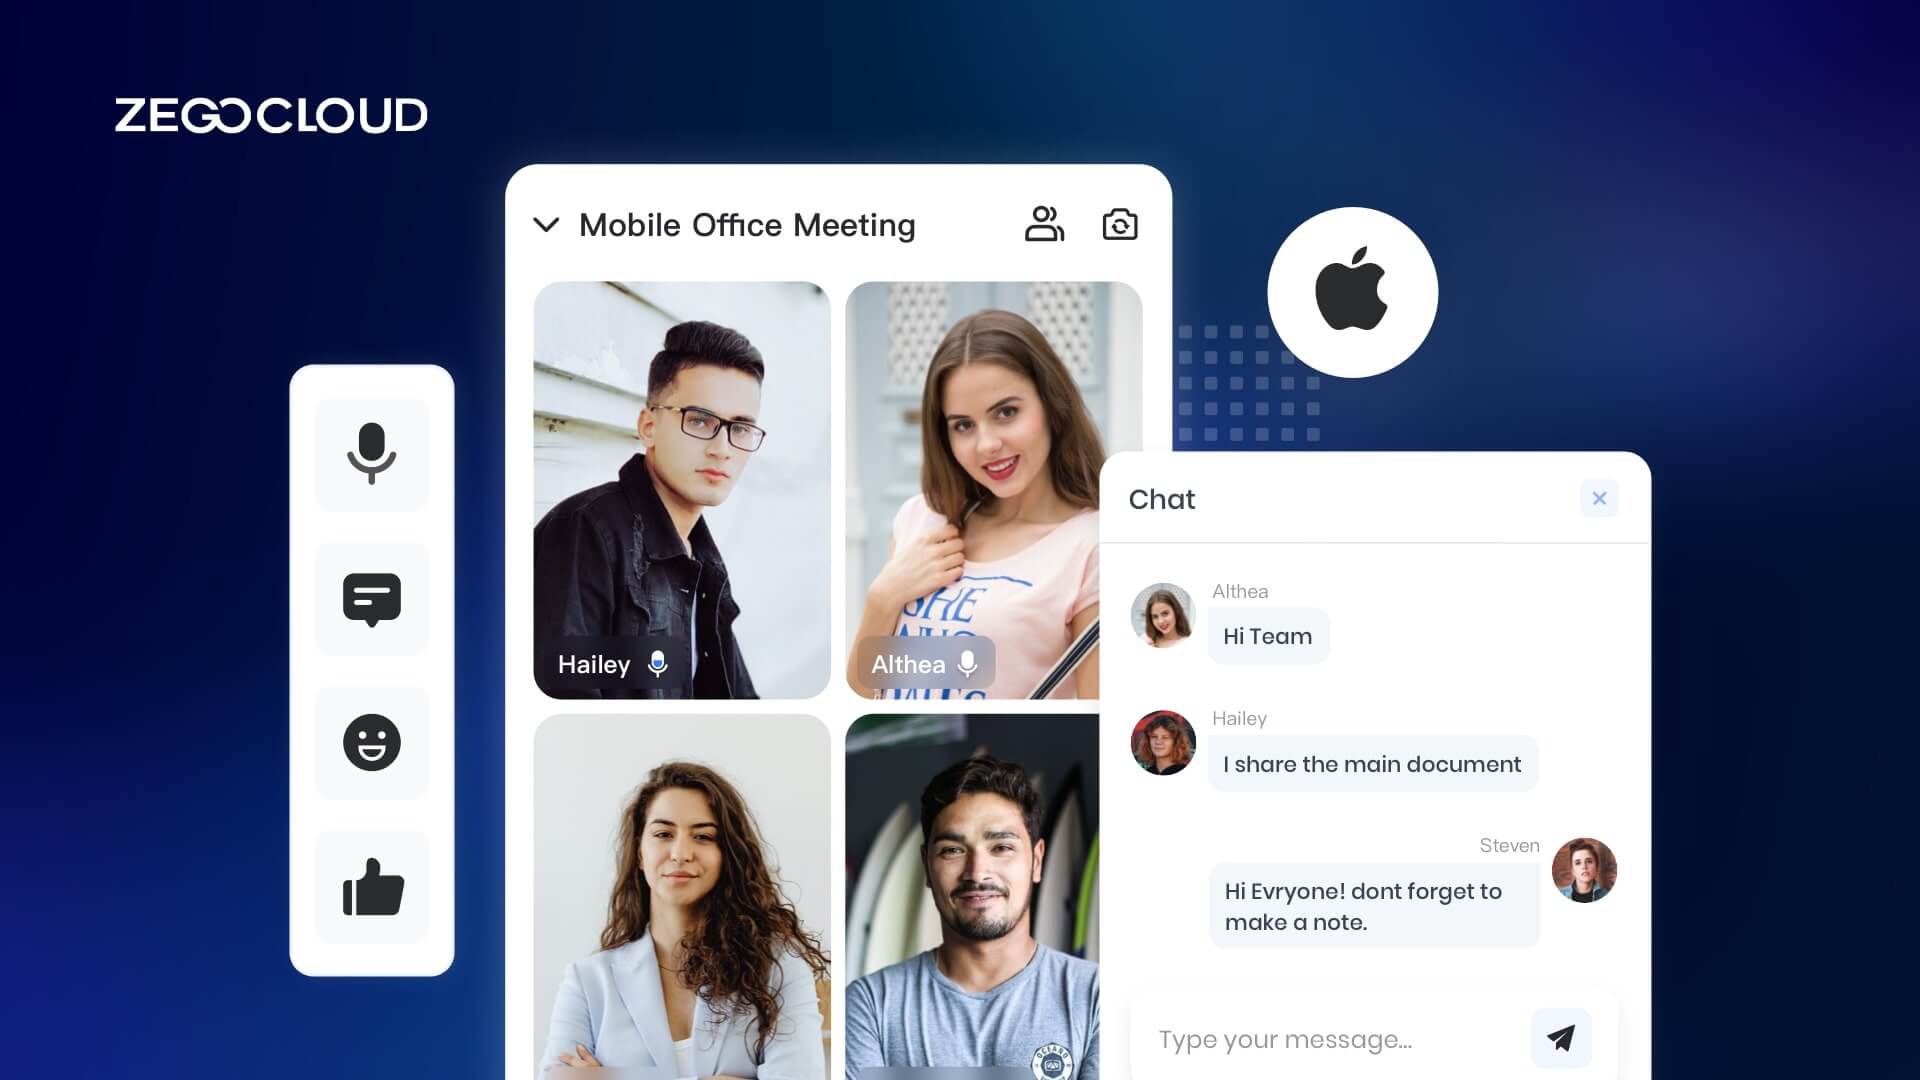
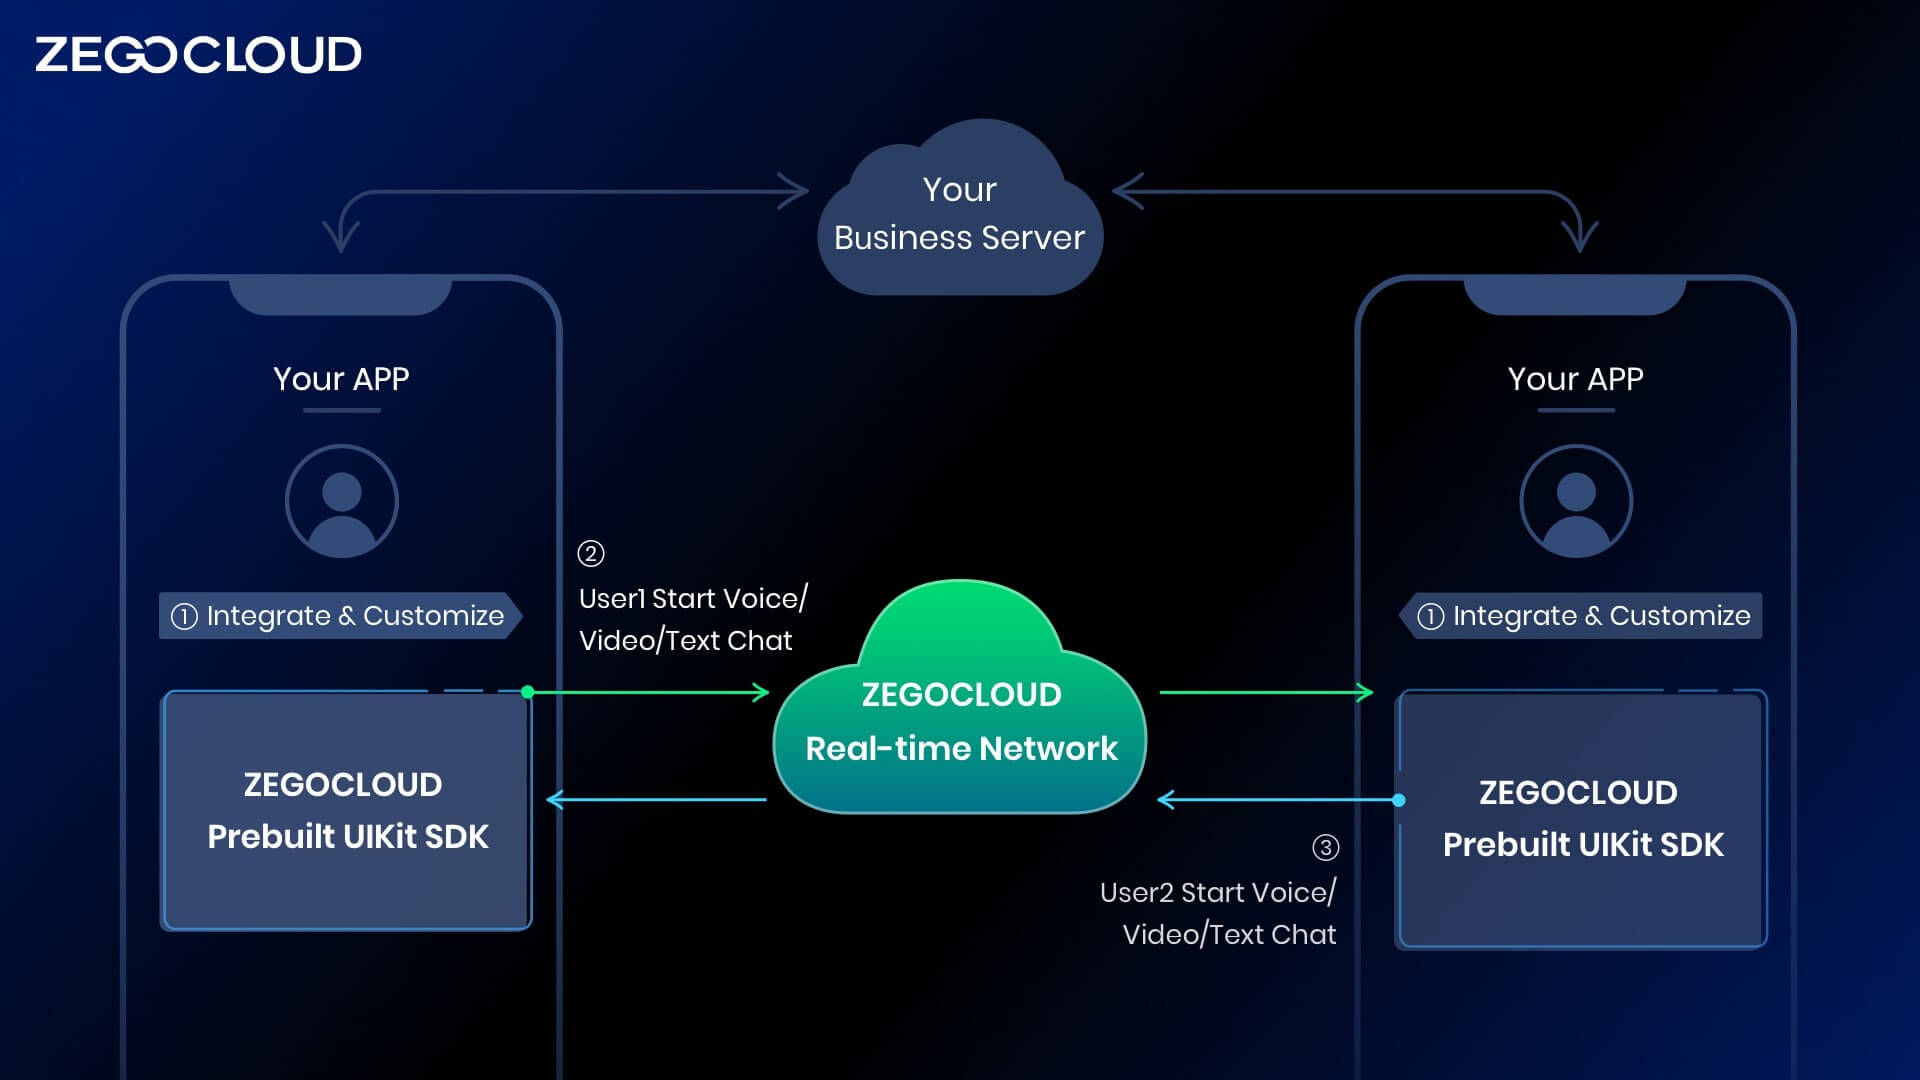
UIKits is a prebuilt feature-rich component from ZEGOCLOUD, which enables you to build video conferences into your iOS app in minutes. And it includes the business logic with the UI, you can add or remove features accordingly by customizing UI components. It includes an iOS Video Conference Kit that is responsible for handling all the logic and UI of the video conference function. Include:
- Multi-user audio/video conferences
- Adaptive video layouts
- Real-time sound waves display
- Customizable UI styles
- Device management
- Extendable top/bottom menu bar
- Customizable conference title
- Member List
- Conference join/leave notifications
You only need to implement business-related logic. For example:
- User login registration
- Conference List Management
- User permission, etc.
Preparation
- A ZEGOCLOUD developer account — Sign up
- Xcode 12.3 or later
- Devices with iOS 12.0 or later
- Basic understanding of iOS development
Steps to Make Video Conferencing App for iOS
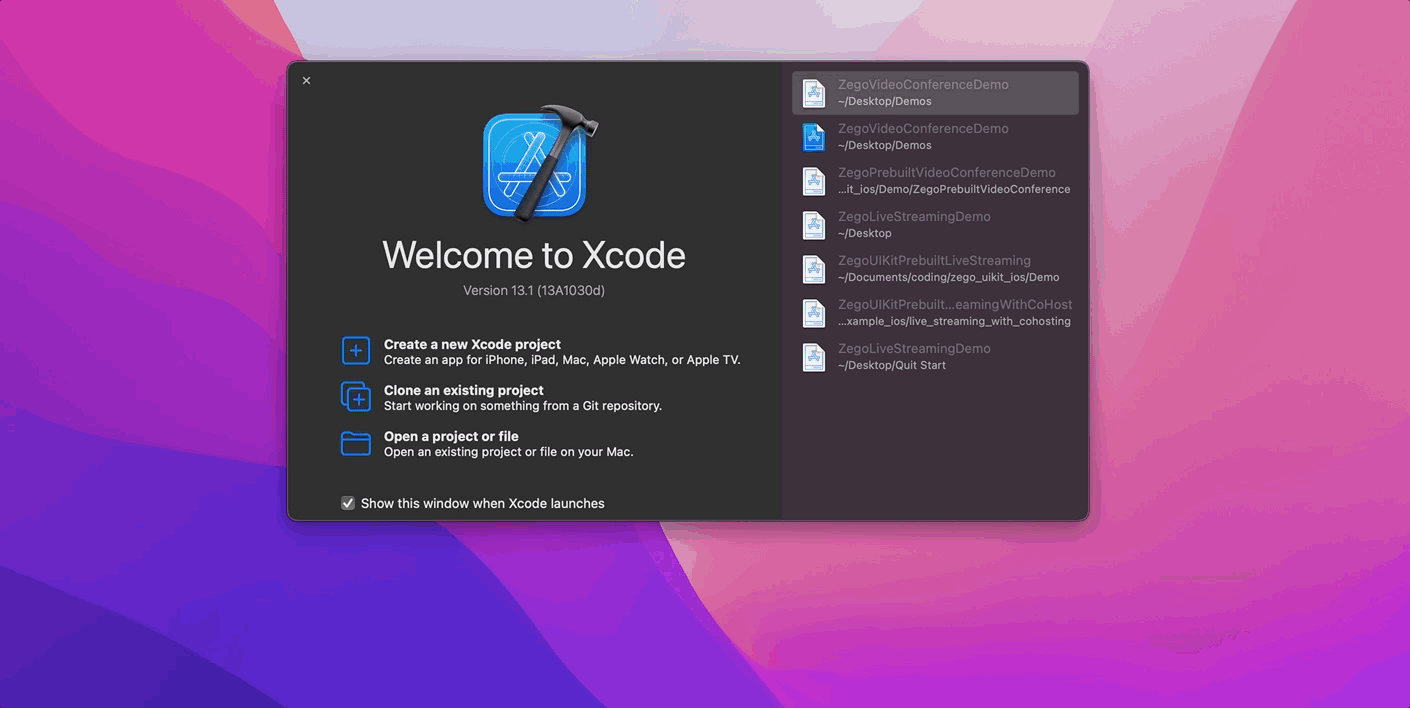
1. Create a project
Create a new project using Xcode.
2. Add ZegoUIKitPrebuiltVideoConference as dependencies
2.1 Create podfile
You need to use cocopods to import the SDK. First, you need to execute pod init in your project root directory to create a podfile.
pod init2.2 Edit podfile
Then open the created podfile and add pod 'ZegoUIKitPrebuiltVideoConference' in the file.
pod 'ZegoUIKitPrebuiltVideoConference'2.3 Download SDK
Finally, execute the pod install command to download the SDK.
pod install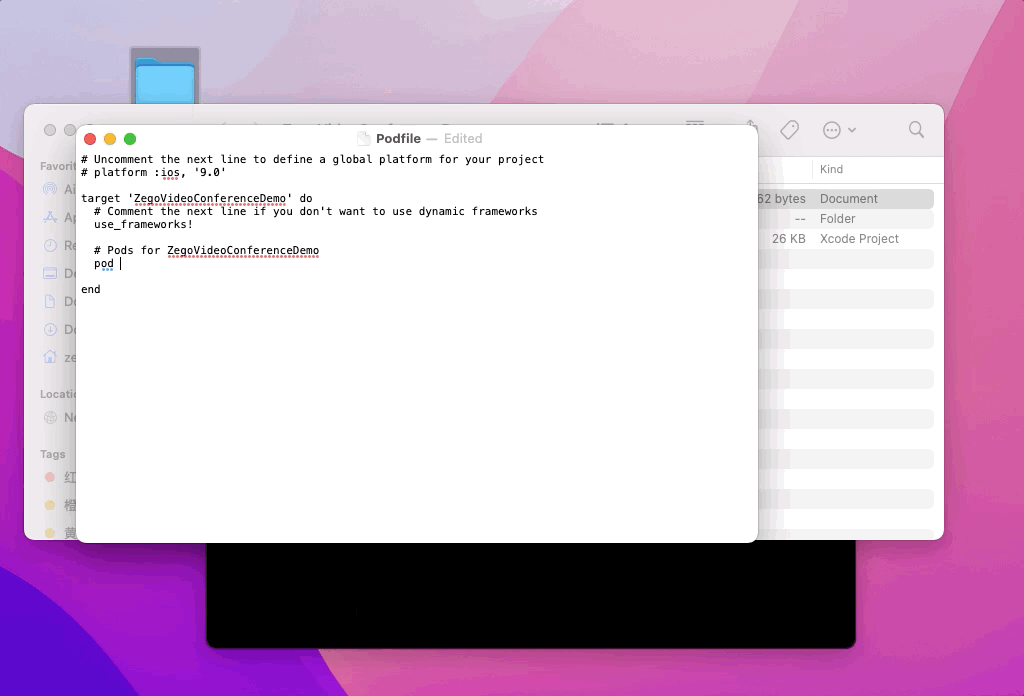
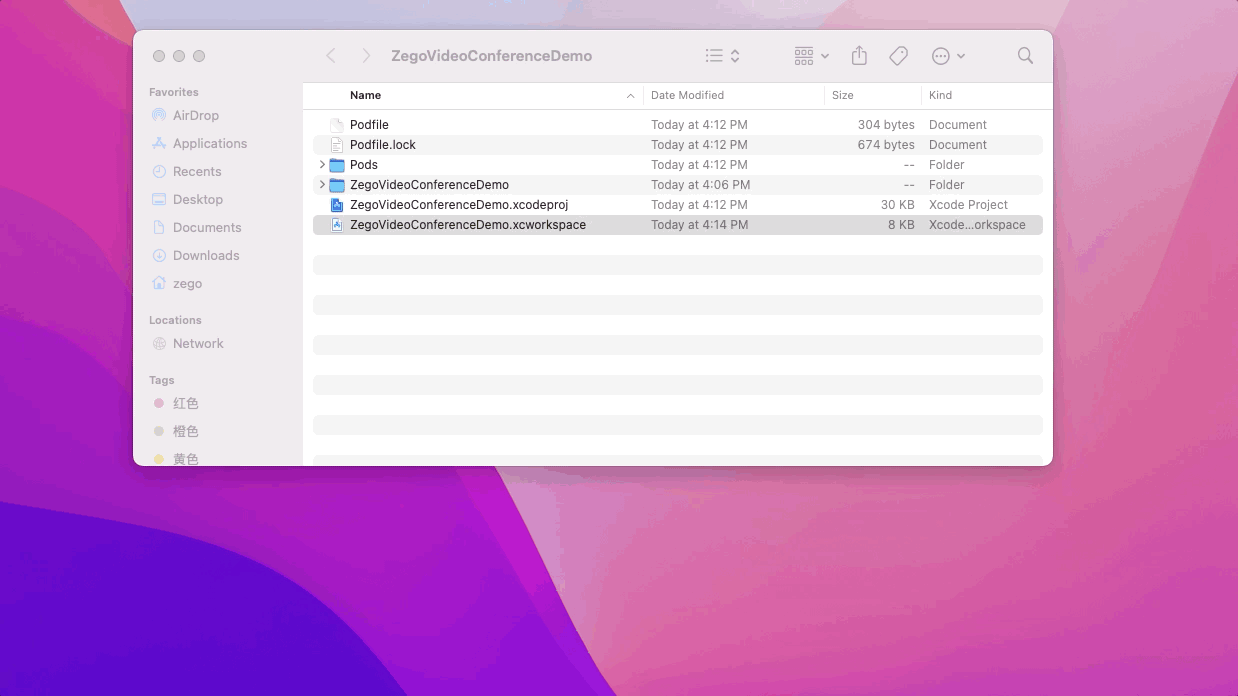
3. Open project
After you finish step 2, a .xcworkspace file will be generated in the root directory, double-click .xcworkspace file to open the project.
4. Add device permissions
Next, you need to add permission requests for camera and microphone in the Info.plist file.
<key>NSCameraUsageDescription</key>
<string>We require camera access to connect to a conference</string>
<key>NSMicrophoneUsageDescription</key>
<string>We require microphone access to connect to a conference</string>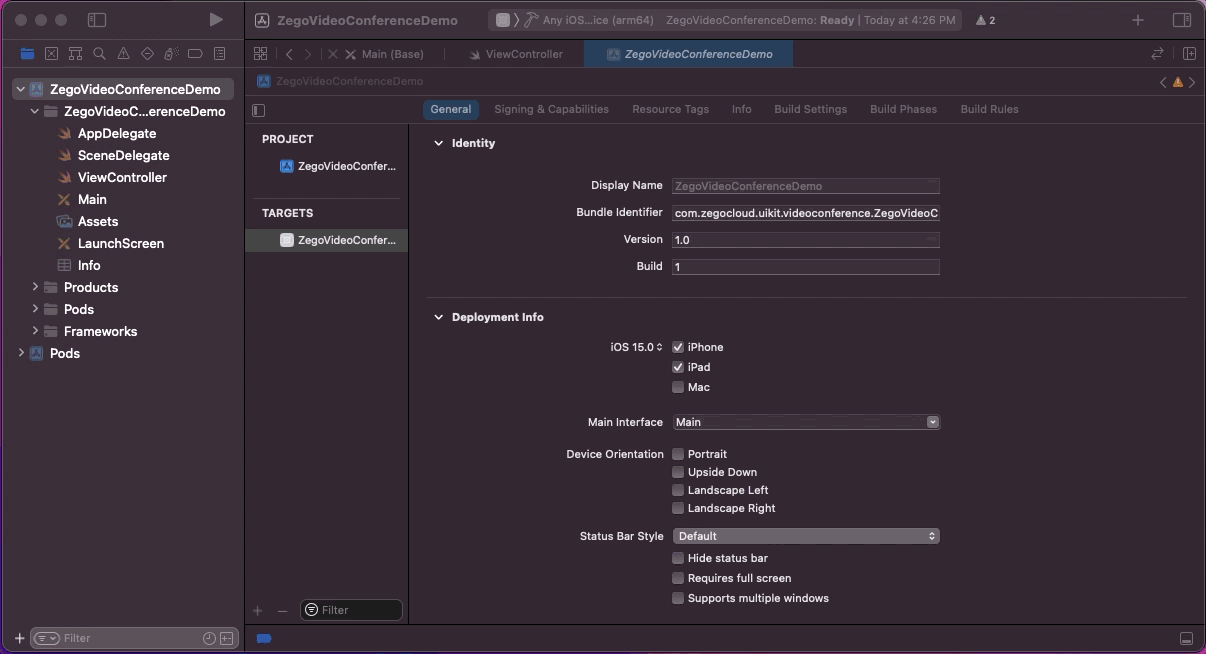
5. Start a video conference
Video Conference Kit supports you to use any conference id to start a video conference, but you need to complete the following configurations before starting a conference.
5.1 Import SDK
First, you need to import ZegoUIKit and ZegoUIKitPrebuiltVideoConference SDK in ViewController file.
import ZegoUIKit
import ZegoUIKitPrebuiltVideoConference
5.2 Add SDK authentication parameters
Next, you need to obtain the SDK authentication information from your ZEGOCLOUD console, and fill in the ViewController file.
Here, for the convenience of experience, appID and appSign will be directly used as the authentication information. In practical applications, it is recommended to use Token as authentication information to avoid leakage of account information.
let appID: UInt32 = Your App ID
let appSign: String = Your App Sign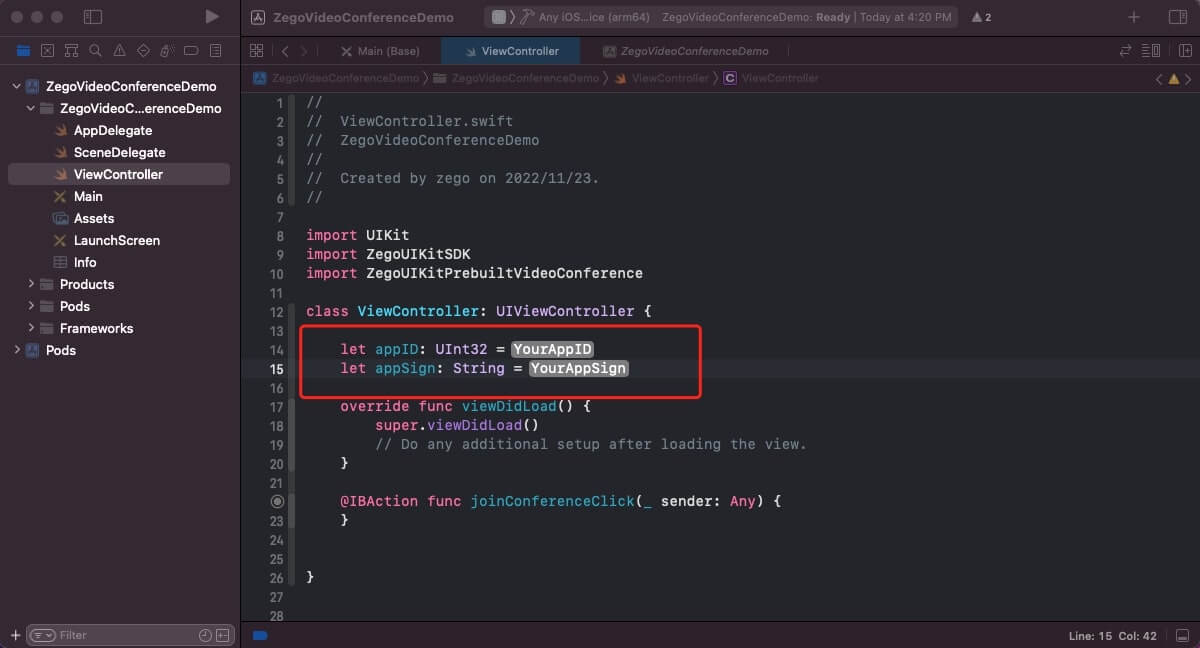
5.3 Add User Info
Next, you need to fill in UserID and UserName as user information. The SDK supports using any characters as UserID and UserName. Here, it is recommended to use the UserID and UserName used by your business server to facilitate you to record user data.
let userID: String = "Your User ID"
let userName: String = "Your User Name"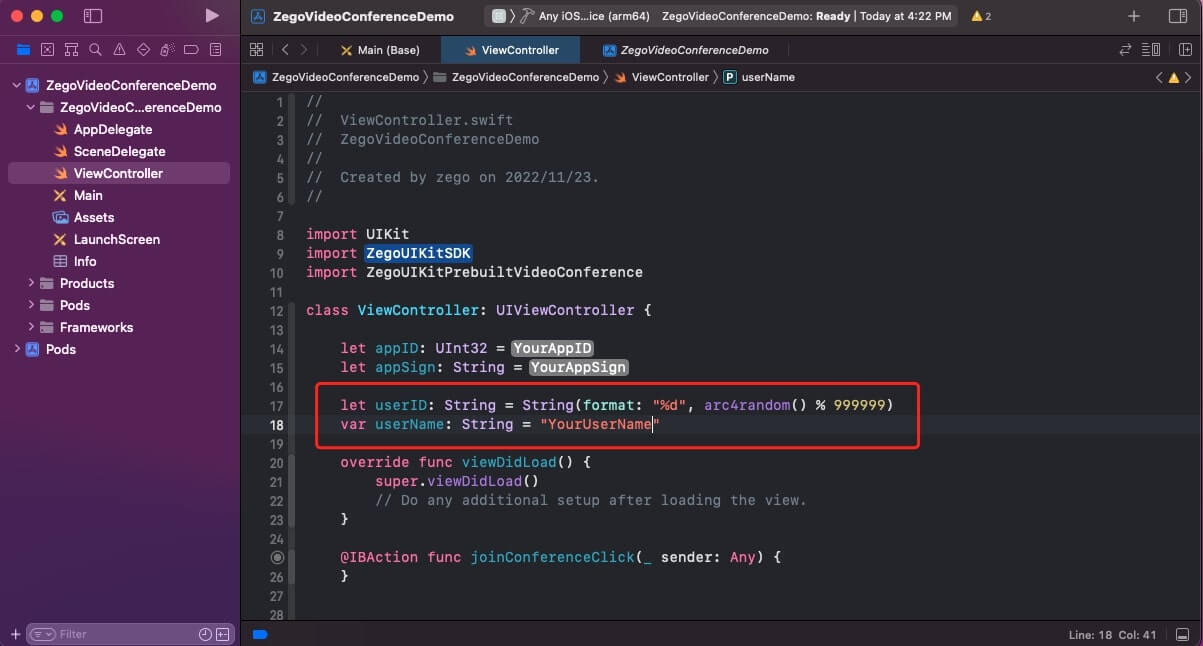
5.4 Generate a conference id
Before joining a conference, you need to generate a conference id. The conference id can be composed of any characters. You can join the same conference with the same conference id.
let conferenceID: String = "123"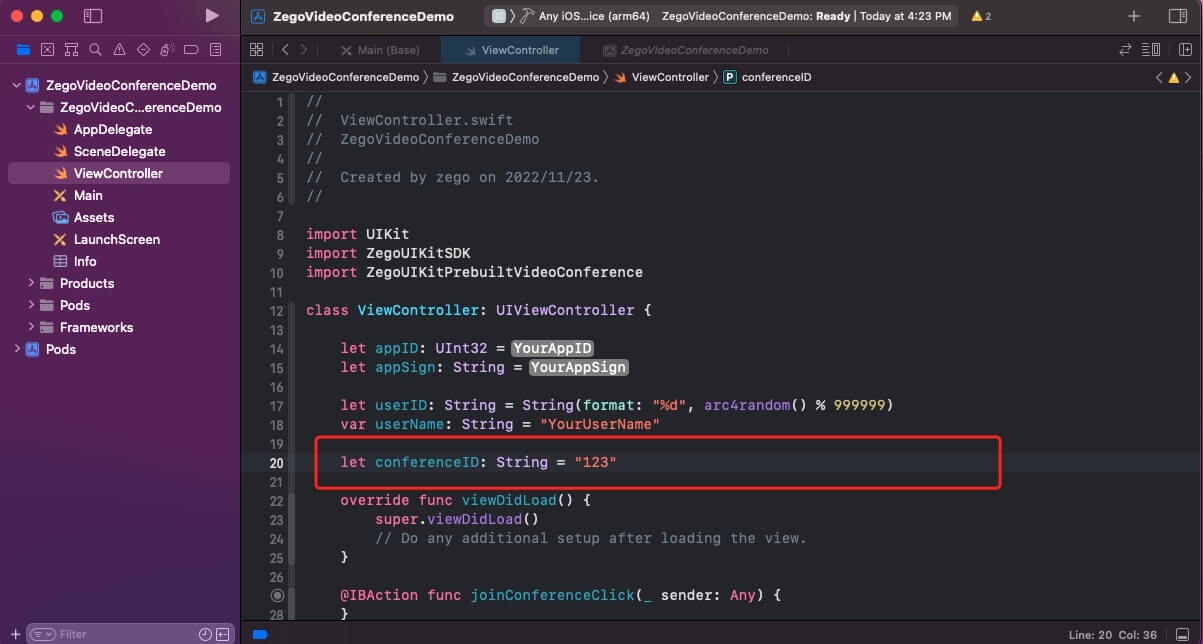
5.5 Join video conference
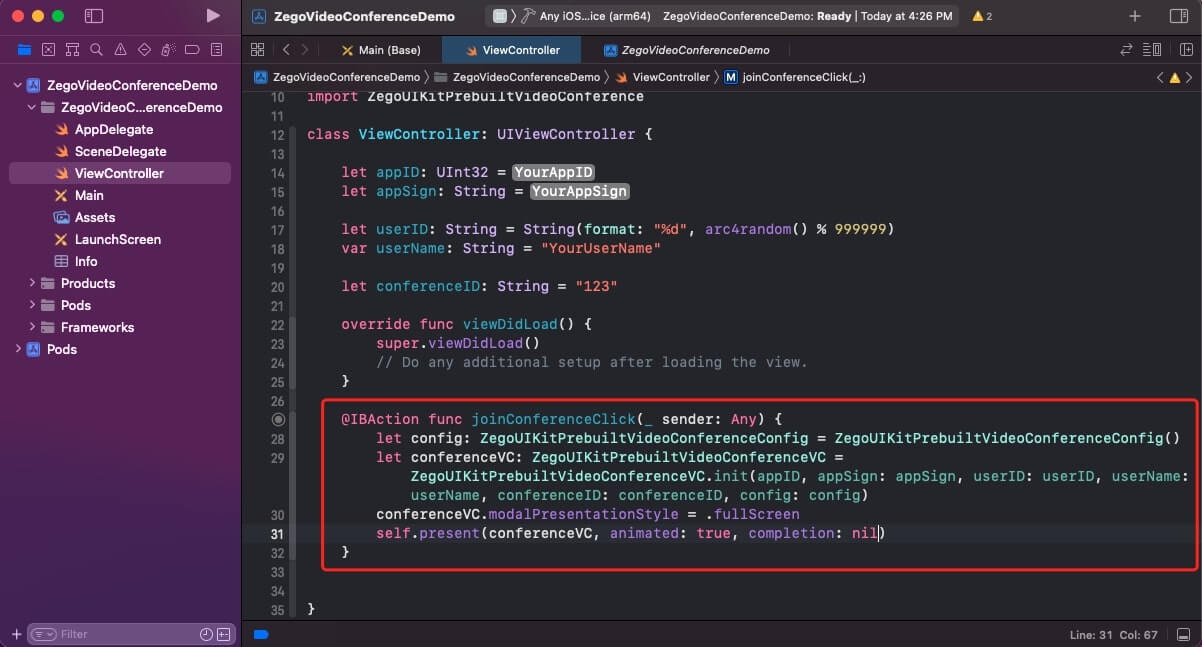
Finally, you can start a video conference by displaying ZegoUIKitPrebuiltVideoConferenceVC on the interface.
@IBAction func joinConferenceClick(_ sender: Any) {
   let config: ZegoUIKitPrebuiltVideoConferenceConfig = ZegoUIKitPrebuiltVideoConferenceConfig()
   let conferenceVC: ZegoUIKitPrebuiltVideoConferenceVC = ZegoUIKitPrebuiltVideoConferenceVC(appID, appSign: appSign, userID: userID, userName: userName, conferenceID: conferenceID, config: config)
   conferenceVC.modalPresentationStyle = .fullScreen
   self.present(conferenceVC, animated: true, completion: nil)
}
It is possible to create a video conferencing app for iOS that works effectively, and this article should give you the knowledge you need to do so. Take action now, You can download the sample demo source code of this article to build an online video conferencing app for iOS.
Conclusion
If you are looking for a fully customized video conferencing SDK, ZEGOCLOUD comes video call SDK that will meet your deeper requirements. By concentrating on the platform and features you require and choosing the best video conferencing API for your needs, you can create an application that will undoubtedly increase your company’s value without failing.
Read more:
Let’s Build APP Together
Start building with real-time video, voice & chat SDK for apps today!
