


Embarking on creating a LinkedIn clone app is a venture into the world of professional networking. This project demands an understanding of what makes a platform valuable for career development, networking, and job hunting. Key to success are core features such as user profiles, connections, and messaging, wrapped up in a user-friendly interface with stringent data security. Getting these elements right can set the foundation for a powerful tool in the professional world.
What is LinkedIn Clone?
A LinkedIn clone refers to a web or mobile application that mimics the core functionalities and features of LinkedIn, the world’s largest professional networking platform. Such a clone aims to provide similar services, including professional networking, job posting, and searching, creating and sharing professional content, and facilitating industry-related discussions.
Typically, a LinkedIn clone would focus on allowing users to create professional profiles, connect with others in their industry, endorse skills, and participate in groups or forums. While it replicates the fundamental aspects of LinkedIn, a clone might also introduce unique features or target a specific niche market to differentiate itself and cater to specific user needs not fully addressed by LinkedIn.
Can We Clone the LinkedIn App?
Creating a clone of the LinkedIn app involves replicating its core features and functionalities to develop a similar professional networking platform. Technically, it’s possible to develop an app with functionalities similar to LinkedIn, such as user profiles, networking capabilities, job postings, and messaging features. However, there are several important considerations to keep in mind:
Legal and Ethical Considerations
- Copyright and Trademark Laws: Directly copying LinkedIn’s design, trademarks, or specific features could infringe on copyright and trademark laws. It’s crucial to ensure that any clone app has original design elements and functionalities that do not violate intellectual property rights.
- Data Privacy Laws: Complying with data privacy laws such as GDPR in Europe or CCPA in California is essential when collecting and processing user data.
Technical and Market Considerations
- Unique Value Proposition: Simply cloning LinkedIn might not be enough to attract users. It’s important to offer unique features or target a specific niche to provide additional value to your user base.
- Development Costs: As discussed previously, developing a LinkedIn clone can be costly and time-consuming, requiring a significant investment in both the initial development and ongoing maintenance.
- User Trust and Network Effect: Building a user base and establishing trust within a professional community can be challenging. LinkedIn benefits from the network effect, where its value increases as more users join the platform. Replicating this effect requires strategic planning and marketing.
Alternatives to Cloning
- Innovating on the Concept: Instead of directly cloning LinkedIn, consider innovating on the concept of professional networking. This could involve focusing on a specific industry, offering unique tools for career development, or creating a platform with enhanced privacy and security features.
- Complementary Services: Developing an app or service that complements LinkedIn by integrating with its platform (using LinkedIn’s API, with permission) could be a more viable approach, offering new functionalities that LinkedIn does not provide.
How will Your LinkedIn Clone App Work?
A LinkedIn clone app functions as a professional networking platform, connecting users with peers, potential employers, and industry leaders. Here’s a simplified workflow of how such an app operates:
- User Registration and Profile Creation: Users sign up, often with an email address or via social media integrations, and create a professional profile. This profile includes details like work experience, education, skills, and a professional photo.
- Networking: Users can search for and connect with other professionals. Connections might be suggested based on mutual contacts, industry, location, or interests. Users can send and accept connection requests to expand their professional network.
- Messaging and Communication: Once connected, users can message each other directly through the app. Advanced features might include group chats, voice calls, or video meetings to facilitate communication.
- Job Searching and Posting: Employers can post job listings, and users can apply for these jobs directly through the app. The app may recommend jobs to users based on their profiles and preferences. Users can also set their status to “Looking for Opportunities” to attract recruiters.
- Content Sharing and Interaction: Users can share professional content, articles, and updates. They can interact with content posted by others in their network through likes, comments, and shares, fostering a professional community.
- Notifications: The app notifies users of important events, such as connection requests, messages, job alerts, or interactions with their shared content, keeping them engaged and informed.
- Endorsements and Recommendations: Users can endorse each other for skills or write recommendations, which are then visible on their profiles. This adds credibility and helps in professional branding.
- Groups and Forums: Users can join or create groups based on professional interests, industries, or topics, facilitating discussion, networking, and knowledge sharing within specific communities.
How Much Does it Cost to Develop LinkedIn Clone?
The cost of developing a LinkedIn clone app can vary widely based on several factors, including the complexity of features, the platforms (iOS, Android, Web), design specifications, and the geographic location of the development team. Here’s a rough estimation:
Basic Version
For a minimal viable product (MVP) featuring core functionalities like profile creation, networking, basic messaging, and job postings, the cost could range from $20,000 to $50,000. This version would likely have a simple design and limited customization options.
Intermediate Version
An app with more advanced features, such as in-depth user profiles, advanced messaging capabilities, endorsements, content sharing, and interaction, detailed job listings, and search filters, could cost between $50,000 and $100,000. This range accounts for a more sophisticated UI/UX design and possibly the development of both iOS and Android versions.
Full-Featured Clone
A comprehensive LinkedIn clone with all the above features plus additional functionalities like advanced analytics for users, premium subscription models, in-app communication tools (voice/video calling), and extensive backend infrastructure for scalability might cost $100,000 to $250,000 or more. The higher cost would also cover cross-platform support, high-end security features, and integrations with external services.
Additional Costs
- Ongoing Maintenance: Typically 15-20% of the initial development cost per year, for updates, bug fixes, and new features.
- Marketing and Launch: Costs can vary widely depending on the strategy but are essential for user acquisition.
- Server and Infrastructure: Depending on the number of users, costs can start from a few hundred to several thousand dollars per month.
Factors Influencing Cost
- Development Team: The location and structure (in-house, freelancers, outsourcing companies) of the development team significantly impact costs. Developers in North America and Western Europe generally charge more than those in Eastern Europe or Asia.
- Design Complexity: Custom designs and animations increase costs.
- Feature Complexity: More advanced features require more development time and resources, increasing costs.
Given these variables, it’s crucial to define the project’s scope and prioritize features for the initial launch, with a plan for scaling and adding features over time. Consulting with development companies or freelancers for quotes based on your specific requirements can provide a clearer cost estimation.
Why Choose ZEGOCLOUD SDK for LinkedIn Clone?
Choosing ZEGOCLOUD SDK for developing a LinkedIn clone can offer several compelling advantages, particularly in areas where real-time communication and networking features are crucial.
Here are some reasons why ZEGOCLOUD SDK stands out for such a project:
- Ease of Integration: ZEGOCLOUD SDK is designed for straightforward integration into existing projects or new developments. This ease of integration can significantly reduce development time and complexity, allowing you to focus on core functionalities and user experience.
- Real-Time Communication: For a LinkedIn clone, features such as messaging, voice calls, and video conferencing are vital for facilitating professional networking and communication. ZEGOCLOUD SDK provides robust real-time communication capabilities, ensuring high-quality, low-latency interactions that can enhance user engagement and satisfaction.
- Scalability: As your LinkedIn clone grows in user base and traffic, you’ll need infrastructure that scales efficiently. ZEGOCLOUD SDK is built to handle scaling challenges, ensuring that your application remains stable and responsive as it grows.
- Cross-Platform Support: ZEGOCLOUD SDK supports multiple platforms, including iOS, Android, and web applications. This cross-platform capability is essential for reaching a wider audience and ensuring a seamless user experience across different devices and operating systems.
- Security: Security is paramount in professional networking platforms, where sensitive personal and professional information is exchanged. ZEGOCLOUD SDK offers features such as end-to-end encryption for communications, helping to protect user data and privacy.
- Customization and Control: With the ZEGOCLOUD SDK, developers have a high degree of customization and control over the communication features, allowing for a tailored user experience that can differentiate your LinkedIn clone in the market.
- Technical Support and Documentation: ZEGOCLOUD provides comprehensive documentation and developer support, which can be invaluable during development and troubleshooting, ensuring that you can resolve issues quickly and efficiently.
How Do I Clone My LinkedIn App?
If you’re looking to clone your LinkedIn app on Android, ZEGOCLOUD UIKits is your go-to solution. This section will delve into how to get started with your LinkedIn App clone with this tool.
Preparation
- A ZEGOCLOUD developer account – Sign up
- Get app credentials like AppID and ServerSecret from Admin Console
- A computer with internet connectivity
- Have NodeJS installed
- Basic Knowledge of React and web dev.
Follow the guides below to get started with building your LinkedIn clone app.
Set Up the Development Environment
Setting up the Development Environment for a LinkedIn Clone with React, Firebase, and ZEGOCLOUD’s In-app Chat SDK
Create a New React Project
To begin creating your React LinkedIn Clone project using Vite, please follow these steps:
- Launch your terminal or command prompt.
- Navigate to the directory where you want to set up your LinkedIn clone project.
- Execute the subsequent command, which will initiate the project creation process with Vite:
npm create vite@latestFollowing these instructions will establish a unique environment for your React LinkedIn Clone project using Vite.
Set up Firebase
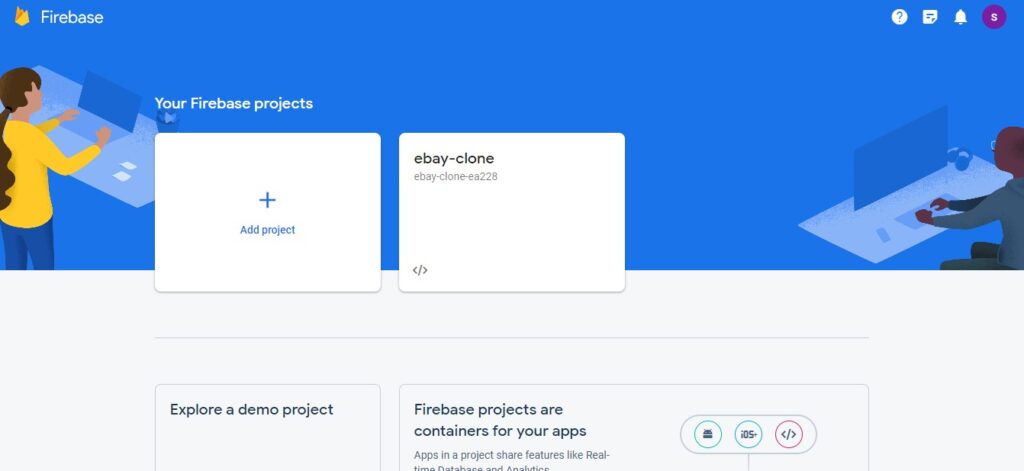
- Go to the Firebase website (https://firebase.google.com) and sign in with your Google account.
- Click the “Go to Console” button to access the Firebase Console.
- Click the “Add Project” button to provide a name for your project and select the preferred region.
- Once the project is created, click “Continue” to proceed to the project dashboard.
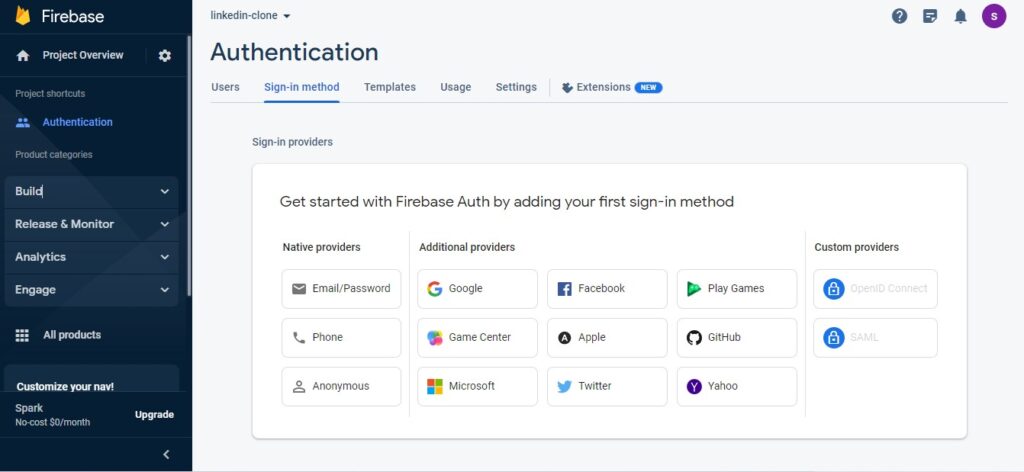
- In the project dashboard, navigate to the “Authentication” tab in the left sidebar and enable the desired authentication methods, such as Email/Password.
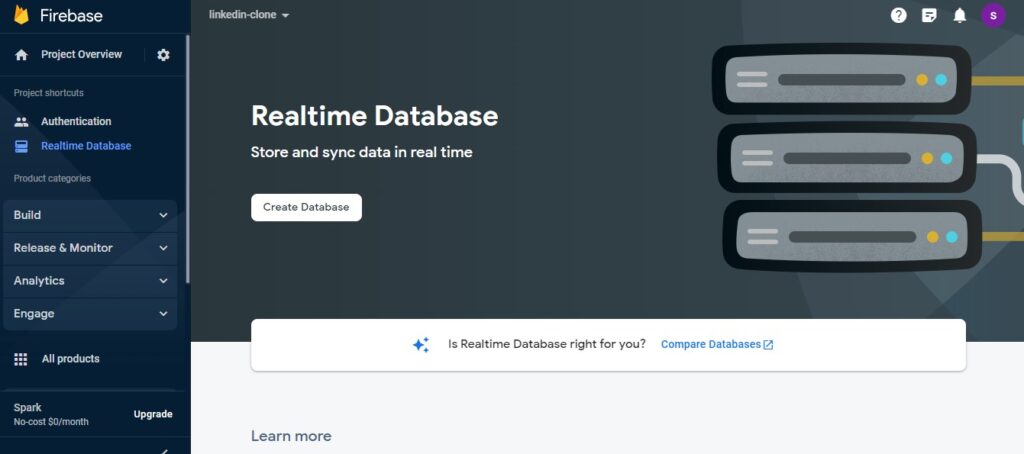
- Click on the “Firestore Database” tab in the sidebar, click “Create Database,” and choose the “Start in test mode” option. Select a region for your database.
- Go to the “Settings” icon next to “
Project Overview” in the sidebar and select “Project settings.“ - In the “General” tab, scroll down to the “Your apps” section and click the “
</>” icon to add a new web app.
   - Provide a nickname for your app and click "R**egister app.**"


   - Copy the Firebase configuration code from the modal that appears.
Integrate Firebase in your React project
In your LinkedIn clone project directory, create a new file in the src folder called firebase.js (or any other preferred name). Paste the Firebase configuration code obtained in the previous step into the firebase.js file:
const firebaseConfig = {
  apiKey: 'YOUR_API_KEY',
  authDomain: 'YOUR_AUTH_DOMAIN',
  projectId: 'YOUR_PROJECT_ID',
  // ... other configuration properties
};

firebase.initializeApp(firebaseConfig);
Install the Firebase SDKs by running the following command:
npm install firebaseInstall Bootstrap
To style the project, install Bootstrap using the following commands:
npm install bootstrap react-bootstrapInstall ZEGOCLOUD’s In-app Chat Kit
To enable chat and video call functionality in your Linkedin clone, integrate ZEGOCLOUD’s In-app Chat Kit:
Add the SDK dependencies by executing the following command:
npm install @zegocloud/zimkit-reactWith these steps, you’ll have the development environment to build an eBay clone with React, Firebase, and ZEGOCLOUD’s In-app Chat SDK and Call Kit.
Configuring Images
The images used in this project are all available for you to download and use in your own project. Simply head to the src/assets folder and take your pick.
Design the Layout and Components
LinkedIn’s user interface is a wonder to behold. It’s intuitive, engaging, and central to the LinkedIn experience.
Login component
To organize our project structure, let’s create a folder called “components“. Inside this folder, we’ll create a dedicated file called “LoginPage.jsx” that will house the code for our login page. The login page will include form validation, Firebase login handling, and an error display. To begin, let’s inject some uniqueness into the code snippet below and place it inside the “LoginPage.jsx” file:
import React, { useState } from 'react';
import firebase from 'firebase/compat/app';
import 'firebase/compat/auth';
import { Link } from 'react-router-dom';
import logo from "../assets/linkedin-logo.png";
import "../App.css";

function LoginPage() {
  const [email, setEmail] = useState('');
  const [password, setPassword] = useState('');
  const [isLoading, setLoading] = useState(false);
  const [errorMessage, setErrorMessage] = useState('');

  const handleLogin = async (e) => {
    e.preventDefault();
    setLoading(true);

    try {
      await firebase.auth().signInWithEmailAndPassword(email, password);
    } catch (error) {
      console.error(error);
      setErrorMessage(getErrorPrompt(error.code));
    }

    setLoading(false);
  };

  // Function to get the prompt message based on error code
  const getErrorPrompt = (errorCode) => {
    switch (errorCode) {
      case 'auth/user-not-found':
        return "User not found. Please check your email and password.";
      case 'auth/wrong-password':
        return "Invalid password. Please try again.";
      // Add more cases for other error codes if needed
      default:
        return "An error occurred during sign-in. Please try again later.";
    }
  };

  return (
    <div className="container d-flex justify-content-center align-items-center vh-100">
      <div className="col-md-6 text-center login-container">
        <h1><img src = {logo} className='logo'/> Login</h1>
        <br/>
        <form onSubmit={handleLogin}>
          <div className="form-group">
            <input
              type="email"
              className="form-control narrow-input"
              placeholder="Email"
              value={email}
              onChange={(e) => setEmail(e.target.value)}
              disabled={isLoading}
            />
            <br/>
          </div>
          <div className="form-group">
            <input
              type="password"
              className="form-control narrow-input"
              placeholder="Password"
              value={password}
              onChange={(e) => setPassword(e.target.value)}
              disabled={isLoading}
            />
          </div>
          <br/>
          {errorMessage && <p className="error-message">{errorMessage}</p>}
          <button type="submit" className="btn btn-primary btn-lg" disabled={isLoading}>
            {isLoading ? 'Logging in...' : 'Login'}
          </button>
        </form>
        <p className="mt-3">
          Not registered? <Link to="/signup">Sign up</Link>
        </p>
      </div>
    </div>
  );
}

export default LoginPage;
Signup component
To create the signup functionality for our application, let’s proceed by creating a file called “SignupPage.jsx” within the “components” folder. This file will house the code for our signup page component. Copy and paste the code snippet provided below, which has been uniquely revised, into the “SignupPage.jsx” file:
import React, { useState } from "react";
import firebase from "firebase/compat/app";
import "firebase/compat/auth";
import { Link } from "react-router-dom";
import logo from "../assets/linkedin-logo.png";
import "../App.css";

function SignupPage() {
  const [email, setEmail] = useState("");
  const [password, setPassword] = useState("");

  const handleSignup = async (e) => {
    e.preventDefault();

    try {
      await firebase.auth().createUserWithEmailAndPassword(email, password);
    } catch (error) {
      console.error(error);
      alert(getErrorPrompt(error.code));
    }
  };

  // Function to get the prompt message based on error code
  const getErrorPrompt = (errorCode) => {
    switch (errorCode) {
      case "auth/email-already-in-use":
        return "Email already in use. Please choose a different email address.";
      case "auth/invalid-email":
        return "Invalid email address. Please enter a valid email.";
      case "auth/weak-password":
        return "The password is too weak. Please choose a stronger password.";
      // Add more cases for other error codes if needed
      default:
        return "An error occurred during sign-up. Please try again later.";
    }
  };

  return (
    <div className="container d-flex justify-content-center align-items-center vh-100">
      <div className="col-md-6">
        <h1 className="text-center">
          <img src={logo}className ="logo"/>Sign Up
        </h1>
        <br />

        <form onSubmit={handleSignup}>
          <div className="form-group">
            <input
              type="email"
              className="form-control"
              placeholder="Email"
              value={email}
              onChange={(e) => setEmail(e.target.value)}
              required
            />
          </div>

          <br />
          <div className="form-group">
            <input
              type="password"
              className="form-control"
              placeholder="Password"
              value={password}
              onChange={(e) => setPassword(e.target.value)}
              required
            />
          </div>
          <br />
          <div className="text-center">
            <button type="submit" className="btn btn-primary">
              Sign Up
            </button>
          </div>
        </form>

        <br />
        <br />
        <p className="text-center">
          Already have an account? <Link to="/signin">Login</Link>
        </p>
      </div>
    </div>
  );
}

export default SignupPage;
Before we move on, let’s make a quick change to our App.jsx file in the src folder. We’ll replace the existing code with the snippet below to ensure smooth authentication and routing.
import React, { useState, useEffect } from "react";
import {
  BrowserRouter as Router,
  Route,
  Navigate,
  Routes,
} from "react-router-dom";
import firebase from "firebase/compat/app";
import "firebase/compat/auth";
import HomePage from "./components/HomePage.jsx";
import LoginPage from "./components/LoginPage.jsx";
import SignupPage from "./components/SignupPage.jsx";
import JobList from "./components/JobList.jsx";
import ChatPanel from "./components/ChatPanel.jsx";

// Replace the following configuration with your Firebase project configuration
const firebaseConfig = {
  apiKey: "AIzaSyA1vi5_ayIE26WD5dwQaPa1_MEhx7CIHzU",
  authDomain: "linkedin-clone-8243f.firebaseapp.com",
  databaseURL: "https://linkedin-clone-8243f-default-rtdb.firebaseio.com",
  projectId: "linkedin-clone-8243f",
  storageBucket: "linkedin-clone-8243f.appspot.com",
  messagingSenderId: "1073036094350",
  appId: "1:1073036094350:web:a302064a5bf47fdd9552df",
  measurementId: "G-Z13YRGWS3V",
};

// Initialize Firebase
firebase.initializeApp(firebaseConfig);

function App() {
  const [user, setUser] = useState(null);
  const [loading, setLoading] = useState(true);

  useEffect(() => {
    // Listen for user authentication state changes
    const unsubscribe = firebase.auth().onAuthStateChanged((user) => {
      setUser(user);
      setLoading(false);
    });

    // Clean up the listener
    return () => unsubscribe();
  }, []);

  if (loading) {
    return <div>Loading...</div>;
  }

  return (
    <Router>
      <Routes>
        <Route
          path="/"
          element={user ? <HomePage /> : <Navigate to="/signin" />}
        />
        <Route
          path="/signin"
          element={!user ? <LoginPage /> : <Navigate to="/" />}
        />
        <Route
          path="/signup"
          element={!user ? <SignupPage /> : <Navigate to="/" />}
        />

        <Route
          path="/jobs"
          element={<JobList />}

          />

          <Route
          path="/message"
          element={<ChatPanel />}

          />

      </Routes>
    </Router>
  );
}

export default App;
Homepage component
The homepage of our application acts as the central hub and can only be accessed after successful login or signup. Let’s create a file called “HomePage.jsx” within the “components” folder and incorporate the following unique code snippet into it:
import React, { useState, useEffect } from "react";
import firebase from "firebase/compat/app";
import "firebase/compat/auth";
import { Navigate } from "react-router-dom";
import NavBar from "./NavBar.jsx";
import CreatePost from "./CreatePost.jsx";
import ShowPost from "./ShowPost.jsx";

function HomePage() {
  const [loading, setLoading] = useState(true);
  const [user, setUser] = useState(null);

  useEffect(() => {
    const unsubscribe = firebase.auth().onAuthStateChanged((user) => {
      setUser(user);
      setLoading(false);
    });

    return () => unsubscribe();
  }, []);

  if (loading) {
    return <div>Loading...</div>;
  }

  if (!user) {
    return <Navigate to="/signin" />;
  }

  return (
    <div>
    <NavBar/>
    <br/>
    <CreatePost/>

    <br/>

    <ShowPost/>

    </div>
  );
}

export default HomePage;
As we analyze the components in our application, we can identify the following key components:
1. NavBar
The “NavBar” component represents the navigation bar at the top of our application. It typically includes the logo, menu items, and other navigation-related elements. The NavBar facilitates easy navigation between different sections of the LinkedIn clone.
2. CreatePost
This component enables users to create and publish posts within the LinkedIn clone. It provides a form or interface where users can input content, such as text, images, or links, and share it with their network.
3. ShowPost
The “ShowPost” component is used to display individual posts within the LinkedIn clone. It retrieves lost data from Firebase Real-time Database and presents it in a visually appealing and user-friendly format. Users can view, interact with, and engage in discussions around these posts.
4. JobList
“JobList” component focuses on presenting a list of available job opportunities within the LinkedIn clone. It retrieves job postings from a database or API and displays them, including information such as job titles, company names, locations, and descriptions. Users can browse and explore these job listings.
5. ChatPanel
The “ChatPanel” component integrates the in-app chat functionality using the ZEGOCLOUD In-app Chat Kit and CallKit. It provides a user interface for real-time messaging and communication between users within the LinkedIn clone. The ChatPanel lets users send messages, view conversations, and interact with other professionals.
To build the components above, simply create files with the .jsx extension and paste the code below into the respective elements. It’s that easy!
NavBar.jsx
import React from 'react';
import { Link } from 'react-router-dom';
import firebase from 'firebase/compat/app';
import 'firebase/compat/auth';
import logo from "../assets/linkedin-logo.png";
import '../App.css';

function NavBar() {
  const handleLogout = () => {
    firebase.auth().signOut();
  };

  const getCurrentUserInitial = () => {
    const user = firebase.auth().currentUser;
    if (user && user.email) {
      const email = user.email;
      return email[0].toUpperCase();
    }
    return '';
  };

  const getRandomColor = () => {
    const colors = ['#f44336', '#e91e63', '#9c27b0', '#673ab7', '#3f51b5', '#2196f3', '#03a9f4', '#00bcd4', '#009688', '#4caf50', '#8bc34a', '#cddc39', '#ffeb3b', '#ffc107', '#ff9800', '#ff5722'];
    const randomIndex = Math.floor(Math.random() * colors.length);
    return colors[randomIndex];
  };

  const getInitialsStyle = {
    backgroundColor: getRandomColor(),
    color: '#fff',
    width: '36px',
    height: '36px',
    borderRadius: '50%',
    display: 'flex',
    alignItems: 'center',
    justifyContent: 'center',
    fontWeight: 'bold',
    fontSize: '20px',
  };

  return (
    <nav className="navbar navbar-expand-md navbar-dark bg-dark">
      <div className="container">
        <Link to="/" className="navbar-brand">
          <img src={logo} alt="LinkedIn Logo" className="logo-l" />
        </Link>
        <form className="form-inline my-2 my-md-0">
          <input
            className="form-control mr-sm-2 custom-search-bar"
            type="text"
            placeholder="Search for jobs, people..."
          />
        </form>
        <div className="collapse navbar-collapse justify-content-end" id="navbarNav">
          <ul className="navbar-nav ml-auto">
            <li className="nav-item">
              <Link to="/" className="nav-link">
                Home
              </Link>
            </li>
            <li className="nav-item">
              <Link to="/network" className="nav-link">
                My Network
              </Link>
            </li>
            <li className="nav-item">
              <Link to="/jobs" className="nav-link">
                Jobs
              </Link>
            </li>
            <li className="nav-item">
              <Link to="/message" className="nav-link">
                Messaging
              </Link>
            </li>
            <li className="nav-item">
              <Link to="/" className="nav-link" onClick={handleLogout}>
                Logout
              </Link>
            </li>
            <li className="nav-item">
              <div className="profile-picture" style={getInitialsStyle}>
                {getCurrentUserInitial()}
              </div>
            </li>
          </ul>
        </div>
      </div>
    </nav>
  );
}

export default NavBar;
CreatePost.jsx
import React, { useState, useRef } from 'react';
import firebase from 'firebase/compat/app';
import 'firebase/compat/auth';
import 'firebase/compat/database';

function CreatePost() {
  const [postText, setPostText] = useState('');
  const [postImage, setPostImage] = useState(null); // Add postImage state
  const fileInputRef = useRef(null);

  const handleTextChange = (e) => {
    setPostText(e.target.value);
  };

  const handlePhotoClick = () => {
    fileInputRef.current.click();
  };

  const handleImageChange = (e) => {
    const image = e.target.files[0];
    setPostImage(image);
  };

  const handlePost = () => {
    if (postText || postImage) {
      const currentUser = firebase.auth().currentUser;
      const post = {
        text: postText,
        image: postImage ? postImage.name : null,
        timestamp: firebase.database.ServerValue.TIMESTAMP,
        userEmail: currentUser ? currentUser.email : null,
      };

      // Get a reference to the 'posts' collection in Firebase database
      const postsRef = firebase.database().ref('posts');

      // Create a new post ID
      const newPostRef = postsRef.push();

      // Set the post data under the new post ID
      newPostRef.set(post);

      // Clear the form fields
      setPostText('');
      setPostImage(null);
    }
  };


  return (
    <div className="create-post">
      <div className="d-flex align-items-center">

        <input
          ref={fileInputRef}
          type="file"
          accept="image/*"
          className="sr-only"
          onChange={handleImageChange}

          onClick={handlePhotoClick}
          style={{ marginLeft: '125px' }}
        />
        <textarea
          className="form-control form-control-sm mr-2"
          rows="2"
          placeholder="Start a post..."
          style={{ width: 'calc(100% - 500px)' }}
          value={postText}
          onChange={handleTextChange}

        ></textarea>
        <button className="btn btn-primary" onClick={handlePost}>
          Post
        </button>
      </div>
    </div>
  );
}

export default CreatePost;
ShowPost.jsx
import React, { useEffect, useState } from 'react';
import firebase from 'firebase/compat/app';
import 'firebase/compat/database';
import 'firebase/compat/auth';
import 'firebase/compat/storage';
import { Card } from 'react-bootstrap';

function ShowPost() {
  const [posts, setPosts] = useState([]);

  useEffect(() => {
    // Fetch posts from Firebase database
    const fetchPosts = async () => {
      const postsRef = firebase.database().ref('posts');
      const snapshot = await postsRef.once('value');
      const postsData = snapshot.val();
      if (postsData) {
        const postsArray = Object.entries(postsData).map(([key, value]) => ({
          id: key,
          ...value,
        }));
        setPosts(postsArray);
      }
    };

    fetchPosts();
  }, []);

  const getRandomColor = () => {
    const colors = [
      '#F44336',
      '#E91E63',
      '#9C27B0',
      '#673AB7',
      '#3F51B5',
      '#2196F3',
      '#03A9F4',
      '#00BCD4',
      '#009688',
      '#4CAF50',
      '#8BC34A',
      '#CDDC39',
      '#FFC107',
      '#FF9800',
      '#FF5722',
      '#795548',
      '#607D8B',
    ];
    return colors[Math.floor(Math.random() * colors.length)];
  };

  return (
    <div className="show-post">
      {posts.map((post) => (
        <Card key={post.id} className="mb-4" style={{ marginLeft: '125px', marginRight: '140px' }}>
          <Card.Body>
            <div className="d-flex align-items-center mb-3">
              {post.userEmail && (
                <div
                  className="profile-picture"
                  style={{
                    width: '50px',
                    height: '50px',
                    borderRadius: '50%',
                    backgroundColor: getRandomColor(),
                    display: 'flex',
                    justifyContent: 'center',
                    alignItems: 'center',
                    color: '#fff',
                    fontSize: '24px',
                    fontWeight: 'bold',
                    textTransform: 'uppercase',
                  }}
                >
                  {post.userEmail[0]}
                </div>
              )}
              <div style={{ marginLeft: '10px' }}>
                {post.userEmail && <div>{post.userEmail}</div>}
              </div>
            </div>
            {post.text && <Card.Text>{post.text}</Card.Text>}
            {post.imageUrl && (
              <Card.Img
                src={post.imageUrl}
                alt="Post Image"
                className="mb-3"
                style={{ maxWidth: '100%', height: 'auto' }}
              />
            )}
          </Card.Body>
        </Card>
      ))}
    </div>
  );
}

export default ShowPost;
JobList.jsx
import React from 'react';
import 'bootstrap/dist/css/bootstrap.min.css';

const JobList = () => {
  const jobs = [
    { title: 'Software Engineer', location: 'San Francisco, CA', requirements: 'Bachelor's degree in Computer Science, experience with JavaScript, Node.js, and React' },
    { title: 'Frontend Developer', location: 'New York, NY', requirements: 'Experience with HTML, CSS, JavaScript, and popular frontend frameworks' },
    { title: 'Full Stack Developer', location: 'Seattle, WA', requirements: 'Proficiency in both frontend and backend technologies like JavaScript, Node.js, React, and SQL' },
    // Add more job entries here
  ];

  return (
    <div className="container">
      <h1 className="mt-4 mb-4">Jobs</h1>
      <ul className="list-group">
        {jobs.map((job, index) => (
          <li key={index} className="list-group-item">
            <h4>{job.title}</h4>
            <p>{job.location}</p>
            <p>Requirements: {job.requirements}</p>
          </li>
        ))}
      </ul>
    </div>
  );
};

export default JobList;
ChatPanel.jsx
import React from 'react';

// Integrate the SDK
import { ZIMKitManager, Common } from '@zegocloud/zimkit-react';
import '@zegocloud/zimkit-react/index.css';

// The following uses the App instance as an example.
export default class App extends React.Component {
    constructor() {
        super();
        this.state = {
            appConfig: {
                appID: 130638254,        // The AppID you get from the ZEGOCLOUD admin console.
                serverSecret: '9f16d09601ff25ad54cdb06c18fc68b3' // The serverSecret you get from ZEGOCLOUD Admin Console.
            },
            // The userID and userName is a strings of 1 to 32 characters.
            // Only digits, letters, and the following special characters are supported: '~', '!', '@', '#', '$', '%', '^', '&', '*', '(', ')', '_', '+', '=', '-', '`', ';', ''', ',', '.', '<', '>', '/', '\'
            userInfo: {
                // Your ID as a user.
                userID: '0000001',
                // Your name as a user.
                userName: 'Chigozzdev',
                // The image you set as a user avatar must be network images. e.g., https://storage.zego.im/IMKit/avatar/avatar-0.png
                userAvatarUrl: 'https://www.pngmart.com/image/479973/png/479972'
            },
        }
    }
    async componentDidMount() {
        const zimKit = new ZIMKitManager();
        const token = zimKit.generateKitTokenForTest(this.state.appConfig.appID, this.state.appConfig.serverSecret, this.state.userInfo.userID);
        await zimKit.init(this.state.appConfig.appID);
        await zimKit.connectUser(this.state.userInfo, token);
    }
    render() {
        return (
            <Common></Common>
        );
    }
}
Integrate Call Kit into the project
To incorporate high-definition (HD) voice and video call functionality into your LinkedIn clone application, you can seamlessly integrate the ZEGOCLOUD Call Kit. Follow the concise steps outlined below to achieve this:
Install the SDK
npm i @zegocloud/zego-uikit-prebuilt --saveInitialize the SDK
To begin, you must generate a Kit Token. Afterward, update the code snippet below by substituting the appID and serverSecret parameters with the AppID and ServerSecret specific to your project, which you can acquire from the Admin Console.
import * as React from 'react';
import { ZegoUIKitPrebuilt } from '@zegocloud/zego-uikit-prebuilt';


function randomID(len) {
  let result = '';
  if (result) return result;
  var chars = '12345qwertyuiopasdfgh67890jklmnbvcxzMNBVCZXASDQWERTYHGFUIOLKJP',
    maxPos = chars.length,
    i;
  len = len || 5;
  for (i = 0; i < len; i++) {
    result += chars.charAt(Math.floor(Math.random() * maxPos));
  }
  return result;
}

export function getUrlParams(
  url = window.location.href
) {
  let urlStr = url.split('?')[1];
  return new URLSearchParams(urlStr);
}

export default function App() {
      const roomID = getUrlParams().get('roomID') || randomID(5);
      let myMeeting = async (element) => {
     // generate Kit Token
      const appID = ;
      const serverSecret = "";
      const kitToken =  ZegoUIKitPrebuilt.generateKitTokenForTest(appID, serverSecret, roomID,  randomID(5),  randomID(5));


     // Create instance object from Kit Token.
      const zp = ZegoUIKitPrebuilt.create(kitToken);
      // start the call
      zp.joinRoom({
        container: element,
        sharedLinks: [
          {
            name: 'Personal link',
            url:
             window.location.protocol + '//' +
             window.location.host + window.location.pathname +
              '?roomID=' +
              roomID,
          },
        ],
        scenario: {
          mode: ZegoUIKitPrebuilt.GroupCall, // To implement 1-on-1 calls, modify the parameter here to [ZegoUIKitPrebuilt.OneONoneCall].
        },
      });


  };

  return (
    <div
      className="myCallContainer"
      ref={myMeeting}
      style={{ width: '100vw', height: '100vh' }}
    ></div>
  );
}
Run a Demo
You can download this project’s demo source code here!
Conclusion
Developing a LinkedIn clone app with React and Firebase offers a winning formula for creating a dynamic professional networking platform. By integrating ZEGOCLOUD’s In-app Chat Kit, you can elevate the user experience with seamless real-time communication, group chats, file sharing, and push notifications. If you have a deeper requirement for instant messages, ZEGOCLOUD comes with 100% customized chat & messaging SDK to help you build a powerful customized app for iOS and Android effectively.
Read more:
LinkedIn Clone FAQ
Q1: What are the essential features of a LinkedIn clone?
A LinkedIn clone should include user profile creation, networking capabilities (connecting with other users), a messaging system, job postings and applications, and content sharing and interaction (like posts and comments). Additional features could include endorsements, skill assessments, and group discussions to further enrich the platform.
Q2: Can a LinkedIn clone be monetized, and if so, how?
LinkedIn clone can be monetized through various models, including premium subscriptions for advanced features (like seeing who viewed your profile, and advanced job insights), advertising, and fees for job postings or talent search functionalities. Offering exclusive content or courses could also be a viable revenue stream.
Q3: What challenges might I face when creating a LinkedIn clone?
Key challenges include ensuring data privacy and security, achieving a seamless and intuitive user experience, developing a scalable infrastructure to support growth, and creating a unique value proposition to attract users in a market dominated by LinkedIn. Additionally, legal compliance and building a network effect to make the platform valuable for early adopters are significant hurdles.
Let’s Build APP Together
Start building with real-time video, voice & chat SDK for apps today!
