


React Native is a great way to build mobile apps, and it’s especially well-suited for building clones of popular apps like Uber. In this guide, we’ll show you how to build a React Native Uber clone with ZEGOCLOUD. By the end of this guide, you’ll have a working chat functionality in your Uber clone that you can use to learn React Native and build your own mobile apps.
How Does Uber Work?
Uber, the renowned ride-hailing platform, operates on a remarkably straightforward and user-friendly model. To understand how Uber works, let’s take a closer look at its key components.
Firstly, Uber connects riders and drivers through a mobile app. When a user needs a ride, they open the app and enter their pickup location and destination. The app then matches them with available drivers in their vicinity.
Once a driver accepts the request, the rider receives information about the driver, including their name, photo, and vehicle details. Riders can track the driver’s real-time location as they make their way to the pickup point.
Uber utilizes GPS technology to calculate the fare based on factors like distance and duration of the ride. Riders can view the estimated cost before confirming the booking. Payments are cashless, with riders’ credit cards or other preferred payment methods linked to their Uber account.
After the ride, both riders and drivers have the option to rate each other and provide feedback. This feedback system helps maintain quality and safety standards within the Uber community.
Uber’s success can be attributed to its ability to provide reliable, on-demand transportation, flexible pricing, and a seamless user experience. It has transformed the way people travel, offering convenience and accessibility with just a few taps on a smartphone.
Uber Alternatives: 5 Best Apps Like Uber
1. Lyft
Lyft stands as Uber’s main competitor in the United States, offering a similar range of services from basic rides to premium options. It emphasizes community and sustainability, often highlighting its efforts to reduce carbon emissions and improve urban mobility.
Main Features:
- In-app payment system
- Split fare with friends
- Real-time ride tracking
- Bike and scooter rentals in select cities
2. Grab
Predominantly serving Southeast Asia, Grab has expanded beyond ride-hailing to offer food delivery, digital payments, and financial services, making it a super app in the region.
Main Features:
- GrabPay for cashless convenience
- GrabFood for food delivery
- GrabExpress for courier services
- With a wide range of ride options, from economy to premium
3. Didi Chuxing
It is often referred to as “DiDi,” this app is the leading ride-hailing platform in China, offering a vast range of services from taxi-hailing to private car services, and even bicycles.
Main Features:
- Ola Money for fast payments
- Ola Play for in-ride entertainment
- Safety features like an emergency button and ride-tracking
- A variety of vehicles, including auto-rickshaws and bikes
4. Ola
As India’s counterpart to Uber, Ola offers a wide spectrum of ride options, including auto-rickshaws and bikes, making it versatile in addressing the diverse needs of Indian commuters.
Main Features:
- Ola Money for fast payments
- Ola Play for in-ride entertainment
- Safety features like an emergency button and ride-tracking
- A variety of vehicles, including auto-rickshaws and bikes
5. Bolt
Headquartered in Estonia, Bolt operates in over 150 countries, providing ride-hailing, scooter rentals, and food delivery services. It’s known for its user-friendly interface and competitive pricing.
Main Features:
- Bolt Food for meal deliveries
- Bolt Scooters for eco-friendly short commutes
- Competitive Pricing
- Options for electric vehicles and scooters
What is An Uber Clone?
An Uber clone refers to a software solution that replicates the core features and functionalities of the popular ride-hailing app, Uber. This type of solution is typically developed by third-party developers or companies to allow entrepreneurs and businesses to launch their own ride-sharing services without having to build the technology from scratch.
An Uber clone app would include features such as user registration, ride booking, pricing estimates, driver tracking, payments, and ratings, aiming to offer a similar user experience to that of the original Uber app. These clone solutions are customizable, enabling businesses to add unique features or adapt the app to specific markets or requirements.
Benefits Of Uber Clone App by ZEGOCLOUD
The benefits of using an Uber clone app, especially one developed by a company like ZEGOCLOUD, which is known for its expertise in real-time communication and live streaming technologies, can include:
- Quick Market Entry: By utilizing a clone app, businesses can launch their ride-hailing service quickly, bypassing the time-consuming and costly process of developing an app from scratch.
- Cost-Effectiveness: Developing a ride-sharing app akin to Uber from the ground up requires significant investment in research, development, and testing. A clone app offers a cost-effective alternative with a proven framework.
- Customization and Scalability: Despite being a clone, these apps are highly customizable. ZEGOCLOUD’s expertise ensures that businesses can tailor the app to fit their specific needs and scale up as the business grows.
- High-Quality User Experience: Leveraging ZEGOCLOUD’s strengths in providing seamless live streaming and real-time interactions, their Uber clone app is likely to offer superior quality in terms of live map tracking, communication between riders and drivers, and overall user interface.
- Enhanced Features: ZEGOCLOUD might include advanced features such as real-time analytics, better TTFF (Time to First Frame) for live interactions, and superior video call quality for in-app communications, providing an edge over standard clone apps.
- Support and Maintenance: Choosing a clone app from a reputable company comes with ongoing support and maintenance, ensuring the app stays up-to-date with the latest technology standards and user expectations.
- Improved Engagement and Retention: The inclusion of high-quality live streaming and real-time features can enhance user engagement and retention, making the service more attractive to users and potentially increasing revenue.
- Global Reach: ZEGOCLOUD’s experience in handling global communications could make the clone app more adaptable to different regions, supporting various languages and compliance with local regulations.
How to Make Apps like Uber with ZEGOCLOUD SDK
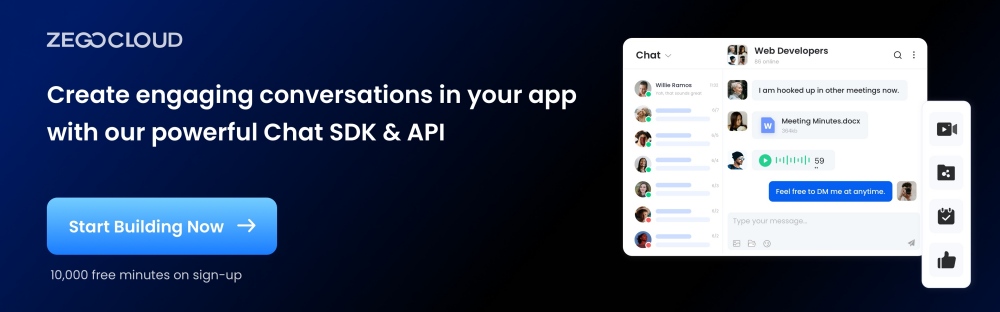
Building an app like Uber requires careful planning and execution. Several elements contribute to its success, from user interface design to integrating mapping services. One critical aspect is incorporating a reliable in-app chat feature. ZEGOCLOUD’s In-app Chat SDK provides a robust solution that enables seamless communication between riders and drivers.
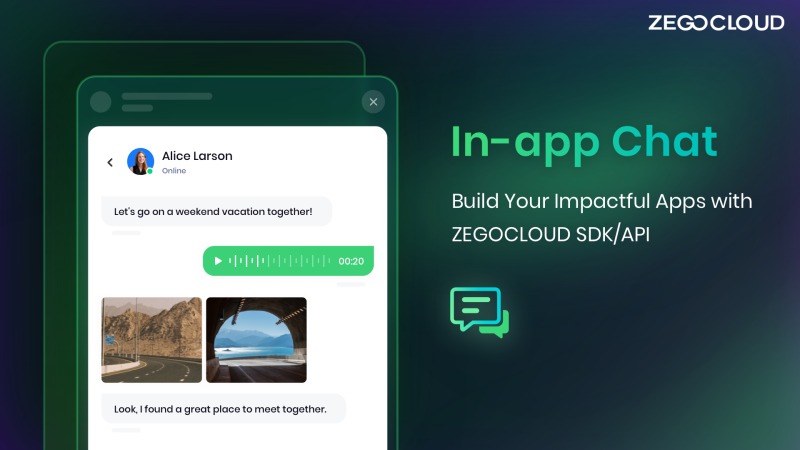
ZEGOCLOUD’s chat SDK empowers developers to create secure and scalable chat systems with its easy-to-use API and comprehensive documentation, enhancing the overall user experience.
Moreover, ZEGOCLOUD UIKits offers a comprehensive collection of pre-designed user interface components, meticulously crafted to expedite the development process for Uber clone apps. With our ready-to-use UI elements, developers can quickly build and customize their app interfaces, saving valuable time and resources while ensuring a polished and intuitive user experience.
Preparation to Create Apps like Uber
- A ZEGOCLOUD developer account – Sign up
- Get appSign and appID, and activate In-app chat functionality in ZEGOCLOUD admin console
- Install NodeJS
- Basic knowledge of React Native or JavaScript
Once you meet the aforementioned requirements, follow these steps to integrate chat functionality into your Uber clone app.
Integrate the SDK for Uber Clone
Create a new project
- Start by creating a new React Native project called “
Zego-zim-example” using the Node.jsnpxcommand. This command-line tool allows you to effortlessly initiate the project without the hassle of installation.
npx react-native init zego-zim-example- To compile and run the project on iOS, open it in Xcode and choose Product > Run. Alternatively, you can use the following command as an alternative:
yarn react-native run-ios- To compile and run the project on Android, simply run the following command in your terminal:
yarn react-native run-androidImport the SDK
To import the In-app Chat SDK via NPM, you can follow these guidelines:
- To install the SDK, open a terminal window and navigate to your preferred directory. Then, run the following command:
npm install @zegocloud/zimkit-react-native- Effortlessly integrate the SDK into your project using the following code snippet:
import { ZIMKiti18n } from '@zegocloud/zimkit-react-native';Create a ZIM SDK instance
Clients A and B can use the create method to initialize a ZIM instance for client login. They can then use their AppIDs to create ZIM SDK instances, which will allow them to exchange messages smoothly.
/*
The ZIM SDK uses the AppSign authentication mode by default. To change the authentication mode, contact Technical Support for SDK 2.3.0 or later, or make the change independently for SDK 2.3.3 or later.

To create a ZIM SDK object, use the static synchronized create method and provide the AppID and AppSign. The create method only creates a ZIM instance on its first invocation, returning null for subsequent calls.


*/

ZIM.create({ appID: 0, appSign: '' });

// To avoid multiple null returns from hot updates, obtain a single instance of the ZIM SDK using the getInstance() method.

var zim = ZIM.getInstance();
Set event callbacks
To customize event callbacks for receiving notifications such as SDK errors and message-related events, invoke the on method before the client user logs in.
// Capture error codes by configuring a callback for the error event.

zim.on('error', function (zim, errorInfo) {
    console.log('error', errorInfo.code, errorInfo.message);
});

// Stay informed about connection status changes by establishing a callback for the event.


zim.on('connectionStateChanged', function (zim, { state, event, extendedData }) {
    console.log('connectionStateChanged', state, event, extendedData);
});

// Effortlessly receive one-to-one messages by configuring a callback for the message event.

zim.on('receivePeerMessage', function (zim, { messageList, fromConversationID }) {
    console.log('receivePeerMessage', messageList, fromConversationID);
});
Log in to the ZIM SDK
To facilitate message exchange and token renewal, both client A and client B can log in to the ZIM SDK by following these concise steps:
- Utilize the
ZIMUserInfomethod to create a user object. - Login using the
loginmethod, supplying the user information and Token obtained from the initial prerequisite steps.
//User IDs must be 32 characters or less and can contain letters, numbers, and the following special characters: ~!@#$%^&*()_+-=`;',.<>/.

//Usernames must be 1 to 64 characters.


var userInfo = { userID: 'xxxx', userName: 'xxxx' };

/*

During login, use the following authentication methods:

* Token-based: Provide the token from the [Guides - Authentication] document.
* AppSign (default in SDK 2.3.0): Leave the Token field empty.


*/


zim.login(userInfo, '')
    .then(function () {
        // Login successful.
    })
    .catch(function (err) {
        // Login failed.
    });
Send messages
To send a message, client A can use the sendMessage method and provide client B’s user ID, content, and type. Upon successful execution, you will receive the ZIMMessageSentResult, triggering the onMessageAttached event with a ZIMMessage. Utilize onMessageAttached to obtain the message’s ID or local ID before sending it.
// To send a one-on-one (1V1) message, simply configure the ZIMConversationType as Peer.

var toUserID = 'xxxx1';
var config = {
    priority: 1 // Choose the desired message priority level from three options: low, medium, or high. Low is the default priority.
};
var type = 0; // The session type can be categorized as one-on-one (0), chat room (1), or group chat (2) for different communication scenarios.


var notification = {
    onMessageAttached: function(message) {
        // todo: Loading
    }
};

// Send a 1V1 text message.

var messageTextObj = { type: 1, message: 'Text message content' };
zim.sendMessage(messageTextObj, toUserID, type, config, notification)
    .then(function ({ message }) {
        // Successful messages.
    })
    .catch(function (err) {
        // Failed messages.
    });
Receive messages
After client B logs in, any messages sent by client A will be delivered to the callback function previously set in the receivePeerMessage method, as per your configuration.
// To receive one-to-one messages, establish a callback registration.


zim.on('receivePeerMessage', function (zim, { messageList, fromConversationID }) {
    console.log('receivePeerMessage', messageList, fromConversationID);
});
Log out
To initiate the logout process for the client, simply use the logout method.
zim.logout();Destroy the ZIM SDK instance
To remove the ZIM SDK instance, invoke the destroy method to dismantle it completely.
zim.destroy();Run a Demo
Explore the full potential of ZEGOCLOUD’s In-app Chat SDK by checking out our React Native sample app.
Conclusion
Embarking on the journey of building an Uber clone using React Native not only allows you to grasp the fundamentals of this powerful framework but also enables you to craft a fully operational mobile application. By diligently following the steps outlined in this guide, you’ll be able to develop a convincing replica of Uber with a touch of your own creativity and unique features, making your app shine in its own distinctive way. Sign up for 10000 free minutes to get started with ZEGOCLOUD’s In-app Chat SDK!
FAQ
Q1: What is an Uber clone?
An Uber clone is a ride-hailing app that replicates the core features of Uber, including user booking, driver matching, GPS navigation, payment processing, and ride tracking. It uses similar workflows but is customized for different markets or business needs.
Q2: What features are required for an Uber clone?
The essential features include user login, real-time location tracking, a map interface, ride requests, driver matching, fare calculation, in-app chat, notifications, trip history, and secure payments. Most developers also add an admin dashboard for operations and analytics.
Q3: How much does it cost to build an Uber clone?
Costs vary widely based on tech stack, team location, and required features. A basic version can cost a few thousand dollars, while a fully scalable version with real-time tracking, complex routing, and high availability can cost significantly more due to backend infrastructure and continuous updates.
Q4: Which tech stack is best for building an Uber clone?
Most teams use a cross-platform framework like Flutter or React Native for the app, Node.js or Python for the backend, and Firebase or a similar service for authentication. GPS functionality is often powered by Google Maps or Mapbox.
Let’s Build APP Together
Start building with real-time video, voice & chat SDK for apps today!
