


To begin with, modern applications increasingly rely on intelligent chatbots that can understand user intent and respond naturally. Whether you want to build an AI chatbot for customer support, education, or interactive assistants, users now expect seamless text and voice interactions. This guide walks you through how to build an AI chatbot with both text and voice capabilities using ZEGOCLOUD. Step by step, you’ll learn how to design a responsive interface, integrate real-time AI processing, and deploy a chatbot that works smoothly across devices while delivering fast and engaging user experiences.
What are AI Chatbots?
AI chatbots are software systems designed to communicate with users through text or voice in a more natural way. Unlike traditional rule-based chatbots that rely on fixed scripts, AI chatbots use technologies such as natural language processing and machine learning to understand what users are saying and respond accordingly.
What sets AI chatbots apart today is their ability to handle conversations more flexibly. Instead of reacting to single commands, they can understand intent, respond in context, and adjust their answers based on how the conversation evolves. This makes them suitable for real-world scenarios such as customer support, online learning platforms, internal enterprise tools, healthcare services, and interactive consumer apps.
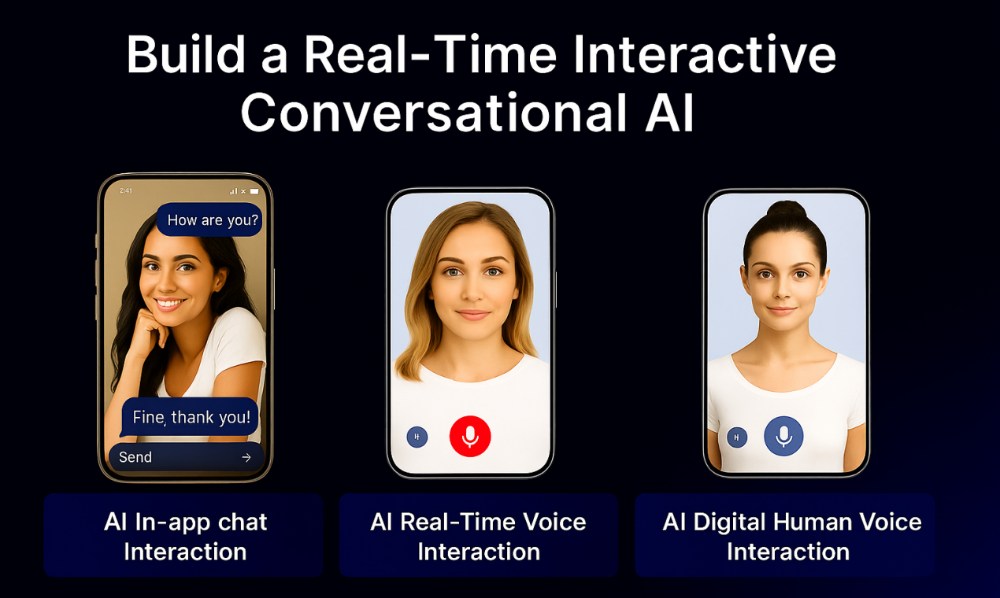
More advanced AI chatbots also support voice-based interaction. In addition to text, they can process spoken input and generate voice responses, enabling more immersive and real-time communication experiences. As user expectations continue to rise, AI chatbots are increasingly viewed not as simple automation tools but as intelligent digital assistants that improve engagement and usability across different products and services.
Market Overview of AI Chatbot Development
The AI chatbot development market is expanding rapidly as businesses and consumers increasingly adopt automated conversational technologies. According to industry reports and global market research firms, the worldwide AI chatbot market is estimated to reach around 10 to 11 billion USD in 2026, up from approximately 7.8 to 9.5 billion USD in recent years, reflecting strong year-on-year growth.
Market analysts expect this growth to continue, with the AI chatbot market projected to exceed 27 billion USD by 2030. This expansion is largely driven by improvements in natural language processing and generative AI, which make chatbots more accurate, flexible, and practical in everyday use.
More and more companies are using chatbots in their products, websites, and internal systems. Industry research shows that over 90% of medium and large companies already use chatbots in some form, whether to support users, assist employees, or automate routine communication. From the user side, most people have interacted with chatbots before, and many now expect services to be available at any time, without waiting for human support.
These trends show that AI chatbot development is no longer just an emerging technology. It has become a core part of how digital products communicate with users. As AI technologies continue to evolve, chatbots are moving beyond simple automation and becoming intelligent assistants that support real conversations and ongoing engagement across many industries.
Must-have Feature of AI Chatbot
To build an AI chatbot that users actually want to interact with, developers need to focus on a few core capabilities rather than an overloaded feature set. A well-designed chatbot should understand users, respond in real time, and scale smoothly as usage grows. Below are the essential features that define a high-quality AI chatbot.
- Natural Language Understanding: Enables the chatbot to interpret user intent, context, and everyday language instead of relying on fixed commands.
- Context Awareness: Allows the chatbot to remember previous messages and maintain conversation continuity for more natural interactions.
- Text and Voice Interaction: Supports both text chat and voice communication to meet modern user expectations across different scenarios.
- Real-time Performance: Ensures fast responses with minimal latency, which is critical for customer support and interactive experiences.
- Scalability and Stability: Handles increasing user traffic without interruptions or performance drops.
- AI Model and API Integration: Connects smoothly with AI models, NLP services, and external systems to deliver intelligent responses.
- Security and Data Protection: Safeguards user data and conversations with proper access control and compliance standards.
How to Build an AI Chatbot in Easy Steps
Traditionally, AI chatbot development often requires connecting multiple services, including natural language processing, text-to-speech, speech recognition, and real-time messaging. Moreover, each of these services demands separate integration, authentication, and error handling. As a result, ensuring both low latency and high reliability quickly becomes a complex challenge.
ZEGOCLOUD’s AI Agent platform simplifies this AI Chatbot Development process with an all-in-one chatbot solution. Instead of juggling multiple integrations, you can build an AI chatbot through a single SDK that seamlessly manages text conversations, processes voice input, and delivers natural speech responses. This approach not only reduces development complexity but also ensures a smoother, real-time experience for users.
Prerequisites
Before you begin, gather these essential components:
- ZEGOCLOUD developer account with active AppID and ServerSecret from the console – Sign up here.
- Node.js 18+ is installed locally for both backend and frontend development.
- OpenAI API key or compatible language model provider for intelligent responses.
- Code editor with TypeScript support for a better development experience.
- Testing device with microphone access since chatbot voice features require actual hardware.
- Basic familiarity with React hooks and Express.js for building the user interface and API endpoints.
If you’ve met the prerequisites above, you can proceed with the steps below:
1. Project Setup and Configuration
Initialize the project structure that separates chatbot server logic from the user interface:
mkdir ai-chatbot
cd ai-chatbot
mkdir server client
Install the required backend dependencies:
cd server
npm init -y
npm install express cors dotenv axios typescript tsx
npm install --save-dev @types/express @types/cors @types/node
Rename the .env.example file in the server directory to .env, then fill in the necessary values as instructed.
# ZEGOCLOUD Configuration
ZEGO_APP_ID=your_numeric_app_id
ZEGO_SERVER_SECRET=your_32_character_secret
ZEGO_API_BASE_URL=https://aigc-aiagent-api.zegotech.cn

# AI Model Configuration
DASHSCOPE_API_KEY=your_dashscope_api_key

# Server Settings
PORT=8080
Create server/tsconfig.json:
{
  "compilerOptions": {
    "target": "ES2022",
    "module": "ESNext",
    "moduleResolution": "bundler",
    "allowSyntheticDefaultImports": true,
    "esModuleInterop": true,
    "strict": true,
    "outDir": "./dist",
    "rootDir": "./src",
    "declaration": true,
    "sourceMap": true,
    "resolveJsonModule": true
  },
  "include": ["src/**/*"],
  "exclude": ["node_modules", "dist"]
}
2. Chatbot Server Implementation
2.1 Authentication Tokens
The token endpoint generates secure authentication for chatbot users to join ZEGOCLOUD rooms:
app.get('/api/token', (req, res) => {
  try {
    const { user_id } = req.query

    if (!user_id || typeof user_id !== 'string') {
      return res.status(400).json({
        success: false,
        error: 'User ID required for chatbot session'
      })
    }

    const token = generateToken04(
      ZEGO_APP_ID,
      user_id,
      ZEGO_SERVER_SECRET,
      7200, // 2 hours
      ''
    )

    res.json({
      success: true,
      token,
      expires_in: 7200
    })
  } catch (error) {
    res.status(500).json({
      success: false,
      error: 'Failed to generate chatbot token'
    })
  }
})
2.2 Bot Registration
Bot registration configures the chatbot’s personality, response style, and processing capabilities:
async function registerAgent(): Promise<string> {
  if (REGISTERED_AGENT_ID) return REGISTERED_AGENT_ID

  const agentId = `agent_${Date.now()}`
  const agentConfig = {
    AgentId: agentId,
    Name: 'AI Assistant',
    LLM: {
      Url: 'https://dashscope-intl.aliyuncs.com/compatible-mode/v1/chat/completions',
      ApiKey: CONFIG.DASHSCOPE_API_KEY || 'zego_test',
      Model: 'qwen-plus',
      SystemPrompt: 'You are a helpful AI chatbot assistant. Be concise and friendly. Respond in the same language as the user. Keep responses under 100 words for better conversation flow.',
      Temperature: 0.7,
      TopP: 0.9,
      Params: {
        max_tokens: 200
      }
    },
    TTS: {
      Vendor: 'CosyVoice',
      Params: {
        app: { api_key: 'zego_test' },
        payload: {
          model: 'cosyvoice-v2',
          parameters: {
            voice: 'longxiaochun_v2',
            speed: 1.0,
            volume: 0.8
          }
        }
      }
    },
    ASR: {
      VADSilenceSegmentation: 1500,
      PauseInterval: 2000
    }
  }

  const result = await makeZegoRequest('RegisterAgent', agentConfig)
  REGISTERED_AGENT_ID = agentId
  return agentId
}
The registration sets up a persistent chatbot that can handle multiple conversation sessions with consistent personality and voice characteristics.
2.3 Session Initialization
Session creation connects users with chatbot instances inside ZEGOCLOUD rooms:
app.post('/api/chatbot/start', async (req, res) => {
  try {
    const { room_id, user_id } = req.body

    if (!room_id || !user_id) {
      return res.status(400).json({
        success: false,
        error: 'Room ID and User ID required for chatbot'
      })
    }

    const agentId = await registerAgent()

    const instanceConfig = {
      AgentId: agentId,
      UserId: user_id,
      RTC: {
        RoomId: room_id,
        AgentUserId: `chatbot_${room_id}`,
        AgentStreamId: `chatbot_stream_${room_id}`,
        UserStreamId: `${user_id}_stream`
      },
      MessageHistory: {
        SyncMode: 1,
        Messages: [],
        WindowSize: 10
      },
      CallbackConfig: {
        ASRResult: 1,
        LLMResult: 1,
        Exception: 1,
        UserSpeakAction: 1,
        AgentSpeakAction: 1
      }
    }

    const result = await makeZegoRequest('CreateAgentInstance', instanceConfig)

    res.json({
      success: true,
      chatbotId: result.Data?.AgentInstanceId,
      room_id,
      user_id
    })
  } catch (error) {
    res.status(500).json({
      success: false,
      error: 'Failed to start chatbot session'
    })
  }
})
Each session creates an isolated chatbot instance that maintains conversation context and handles real-time communication.
2.4 Session Termination
Clean session termination stops the chatbot instance and releases resources:
app.post('/api/chatbot/stop', async (req, res) => {
  try {
    const { chatbot_id } = req.body

    if (!chatbot_id) {
      return res.status(400).json({
        success: false,
        error: 'Chatbot ID required'
      })
    }

    await makeZegoRequest('DeleteAgentInstance', {
      AgentInstanceId: chatbot_id
    })

    res.json({
      success: true,
      message: 'Chatbot session stopped'
    })
  } catch (error) {
    res.status(500).json({
      success: false,
      error: 'Failed to stop chatbot'
    })
  }
})
Proper session termination prevents resource leaks and ensures clean chatbot lifecycle management. You can get the complete server code here.
3. Frontend Interface with Vite
Configure the React frontend for the chatbot interface:
cd ../client
npm create vite@latest . -- --template react-ts
npm install zego-express-engine-webrtc axios framer-motion lucide-react tailwindcss zod
Create Vite configuration in client/vite.config.ts:
import { defineConfig } from 'vite'
import react from '@vitejs/plugin-react'
import tailwindcss from '@tailwindcss/vite'

export default defineConfig({
  plugins: [react(), tailwindcss()],
  define: {
    global: 'globalThis',
  },
  optimizeDeps: {
    include: ['zego-express-engine-webrtc'],
  }
})
Set up environment variables in client/.env:
VITE_ZEGO_APP_ID=your_numeric_app_id
VITE_ZEGO_SERVER=wss://webliveroom-api.zegocloud.com/ws
VITE_API_BASE_URL=http://localhost:8080
4. ZEGOCLOUD Integration
4.1 Service Initialization
We create a singleton service (ChatbotZegoService) that sets up the ZEGOCLOUD engine once, prepares an audio element for playback, and registers event listeners to handle incoming messages and streams.
export class ChatbotZegoService {
  private static instance: ChatbotZegoService
  private zg: ZegoExpressEngine | null = null
  private messageCallback: ((message: any) => void) | null = null
  private audioElement: HTMLAudioElement | null = null
  private currentRoomId: string | null = null
  private currentUserId: string | null = null
  private localStream: MediaStream | null = null

  static getInstance(): ChatbotZegoService {
    if (!ChatbotZegoService.instance) {
      ChatbotZegoService.instance = new ChatbotZegoService()
    }
    return ChatbotZegoService.instance
  }

  async initialize(appId: string, server: string): Promise<void> {
    this.zg = new ZegoExpressEngine(parseInt(appId), server)
    this.setupEventListeners()
    this.setupAudioElement()
  }

  private setupAudioElement(): void {
    this.audioElement = document.getElementById('chatbot-audio') as HTMLAudioElement
    if (!this.audioElement) {
      this.audioElement = document.createElement('audio')
      this.audioElement.id = 'chatbot-audio'
      this.audioElement.autoplay = true
      this.audioElement.controls = false
      this.audioElement.style.display = 'none'
      document.body.appendChild(this.audioElement)
    }
    this.audioElement.volume = 0.8
    this.audioElement.muted = false
  }
}
4.2 Room Management
This part handles joining a room, authenticating with ZEGOCLOUD, and publishing the user’s local audio stream so they can participate in the conversation.
async joinRoom(roomId: string, userId: string, token: string): Promise<boolean> {
  if (!this.zg) return false

  try {
    this.currentRoomId = roomId
    this.currentUserId = userId

    // Join the ZEGOCLOUD room with authentication
    await this.zg.loginRoom(roomId, token, {
      userID: userId,
      userName: userId
    })

    // Enable message reception for chatbot communication
    this.zg.callExperimentalAPI({
      method: 'onRecvRoomChannelMessage',
      params: {}
    })

    // Create local stream for voice input
    const localStream = await this.zg.createZegoStream({
      camera: { video: false, audio: true }
    })

    if (localStream) {
      this.localStream = localStream
      await this.zg.startPublishingStream(`${userId}_stream`, localStream)
      return true
    }

    throw new Error('Failed to create local stream')
  } catch (error) {
    console.error('Failed to join room:', error)
    return false
  }
}
4.3 Message Handling
All incoming ZEGOCLOUD messages are captured, parsed, and passed to a callback so the app can display or process them.
private setupEventListeners(): void {
  this.zg?.on('recvExperimentalAPI', (result: any) => {
    const { method, content } = result
    if (method === 'onRecvRoomChannelMessage') {
      try {
        const message = JSON.parse(content.msgContent)
        this.handleRoomMessage(message)
      } catch (error) {
        console.error('Failed to parse room message:', error)
      }
    }
  })
}

private handleRoomMessage(message: any): void {
  if (this.messageCallback) {
    this.messageCallback(message)
  }
}

onMessage(callback: (message: any) => void): void {
  this.messageCallback = callback
}
4.4 Audio Stream Management
Here we manage audio playback: creating an audio element, attaching remote streams, and controlling how chatbot voice responses are played.
this.zg?.on('roomStreamUpdate', async (roomID, updateType, streamList) => {
  if (updateType === 'ADD' && streamList.length > 0) {
    for (const stream of streamList) {
      // Skip user's own stream to prevent feedback
      if (stream.streamID !== `${this.currentUserId}_stream`) {
        try {
          const mediaStream = await this.zg?.startPlayingStream(stream.streamID)
          if (mediaStream && this.audioElement) {
            const remoteView = await this.zg?.createRemoteStreamView(mediaStream)
            await remoteView?.play(this.audioElement, {
              enableAutoplayDialog: false,
              muted: false
            })
            this.audioElement.volume = 0.8
          }
        } catch (error) {
          console.error('Failed to play chatbot audio:', error)
        }
      }
    }
  } else if (updateType === 'DELETE') {
    if (this.audioElement) {
      this.audioElement.srcObject = null
    }
  }
})
4.5 Voice Input Control
This optional part lets us enable or disable the user’s microphone dynamically by toggling the local audio track.
async enableVoiceInput(enabled: boolean): Promise<boolean> {
  if (!this.localStream) return false

  try {
    const audioTrack = this.localStream.getAudioTracks()[0]
    if (audioTrack) {
      audioTrack.enabled = enabled
      return true
    }
    return false
  } catch (error) {
    console.error('Failed to toggle voice input:', error)
    return false
  }
}
You get the complete ZEGOCLOUD integration codes here.
5. Chat Services
5.1 Configuration and Environment Validation
The frontend uses Zod for environment validation and service abstractions for comprehensive backend communication:
// client/src/config.ts
import { z } from 'zod'

const configSchema = z.object({
  ZEGO_APP_ID: z.string().min(1, 'ZEGO App ID is required'),
  ZEGO_SERVER: z.string().url('Valid ZEGO server URL required'),
  API_BASE_URL: z.string().url('Valid API base URL required'),
})

const rawConfig = {
  ZEGO_APP_ID: import.meta.env.VITE_ZEGO_APP_ID,
  ZEGO_SERVER: import.meta.env.VITE_ZEGO_SERVER,
  API_BASE_URL: import.meta.env.VITE_API_BASE_URL,
}

export const config = configSchema.parse(rawConfig)
5.2 Backend Communication Layer
The API service provides clean interfaces for all chatbot operations:
// client/src/services/api.ts
import axios from 'axios'
import { config } from '../config'

const api = axios.create({
  baseURL: config.API_BASE_URL,
  timeout: 30000,
  headers: { 'Content-Type': 'application/json' }
})

export const chatbotAPI = {
  async startChatbot(roomId: string, userId: string) {
    const response = await api.post('/api/chatbot/start', {
      room_id: roomId,
      user_id: userId,
      user_stream_id: `${userId}_stream`,
    })

    return { chatbotId: response.data.chatbotId }
  },

  async sendMessage(chatbotId: string, message: string) {
    await api.post('/api/chatbot/message', {
      chatbot_id: chatbotId,
      message: message.trim()
    })
  },

  async getToken(userId: string) {
    const response = await api.get(`/api/token?user_id=${encodeURIComponent(userId)}`)
    return { token: response.data.token }
  },

  async stopChatbot(chatbotId: string) {
    await api.post('/api/chatbot/stop', {
      chatbot_id: chatbotId
    })
  }
}
5.3 Conversation Memory Management
The memory service handles conversation persistence using localStorage with sophisticated metadata management and conversation lifecycle operations:
// client/src/services/memory.ts
class ChatbotMemoryService {
  private static instance: ChatbotMemoryService
  private conversations: Map<string, ConversationMemory> = new Map()

  static getInstance(): ChatbotMemoryService {
    if (!ChatbotMemoryService.instance) {
      ChatbotMemoryService.instance = new ChatbotMemoryService()
    }
    return ChatbotMemoryService.instance
  }

  constructor() {
    this.loadFromStorage()
  }

  private loadFromStorage(): void {
    try {
      const stored = localStorage.getItem('chatbot_conversations')
      if (stored) {
        const conversations = JSON.parse(stored)
        conversations.forEach(conv => {
          this.conversations.set(conv.id, conv)
        })
      }
    } catch (error) {
      console.error('Failed to load conversations from storage:', error)
    }
  }

  private saveToStorage(): void {
    try {
      const conversations = Array.from(this.conversations.values())
      localStorage.setItem('chatbot_conversations', JSON.stringify(conversations))
    } catch (error) {
      console.error('Failed to save conversations to storage:', error)
    }
  }

  createOrGetConversation(id?: string): ConversationMemory {
    const conversationId = id || this.generateConversationId()

    if (this.conversations.has(conversationId)) {
      return this.conversations.get(conversationId)!
    }

    const newConversation: ConversationMemory = {
      id: conversationId,
      title: 'New Chat Session',
      messages: [],
      createdAt: Date.now(),
      updatedAt: Date.now(),
      metadata: {
        totalMessages: 0,
        lastBotResponse: '',
        topics: [],
        averageResponseTime: 0
      }
    }

    this.conversations.set(conversationId, newConversation)
    this.saveToStorage()
    return newConversation
  }

  addMessage(conversationId: string, message: ChatMessage): void {
    const conversation = this.conversations.get(conversationId)
    if (!conversation) return

    // Handle message updates or additions
    const existingIndex = conversation.messages.findIndex(m => m.id === message.id)
    if (existingIndex >= 0) {
      conversation.messages[existingIndex] = message
    } else {
      conversation.messages.push(message)
    }

    // Update conversation metadata
    conversation.updatedAt = Date.now()
    conversation.metadata.totalMessages = conversation.messages.length

    if (message.sender === 'bot') {
      conversation.metadata.lastBotResponse = message.content
    }

    // Auto-generate conversation title from first user message
    if (conversation.messages.length === 1 && message.sender === 'user') {
      conversation.title = message.content.slice(0, 50) + (message.content.length > 50 ? '...' : '')
    }

    this.saveToStorage()
  }

  getAllConversations(): ConversationMemory[] {
    return Array.from(this.conversations.values())
      .sort((a, b) => b.updatedAt - a.updatedAt)
  }

  private generateConversationId(): string {
    return `chat_${Date.now()}_${Math.random().toString(36).substr(2, 9)}`
  }
}

export const memoryService = ChatbotMemoryService.getInstance()
6. Main Chatbot Component
6.1 Component Architecture
Before implementing the chatbot interface, understanding the system architecture helps coordinate the different layers:
The architecture separates concerns:
- React manages UI state and user interactions.
- ZEGOCLOUD handles real-time communication and AI processing, and
- The backend manages authentication and session lifecycle.

6.2 Main Chatbot component
The main chatbot component coordinates all functionality:
export const Chatbot = () => {
  const [messages, setMessages] = useState<ChatMessage[]>([])
  const [session, setSession] = useState<ChatbotSession | null>(null)
  const [isConnected, setIsConnected] = useState(false)
  const [botStatus, setBotStatus] = useState<'idle' | 'listening' | 'thinking' | 'speaking'>('idle')

  const zegoService = useRef(ChatbotZegoService.getInstance())

  useEffect(() => {
    setupMessageHandlers()
  }, [])

  const setupMessageHandlers = () => {
    zegoService.current.onMessage((data: any) => {
      const { Cmd, Data: msgData } = data

      if (Cmd === 3) { // Voice transcript
        const { Text: transcript, EndFlag } = msgData
        if (EndFlag && transcript?.trim()) {
          addMessage({
            id: `voice_${Date.now()}`,
            content: transcript.trim(),
            sender: 'user',
            timestamp: Date.now(),
            type: 'voice'
          })
        }
      } else if (Cmd === 4) { // Bot response
        const { Text: content, MessageId, EndFlag } = msgData
        if (EndFlag) {
          updateMessage(MessageId, content, false)
        } else {
          addStreamingMessage(MessageId, content)
        }
      }
    })
  }

  const startChatbot = async () => {
    const roomId = `chatbot_${Date.now()}`
    const userId = `user_${Date.now()}`

    const { token } = await chatbotAPI.getToken(userId)
    await zegoService.current.joinRoom(roomId, userId, token)

    const { chatbotId } = await chatbotAPI.startChatbot(roomId, userId)

    setSession({ roomId, userId, chatbotId, isActive: true, voiceEnabled: true })
    setIsConnected(true)
  }

  return (
    <div className="flex flex-col h-screen bg-gray-50">
      {/* Chat messages display */}
      <div className="flex-1 overflow-y-auto px-4 py-6">
        {messages.map(message => (
          <MessageBubble key={message.id} message={message} />
        ))}
      </div>

      {/* Input interface */}
      {isConnected && (
        <div className="bg-white border-t border-gray-200 p-4">
          <div className="flex items-center space-x-3">
            <input
              type="text"
              placeholder="Type your message..."
              className="flex-1 px-4 py-3 border border-gray-300 rounded-xl focus:outline-none focus:ring-2 focus:ring-purple-500"
            />
            <button className="p-3 bg-purple-600 text-white rounded-xl hover:bg-purple-700">
              <Send className="w-5 h-5" />
            </button>
          </div>
        </div>
      )}
    </div>
  )
}
The component manages the chatbot lifecycle, handles real-time messages, and provides an interactive interface for users to communicate with the AI chatbot.
7. Application Integration
7.1 Complete Implementation
The full chatbot implementation with all components, configuration files, and deployment setup is available in the GitHub repository. The repository includes the complete server implementation, React components, styling, and production deployment configurations. So, you can clone it to run the demo or modify as needed.
7.2 Running the Chatbot
Start both servers to test the complete chatbot system:
Backend Server:
cd server
npm run dev
Frontend Application:
cd client
npm run dev
Run a Demo
How Much Does It Cost to Develop an AI Chatbot?
The cost of developing an AI chatbot can vary significantly depending on scope and expectations. In practice, most AI chatbot projects fall into a few common budget ranges.
A basic AI chatbot, often used for simple customer inquiries or guided conversations, typically starts at around $10,000 to $20,000. These chatbots usually focus on text-based interactions and limited workflows.
A mid-level chatbot, designed to support more complex conversations, multiple platforms, or basic voice capabilities, generally costs between $20,000 and $50,000. This range covers deeper customization, better user experience design, and more robust backend support.
For enterprise-grade AI chatbots, which require high concurrency, real-time performance, advanced integrations, and ongoing optimization, development costs can exceed $50,000 or more, depending on scale and long-term requirements.
Beyond the initial build, teams should also plan for ongoing costs, including model tuning, system maintenance, infrastructure usage, and feature updates. These are recurring investments that help keep the chatbot reliable and relevant as usage grows.
For most businesses, starting with a smaller, clearly defined chatbot and scaling gradually is the most cost-effective strategy. This approach helps validate real demand before committing to larger development budgets.
Best Practices for Developing AI Chatbots
Building a successful AI chatbot goes beyond technical implementation. Long-term success depends on responsible design, user trust, and operational sustainability.
1. Design with transparency
Users should clearly understand that they are interacting with an AI system. Transparent communication builds trust and helps set realistic expectations for what the chatbot can and cannot do.
2. Define clear boundaries
A chatbot should operate within well-defined limits. When a conversation exceeds its capabilities, the system should gracefully escalate to human support instead of providing uncertain or misleading responses.
3. Prioritize data privacy and compliance
Chatbots often handle sensitive user information. Strong data protection practices, including encryption, access control, and regulatory compliance, should be built into the system from the beginning.
4. Focus on conversation quality, not just intelligence
A technically advanced chatbot can still fail if conversations feel unnatural or confusing. Clear language, consistent tone, and logical response flow are just as important as AI accuracy.
5. Plan for continuous improvement
User behavior, business goals, and AI models evolve over time. Regular monitoring, feedback analysis, and iterative updates are essential to keeping the chatbot relevant and effective.
Conclusion
Now you have a working AI chatbot that can understand speech, respond intelligently, and manage real-time conversations. Users are free to type or speak naturally, and the chatbot delivers appropriate replies in text or voice.
What once required complex integrations of multiple AI services, audio processing pipelines, and real-time synchronization has been made simple with ZEGOCLOUD. With a single platform, you built a chatbot that feels both responsive and natural to use.
This solid foundation can power customer support, education, virtual assistants, or any application where intelligent conversation is essential. From here, you can refine the chatbot’s personality, extend its features, or integrate with external services while maintaining the same reliable communication core.
FAQ
Q1: Can I make my own AI chatbot?
Yes. With platforms like ZEGOCLOUD, you can build an AI chatbot that handles both text and voice interactions. The process no longer requires stitching together multiple services, so even individual developers can create powerful chatbots.
Q2: How much does it cost to build an AI chatbot?
The cost depends on scale and features. Simple chatbots can be built at low cost, while advanced real-time conversational bots may require cloud usage fees. ZEGOCLOUD offers flexible pricing so you can start small and scale as your user base grows.
Q3: Can I create my own AI like ChatGPT?
You can build applications powered by large language models similar to ChatGPT, but instead of training one from scratch, most developers integrate existing APIs and SDKs. This saves time, cost, and computing resources.
Q4: Is it hard to develop an AI chatbot?
Traditionally, it was difficult because you had to integrate natural language processing, speech recognition, text-to-speech, and real-time messaging. With ZEGOCLOUD’s all-in-one AI agent SDK, the process is much easier and faster.
Let’s Build APP Together
Start building with real-time video, voice & chat SDK for apps today!
