


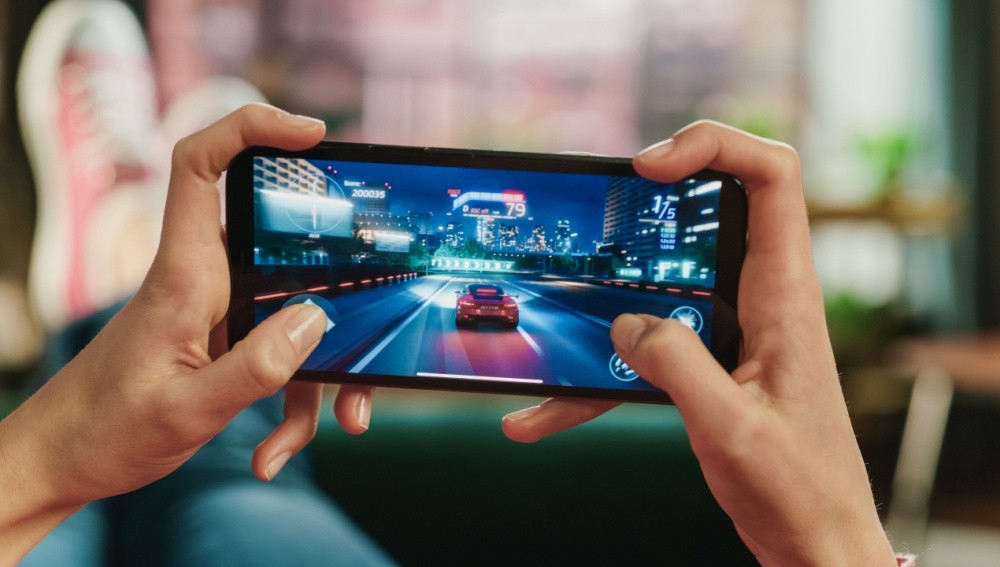
Live streaming isn’t just for video anymore—it’s evolving into an interactive experience that keeps users hooked. One of the most effective ways to enhance your Android app’s engagement is by live streaming a fun mini-game, allowing hosts to play in real time while audiences cheer them on with likes, comments, and virtual gifts. In this tutorial, you’ll learn how to experience minigames by a demo app and sample codes, integrate and live stream a mini-game in your Android app using ZEGOCLOUD MiniGame Engine, from setup to going live—all with minimal effort and maximum impact. Let’s get started!
Experience MiniGames on Android
Download the Android app now to experience firsthand the excitement of ZEGOCLOUD’s mini-games and preview the scenarios you can unlock by enabling ZEGOCLOUD services.
Run Sample Code
ZEGOCLOUD offers sample server code in Node.js and client code for Android. By running both scripts, you can create an application with all mini-game features enabled and explore their full functionality. The sample code also serves as a helpful reference for learning how to implement a mini-game service.
Before you get started
Set up the environment
Make sure you have:
- Installed Node.js.
- Installed Android Studio 2021.2.1 or later version.
- Installed Android SDK 29 or later, Android SDK Build-Tools 29.0.0 or later, and Android SDK Platform-Tools 29.x.x or later version.
- A real Android device with Android 5.0 or later that supports audio and video playback.
- Connected your computer and the Android device to the Internet.
Activate services
First, create a project in the ZEGOCLOUD console to obtain your AppID and ServerSecret.
Then, share this information with your ZEGOCLOUD sales representative to activate the minigame engine service.
Try the Demo Server Project Now
First, download the sever sample code zip package, and extract the the ZegoMiniGameServerDemo folder.
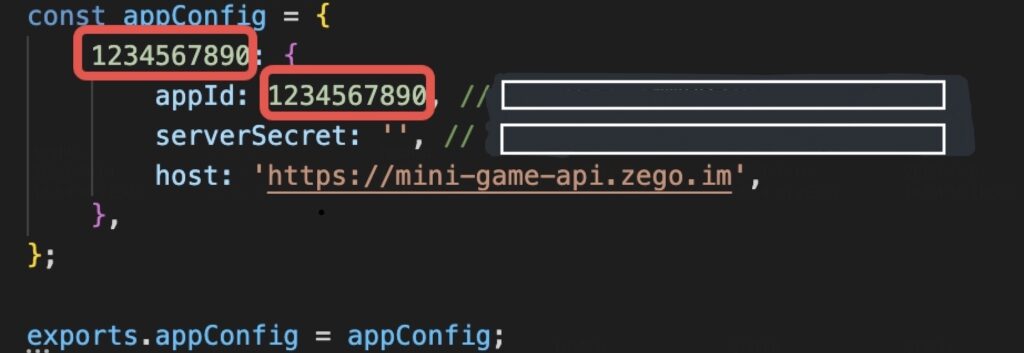
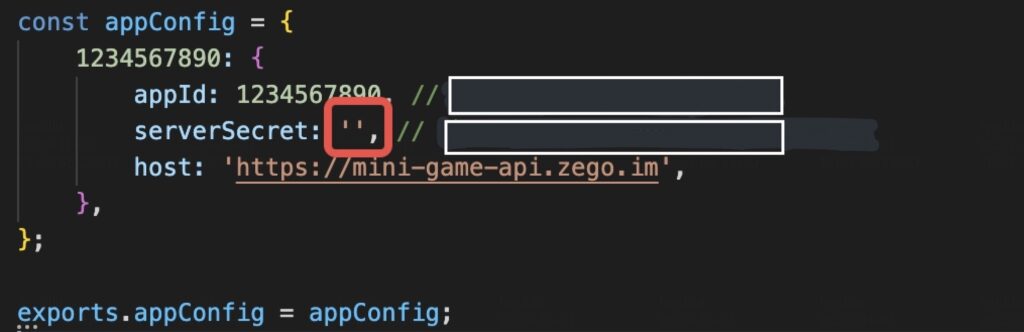
Second, open the ZegoMiniGameServerDemo/utils/config.js and provide the appId and serverSecret you have obtained from ZEGOCLOUD console. FYI, the host address provided in the file is the endpoint for requests to ZEGOCLOUD minigame server. So do not change it so that the demo can run successfully.
Third, navigate to the root directory of the folder, and run the following npm codes to initialize the server.
npm i

node index.js
Congrats! You have established a server for the Android demo. Now note the sample server address from output as shown by the screenshot below:

Next, you can start running the Android sample code.
Launch Android Demo
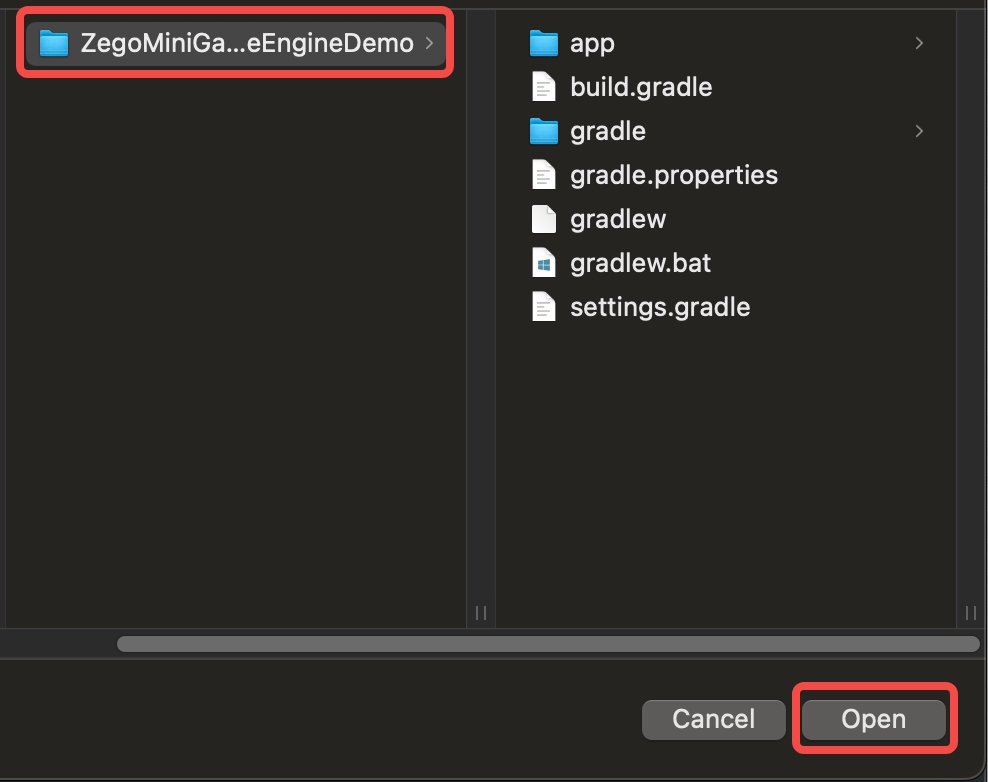
Start by downloading the sample Android project package. Then, decompress it. This will create the ZegoMiniGameEngineDemoSrc-Android folder.
Open the folder with Android Studio.
In the app/src/main/java/im/zego/minigameenginedemo/KeyCenter.java file, input the appID needed for SDK initialization. Also, enter the backend address you obtained after the server you have established before.
Attach a real Android device to your computer. After enabling developer mode and USB debugging on the device, you should see it listed in Android Studio.

Finally, run the sample code.

Congratulations! Your Android device is now ready to run the ZEGO Mini Game Engine with all features enabled.
Steps-by-steps to Integrate Androind MiniGame Engine
Develop a game server
In a mini-game session, the host takes control of the game, while the audience gets involved by sending likes and gifts in real time. The host typically receives a launch code from your backend, and all engagement actions (likes/gifts) are relayed to ZEGOCLOUD through server requests. That means you’ll need to build a game server that can talk to ZEGOCLOUD. To do so, check out Make API requests, Obtain a game start code, Send likes, Send comments, and Send gifts.
Generate a token
A token is used by the ZEGO Android MiniGame Engine SDK to verify whether a user has the required permissions during initialization. This ensures that only authorized users can access and control the mini-game features. It also helps prevent potential issues caused by insufficient permissions or improper operations. Read Token Authentication to understand how to generate a token.
Set up the SDKStart the games
The minigame capability provided by ZEGOCLOUD requires both the ZEGOCLOUD MiniGame Engine SDK and the ZEGOCLOUD Express SDK. Therefore, you should integrate these 2 SDK into your project.
Integrate ZEGOCLOUD Express SDK
The required ZEGOCLOUD Express SDK should be 3.1.1 or later version. Read the ZEGOCLOUD Video Call docs Integrate the SDK.
Integrate ZEGO Android MiniGame Engine SDK
Auto Integration
Open your project-level setting.gradle or build.gradle file, and declare ZEGOCLOUD’s private repository within the repositories block:
repositories {
    ...
    maven { url "https://storage.zego.im/maven" }
    ...
}
In your app-level build.gradle, include the dependency in the dependencies block:
   dependencies {
       ...
       implementation "im.zego:minigameengine:2.0.1"
       ...
   }
Grant Permissions
Add these required permissions to /app/src/main/AAndroidManifest.xml for ZEGO Android MiniGame Engine SDK functionality:
<!-- Permissions mandatory for the SDK -->
<uses-permission android:name="android.permission.INTERNET" />
<uses-permission android:name="android.permission.ACCESS_WIFI_STATE" />
<uses-permission android:name="android.permission.ACCESS_NETWORK_STATE" />
If you want to develop a live streaming feature, or a live audio room feature, grant the permissions related to camera and microphone.
<uses-permission android:name="android.permission.CAMERA" />
<uses-permission android:name="android.permission.BLUETOOTH" />
<uses-permission android:name="android.permission.RECORD_AUDIO" />
<uses-permission android:name="android.permission.MODIFY_AUDIO_SETTINGS" />
Initialize SDKs
Initialize the ZEGO Express SDK
First, create a ZegoExpressEngine instance to initialize the SDK. For detailed steps, refer to the Create a ZegoExpressEngine instance section in the Video Call documentation.
Once the engine is initialized, log in to a real-time communication (RTC) room. To learn how, see the Log in to a room section in the same guide.
Initialize ZEGO MiniGameEngine SDK
Call the ZegoMiniGameEngine.getInstance method to create a ZegoMiniGameEngine object.
Then, call the init method to initialize the SDK. You’ll need to provide the following parameters:
- Your AppID
- A token generated by your server
- A custom user ID and username
- The avatar image URL
// Get a ZEGOCLOUD MiniGameEngine instance
ZegoMiniGameEngine miniGameEngine = ZegoMiniGameEngine.getInstance();

// Initialize ZEGO MiniGameEngine SDK.
// After you create a project in the [ZEGOCLOUD console] (https://console.zegocloud.com), you can obtain the AppID from Project Management. Append an "L" to the application ID. Example: 1234567890L.
// appID has enable the mini game service
long appID = YourAppID;
String token = "your token"; // The token that your server generates. Required
String userID = "your user ID"; // Required. The custom user ID, which must be the same user ID that is used to generate the token.
String userName = "your user name"; // Required. The custom username.
String userAvatar = "your user avatar"; // Optional. The URL of the avatar image. The HTTPS protocol must be used.
ZegoGameUserInfo userInfo = new ZegoGameUserInfo(userID, userName, userAvatar);
miniGameEngine.init(appID, token, userInfo, (errorCode, object) -> {});

// Get a ZegoCloudGameEngine instance
ZegoCloudGameEngine cloudGameEngine = ZegoCloudGameEngine.getInstance();
Set the Game Container and Register a Game Event Listener
Call the setCloudGameContainer method to specify the parent view or container where the mini-game will be displayed. This must be done before starting the game. Next, call the setCloudGameEngineHandler method to register a listener for live comment-based game events. Once the live comment-based game starts, relevant events will be delivered through the IZegoCloudGameEngineHandler callback interface.
ViewGroup gameContainer = xxx; // You need to configure a ViewGroup at the UI layer to display the game.

// Set the cloud game container
cloudGameEngine.setCloudGameContainer(gameContainer);

cloudGameEngine.setCloudGameEngineHandler(new IZegoCloudGameEngineHandler() {
    @Override
    public void onCloudGameError(int errorCode, String message) {
        // An error message is returned for the live comment-based game errors.
    }

    @Override
    public void onCloudGameFirstFrame() {
        // First frame of the game is rendered successfully
        // During the process of launching a live comment-based game until the game is successfully loaded, you can play a custom loading animation or implement other logic
        // After receiving this callback, you can stop playing the custom animation or performing other logic
    }
});
Start a mini game
Call the getGameList method and set the gameMode parameter to ZegoGameMode.ZegoGameModeCloudGame to indicate that you’re requesting games in live comment-based mode. The method will return a list of available live comment-based games. From this list, select the game ID of the game you want to start.
// Obtain the list of live comment-based games.
// Set the `gameMode` parameter to `ZegoGameMode.ZegoGameModeCloudGame`, which specifies the comment-based gaming mode.
miniGameEngine.getGameList(ZegoGameMode.ZegoGameModeCloudGame, (errorCode, gameInfoList) -> {
    // The `gameList` parameter specifies the list of live comment-based games.
});
Obtain a game launch code
Once a game is selected, the host must obtain a game activation code by calling the server API to get the game launch code. After retrieving the code, you should send it to the client so the game can be started.
Start the live comment-based game
To start the game, Call the startCloudGame operation, and specify the room ID and the game ID.
String roomID = "your room id"; // The game room ID. We recommend that you use your business room ID.
String gameID = "your game id"; // The game ID

// Optional. Configure the game settings.
HashMap<String, Object> gameConfig = new HashMap<>();
// You can specify the game activation code and other parameters as required. The parameter formats are different for different games. You can contact ZEGOCLOUD support for help.
// We recommend that you specify the game activation code. In this case, after the startCloudGame method is called, the game is automatically started.
// If you do not specify the game activation code. After the startCloudGame operation is called, you are required to enter the game activation code subsequently during the game.
gameConfig.put(“runningParameters”, “xxx”); // The running parameters differ based on different games.


// Start the game
cloudGameEngine.startCloudGame(gameID, roomID, gameConfig, (errorCode, object) -> {
    // Running result callback
});
Publish the game-playing stream to the RTC room
After the game has started, call the startPublishCloudGameStream method to publish the game stream to the RTC room, making it visible to audience.
String roomID = "your room id"; // The game room ID. We recommend that you use your business room ID.
String gameID = "your game id"; // The game ID
String streamID = "your stream id"; // The stream ID. You can specify the stream ID as needed. The value can not exceed 256 characters in length.
                                         // The value can contain only digits, letters, hyphens (-), and underscores (_).
                                         // Make sure that the stream ID is globally unique under the same appID. If different streams are published with the same `streamID`, the latter stream will fail.
cloudGameEngine.startPublishCloudGameStream(gameID, roomID, streamID, (errorCode, object) -> {
     // Stream publishing result
});
Stop the game
Before stopping the live comment-based game, be sure to stop publishing the stream first.
Terminate the stream-publishing
Call the stopPublishCloudGameStream method to stop publishing the game stream.
String roomID = "your room id"; // The game room ID. It should be the same as the roomID used when publishing the stream
String gameID = "your game id"; // The game ID. It should be the same as the gameID used when publishing the stream
String streamID = "your stream id"; // The stream ID. It should be the same as the streamID used when publishing the stream.
cloudGameEngine.stopPublishCloudGameStream(gameID, roomID, streamID, (errorCode, object) -> {
     // Operation result
});
End the Live Comment-Based Game
Call the stopCloudGame method to end the live comment-based game session.
String roomID = "your room id"; // The game room ID. We recommend that you use your business room ID.
String gameID = "your game id"; // The game ID.
cloudGameEngine.stopCloudGame(gameID, roomID, (errorCode, object) -> {
    // Operation result
});
Uninitialize SDKs
When you no longer need to play live comment-based games, make sure to properly clean up by logging out of the RTC room, destroying the ZegoExpressEngine instance, and uninitializing the ZEGO MiniGameEngine SDK to release resources.
Log Out of the RTC Room
For detailed instructions on logging out of the RTC room, see the “Log out of a room” section in the Implement a basic video call documentation.
Destroy the ZegoExpressEngine Instance
To learn how to properly destroy the ZegoExpressEngine instance, refer to the “Destroy a ZegoExpressEngine instance” section in the ZEGOCLOUD Video Chat documentation.
Uninitialize the ZEGO MiniGameEngine SDK
Finally, call the unInit method to uninitialize the ZEGO MiniGameEngine SDK:
miniGameEngine.unInit();Conclusion
By integrating live-streamed mini games into your Android app, you transform passive viewers into active participants, creating a dynamic and engaging user experience. With the tools and sample code provided in this tutorial, you’re equipped to seamlessly add interactive gameplay that drives user interaction and boosts retention. Whether you’re launching your first mini-game or enhancing an existing app, ZEGOCLOUD makes it easy to deliver real-time fun with minimal effort and maximum impact. Now, let’s sign up to explore more fun interactive features for your Android apps to bring the excitement to your audience!
FAQ
Q1. How do I choose the right minigame engine for Android?
When choosing a minigame engine, consider factors like performance requirements, ease of integration, documentation quality, and community support. Popular lightweight options include Godot, Cocos2d-x, and Defold, which are all well-suited for embedding simple games into Android apps.
Q2. How can I embed a minigame engine into my existing Android app?
You typically need to initialize the engine in your main activity, load game assets correctly, and embed the game view in your layout. It’s also important to manage the game’s lifecycle properly, especially handling pause and resume events when switching between the app and game view.
Q3. What game engine do Android games use?
Many Android games use popular cross-platform game engines like Unity, Unreal Engine, Godot, and Cocos2d-x. Among them, Unity is the most widely adopted due to its ease of use, large asset store, and excellent Android support.
Q4. Can I use Unreal Engine on Android?
Yes, Unreal Engine fully supports Android development. You can build high-quality 3D mobile games using Unreal Engine, but it requires more device resources and may have a steeper learning curve compared to lighter engines like Unity or Godot.
Q5. What is the easiest game engine for Android games?
Unity is often considered the easiest game engine for Android beginners due to its drag-and-drop editor, comprehensive documentation, and strong community support. Godot is also a great lightweight alternative, especially for 2D games.
Q6. Which software is used to make Android games?
Android games are commonly developed using game engines like Unity, Unreal Engine, and Godot. Developers may also use Android Studio for native game development with Java or Kotlin, but this requires more low-level programming.
Let’s Build APP Together
Start building with real-time video, voice & chat SDK for apps today!
