


Video calling has become a standard feature for modern websites, enabling businesses, educators, and service providers to connect with users in real time. If you want to add video calling to WordPress, you can enhance user engagement through live meetings, online classes, customer support, or private consultations directly on your site. With the right plugins and tools, WordPress makes it possible to integrate HD video calling without advanced coding skills. This guide will walk you through practical ways to add video calling to your WordPress website, helping you deliver a smooth and reliable communication experience for your users.
How to Add Video Calling to WordPress
To add video calling to a WordPress site, ZEGOCLOUD UIKits make the process much easier. These prebuilt UIKits handle real-time video and audio, so you do not need to build a video system from scratch. They include all the core features required for live video calls.
In this setup, we use the ZEGOCLOUD Call Kit. Call Kit supports one-to-one and group video calls with HD video quality. It also provides ready-made call controls, such as muting audio, turning the camera on or off, and ending calls.
Since Call Kit runs on the web, you can connect it to a WordPress website with a simple JavaScript setup. This allows users to start video calls directly from your site without complex configuration.
Prerequisites
Before we proceed with the implementation steps, please ensure you have the following:
- A ZEGOCLOUD developer account—sign up here.
- A WordPress account.
- Basic knowledge of web development.
- A computer with a modern web browser that supports WebRTC.
With that in place, let’s get started with adding video calls to WordPress websites!
Step 1. Log in to the ZEGOCLOUD Admin Console
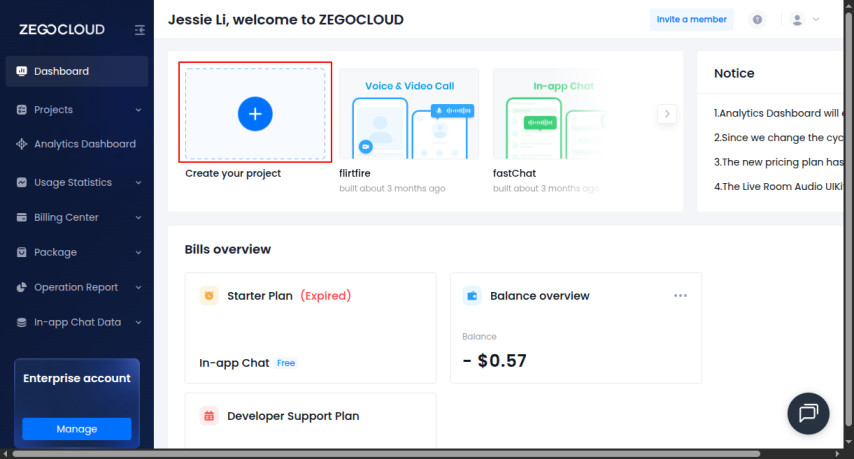
First, log in to your ZEGOCLOUD account or create one if you do not have it yet. After logging in, you will access the ZEGOCLOUD Admin Console. This is where you will create your Call Kit project and get the code needed for the video call integration.
Step 2. Create a Project
From the admin dashboard, follow these steps to create and set up your project:
- Click the Create Your Project button to start.
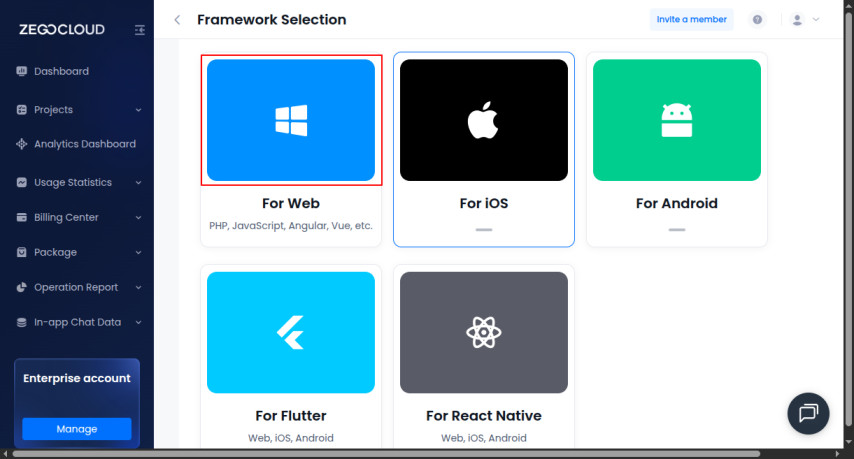
- From the list of UIKit apps, select Voice & Video Call, then click Next. This option uses Call Kit, which is what we need for video calling.

- Enter a name for your app. In this example, the name call_crowd is used, but you can choose any valid name. In the same step, select UIKit as the integration type.

- Choose Web as the platform since this is a WordPress website.
- On the next page, customize the Call Kit UI by selecting the features you need.
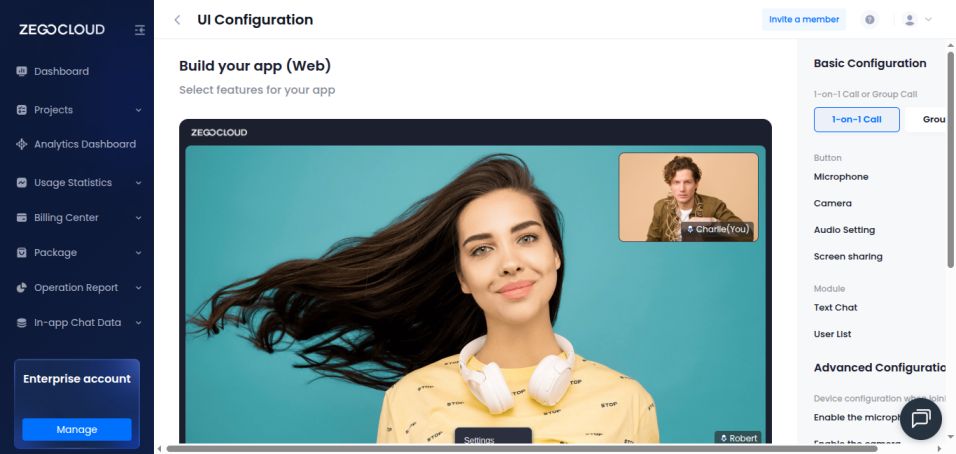
- Click Save & Integrate to generate your integration code.
<html>

<head>
    <style>
        #root {
            width: 100vw;
            height: 100vh;
            }
    </style>
</head>


<body>
    <div id="root"></div>
</body>
<script src="https://unpkg.com/@zegocloud/zego-uikit-prebuilt/zego-uikit-prebuilt.js"></script>
<script>
window.onload = function () {
    function getUrlParams(url) {
        let urlStr = url.split('?')[1];
        const urlSearchParams = new URLSearchParams(urlStr);
        const result = Object.fromEntries(urlSearchParams.entries());
        return result;
    }


        // Generate a Token by calling a method.
        // @param 1: appID
        // @param 2: serverSecret
        // @param 3: Room ID
        // @param 4: User ID
        // @param 5: Username
    const roomID = getUrlParams(window.location.href)['roomID'] || (Math.floor(Math.random() * 10000) + "");
    const userID = Math.floor(Math.random() * 10000) + "";
    const userName = "userName" + userID;
    const appID = your appID;
    const serverSecret = "your server secret";
    const kitToken = ZegoUIKitPrebuilt.generateKitTokenForTest(appID, serverSecret, roomID, userID, userName);


        const zp = ZegoUIKitPrebuilt.create(kitToken);
        zp.joinRoom({
            container: document.querySelector("#root"),
            sharedLinks: [{
                name: 'Personal link',
                url: window.location.protocol + '//' + window.location.host  + window.location.pathname + '?roomID=' + roomID,
            }],
            scenario: {
                mode: ZegoUIKitPrebuilt.VideoConference,
            },

               turnOnMicrophoneWhenJoining: true,
               turnOnCameraWhenJoining: true,
               showMyCameraToggleButton: true,
               showMyMicrophoneToggleButton: true,
               showAudioVideoSettingsButton: true,
               showScreenSharingButton: true,
               showTextChat: true,
               showUserList: true,
               maxUsers: 2,
               layout: "Auto",
               showLayoutButton: false,

            });
}
</script>

</html>
Step 3. Log in to WordPress
Now, log in to your WordPress dashboard and open the website where you want to add the video calling feature.
Step 4. Create or Update a WordPress Page
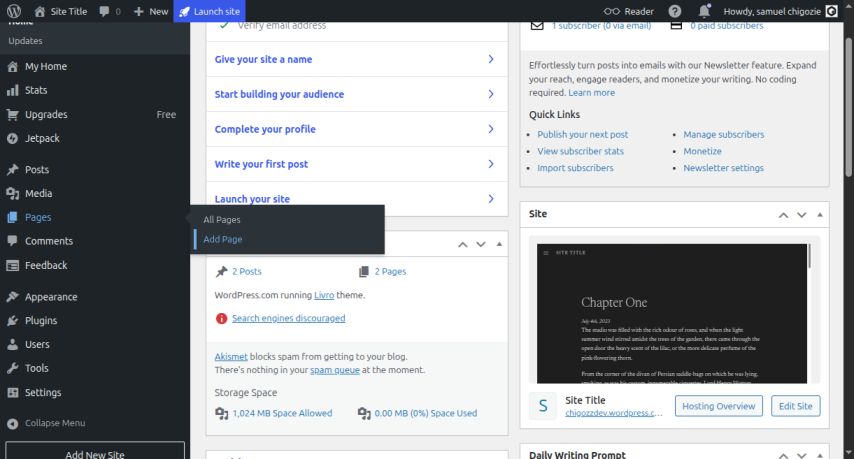
You need a page where the video call will appear. You can create a new page or use an existing one, depending on your needs.
Step 5. Add a Custom HTML Block
To embed the video call, add a Custom HTML block to the page:
- Open the page editor and add a Custom HTML block.
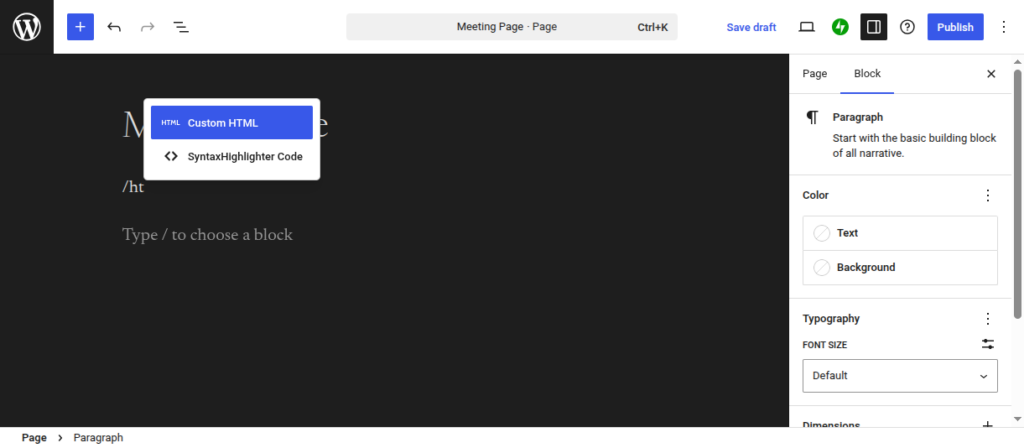
- Paste the integration code you copied from the ZEGOCLOUD Admin Console.
- Allow the required permissions when prompted (camera and microphone).
- Save the page and preview it.
Note: You will need a WordPress Business Plan and WPcode plugin to embed JavaScript on your pages.
Conclusion
Video calling is no longer a nice extra; it is something many users now expect. By adding HD video calls to your WordPress site, you enable faster, clearer, and more personal communication.
ZEGOCLOUD Call Kit helps you do this without complex setup or heavy development work. With everything in place, your website becomes more interactive and useful for real conversations.
From here, you can further enhance the experience by customizing the UI, managing users, or adding more real-time features as your site grows.
FAQ
Q1. How to integrate video calling in a website?
You can integrate video calling into a website by using a real-time communication service or SDK. These tools handle video, audio, and call management, allowing you to add video calling with minimal front-end code.
Q2. Can you add video to a WordPress website?
Yes, WordPress supports video integration through plugins, embeds, or JavaScript-based tools. You can add recorded videos or enable real-time video calling directly on WordPress pages.
Q3. How do I add a call button in WordPress?
You can add a call button in WordPress using a button block, shortcode, or custom HTML. The button can trigger a video call, open a meeting room, or launch a video calling interface.
Q4. How do I add a live video to WordPress?
To add live video to WordPress, you can embed a live stream or connect a real-time video service using plugins or scripts. This allows users to watch or join live video sessions directly on your site.
Let’s Build APP Together
Start building with real-time video, voice & chat SDK for apps today!
