Looking to create a realistic avatar for your online persona? Discover the top 10 realistic avatar creator software available online that offer user-friendly interfaces and customizable options. These tools allow you to personalize your avatar to accurately reflect your unique personality.
Which is The Best Realistic Avatar Creator?
The internet has revolutionized how we present ourselves through avatars. A great avatar can distinguish you from the crowd and create a lasting impression. But with so many options, it’s hard to know which realistic full-body avatar creator to choose. In this section, we’ll examine the top 10 realistic avatar creators available online.
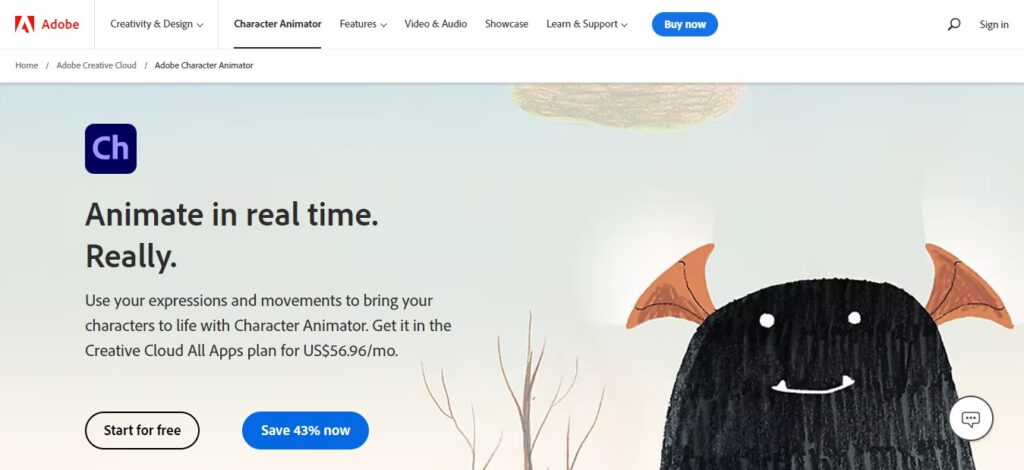
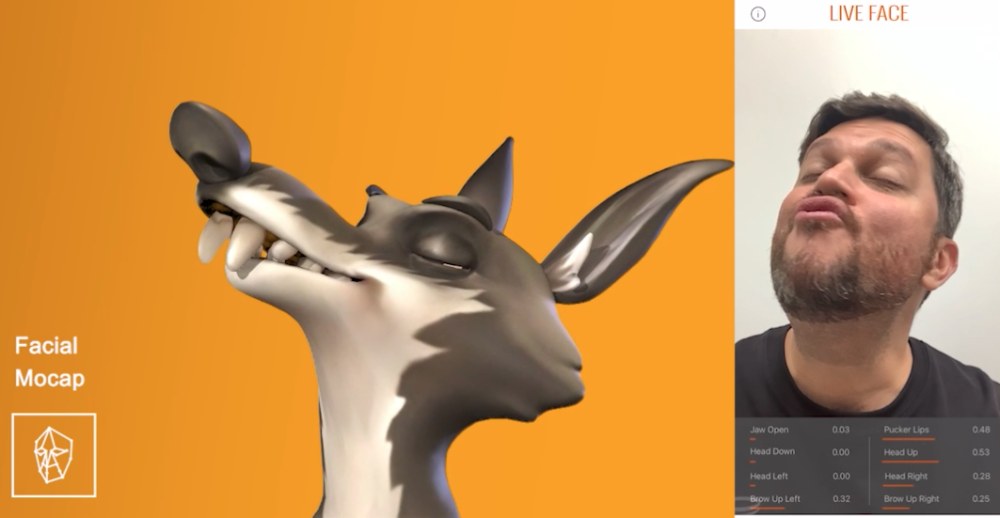
1. Adobe Character Animator

Adobe Character Animator is a top choice for those seeking a dynamic and interactive realistic avatar maker. By using your webcam and microphone, this tool captures your facial expressions and voice and translates them into movements for your avatar. You can also customize your avatar’s appearance with accessories and background effects, bringing it to life in a unique and engaging way.
2. Reallusion Character Creator

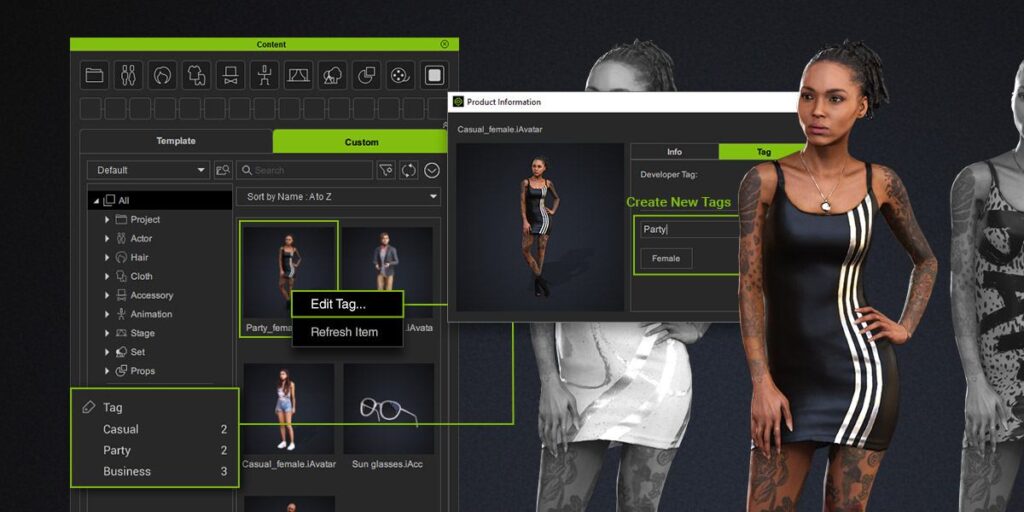
Reallusion Character Creator is a powerful 3D character creation software that allows users to make realistic avatar with detailed facial features, skin textures, and clothing. It offers users a wide range of customization tools to create unique characters, including body shaping, skin tone, hairstyle, and clothing options.
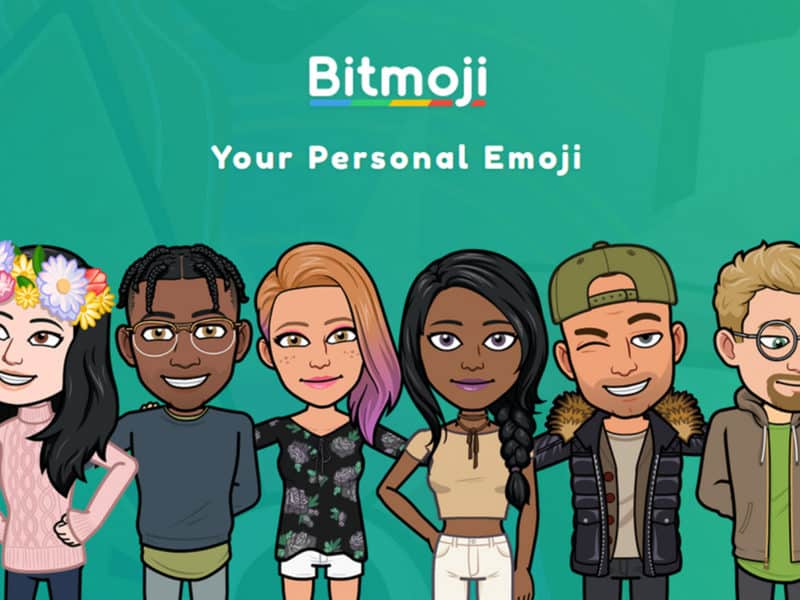
3. Bitmoji

Bitmoji is a user-friendly and popular avatar creator that offers a vast library of facial features, hairstyles, and outfits. It provides users with customization options to create personalized avatars that resemble their real-life selves. Additionally, Bitmoji can be used to create customized emojis and stickers, making it an excellent tool for social media and messaging apps.
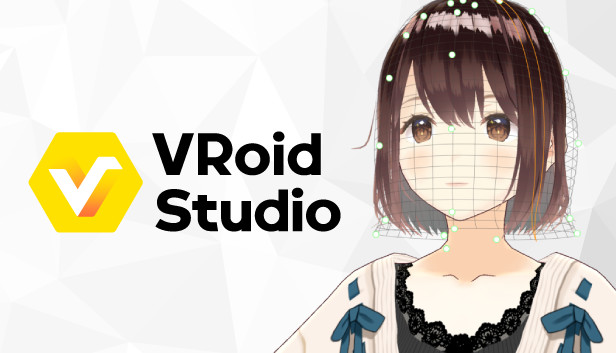
4. VRoid Studio

Designed specifically for creating 3D characters for video games and virtual reality, VRoid Studio is a free realistic avatar creator. It offers an extensive range of customization options, including facial features, hairstyles, and clothing. Additionally, VRoid has tool sets for adjusting body proportions and poses, as well as exporting models to various game engines and virtual reality platforms.
5. Character Creator 3

Character Creator 3 is a powerful realistic avatar creator that provides advanced customization options for highly detailed 3D models. It is perfect for creating realistic characters for video games, animation, and film, with features for creating lifelike skin textures, adjusting facial expressions, and adding accessories and clothing.
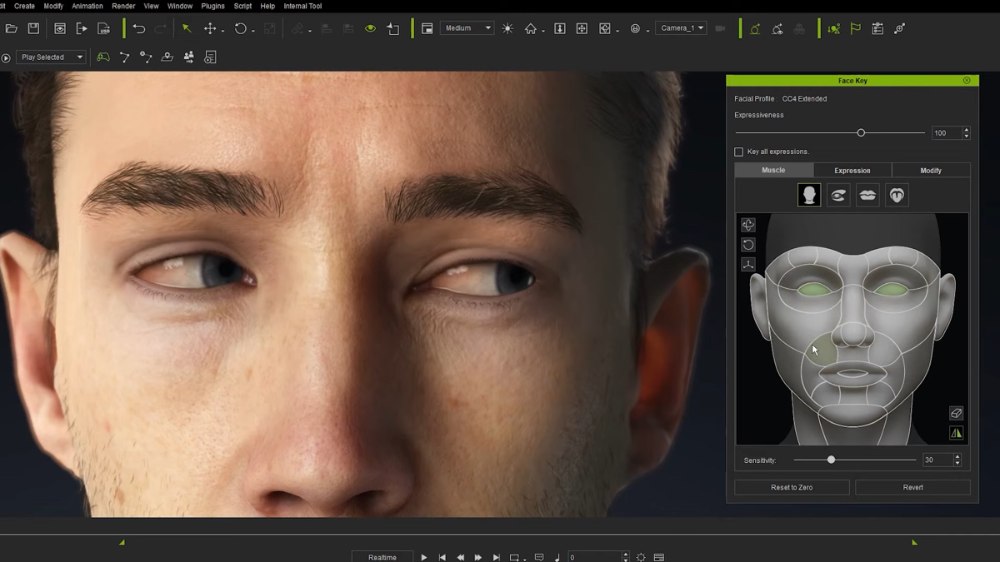
6. Reallusion iClone

Reallusion iClone is a professional-grade and feature-rich avatar creator realistic that offers advanced customization options. This tool provides numerous options for customizing facial features, hairstyles, and clothing, along with features for adjusting lighting and camera angles. It is an excellent tool for creating 3D models for film, animation, and virtual reality projects.
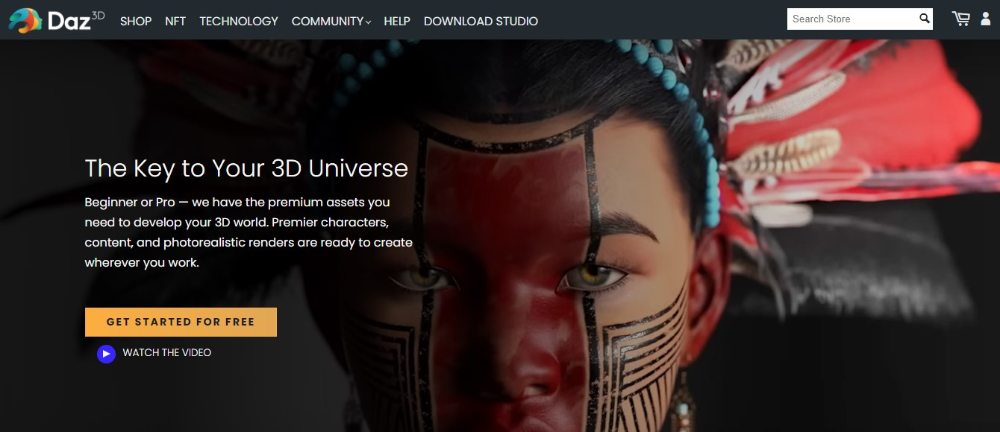
7. Daz Studio

Daz Studio is a 3D realistic avatar maker that provides a broad spectrum of customization options for creating realistic 3D models. With its extensive library of facial features, hairstyles, and clothing, this tool offers a wide range of options for customization. Along with features for adjusting body proportions and poses, it also provides plugins for importing and exporting models to different game engines and virtual reality platforms.
8. Avachara Avatar Maker

Avachara Avatar Maker is another realistic avatar creator free tool that allows you to customize your avatar’s appearance, clothing, and accessories. It features a wide range of customization options, from facial features to hairstyles, and allows you to save your avatar and use it on various social media platforms.
9. Marvel’s Create Your Own Superhero

Marvel’s Create Your Own Superhero is another best realistic avatar creator that allows users to create their own superhero characters. The website offers a wide range of customization options, including costumes, weapons, and special abilities. Users can also choose from a variety of backgrounds and settings to create a unique superhero story. Marvel’s Create Your Own Superhero is a great choice for anyone looking to create a personalized superhero character.
10. South Park Avatar Creator

The South Park Avatar Creator is a free online realistic avatar creator that allows users to create a South Park-style avatar. The website offers a range of customization options, including hairstyles, clothing items, and accessories. Users can also choose from a range of South Park characters to base their avatars on. The South Park Avatar Creator is a great choice for anyone who is a fan of the show and wants to create a customized South Park-style avatar.
How to Build Your Own Realistic Avatar Maker -ZEGOCLOUD
ZEGOCLOUD is a cloud-based platform that offers a variety of avatar SDK services, including a realistic avatar maker called ZEGO Avatars. It provides users with an easy-to-use web interface to create highly customizable avatars with various body movements and expressions.
With ZEGO Avatars, users can choose from a wide range of base models to create their avatar maker realistically, and then customize the appearance, clothing, accessories, and other features to make them unique. Additionally, users can add animations and expressions to their avatars to make them more realistic and engaging.
Steps to Build Your Own Realistic Avatar Creator
Follow the steps below to become a realistic avatar maker with the ZEGOCLOUD Virtual Avatar SDK:
1. Create a project
Follow the steps below to create a project in Android Studio or a similar development environment:
- To start your project in Android Studio, open the application and select “New Project” from the “File” menu.
- Name your project and select a storage location for the project files.
- Leave the remaining fields as default, then select “Next” and “Finish” to complete your project creation.

2. Import the SDK
- Get the latest SDK version by accessing the SDK Downloads section.
- After unpacking the SDK package, move the
ZegoAvatar.aar
file to a project directory such asapp/libs
. - Navigate to the app folder and open the
build.gradle
file to reference the SDK. Add the JAR files from the libs folder to the dependencies section.

3. Set permissions
Make permissions based on your app’s needs by adding the necessary permissions to the AndroidManifest.xml
file found in the app/src/main
directory.
<!-- Permissions required by the SDK -->
<uses-permission android:name="android.permission.CAMERA" />
<uses-permission android:name="android.permission.WRITE_EXTERNAL_STORAGE" />
<uses-permission android:name="android.permission.RECORD_AUDIO" />
<!-- Some permissions required by the app -->
<uses-permission android:name="android.permission.INTERNET" />
<uses-permission android:name="android.permission.READ_PHONE_STATE" />
<uses-feature
android:glEsVersion="0x00020000"
android:required="true" />
<uses-feature android:name="android.hardware.camera" />
<uses-feature android:name="android.hardware.camera.autofocus" />
4. Prevent code obfuscation
To preserve the SDK public class names, add the -keep
class configuration for the SDK in the proguard-rules.pro
file.
-keep class **.zego.**{*;}
5. Import resource packages
To use the AI features of ZegoAvatar SDK, import the required resource packages which can be downloaded from the Downloads section. You can import the packages by either downloading them dynamically or adding them from local storage.
Added from local
a. Access the Download section of the ZegoAvatar SDK to obtain the required resource packages.
b. Move the resource packages to the assets folder of your project after extracting them, and ensure that they are placed correctly.


c. To use the resource packages in your project, copy the AIModel.bundle
, base.bundle
, and Packages
files to the private directory (/data/data/package_name/files
) of the device. Remember that the assets folder of the Android system is read-only. You can use the following code while running the project to perform this task.
AssetsFileTransfer.copyAssetsDir2Phone(this.getApplication(),
"AIModel.bundle"/*The assets root directory in APK.*/, "assets"/* Directory in the SD card. The value is: getFilesDir().getAbsolutePath() + File.separator + destPath. */);
AssetsFileTransfer.copyAssetsDir2Phone(this.getApplication(),
"base.bundle", "assets");
AssetsFileTransfer.copyAssetsDir2Phone(this.getApplication(),
"Packages", "assets");
/*
To copy the contents of the source directory (e.g., AIModel.bundle) to the destination directory (e.g., /data/data/package_name/files/assets/) on a mobile device's storage, use the following code snippet. This method requires an activity parameter and accepts file paths as input.
*/
public static void copyAssetsDir2Phone(Context activity, String filePath, String destPath) {
try {
String[] fileList = activity.getAssets().list(filePath);
if (fileList.length > 0) {//If it is a directory
File file = new File(activity.getFilesDir().getAbsolutePath() + File.separator + destPath + File.separator + filePath);
if (file.exists()) {
deleteAllFiles(file);
}
file.mkdirs();//If the folder does not exist, recursion is performed.
for (String fileName : fileList) {
filePath = filePath + File.separator + fileName;
copyAssetsDir2Phone(activity, filePath, destPath);
filePath = filePath.substring(0, filePath.lastIndexOf(File.separator));
Log.i(TAG, filePath);
}
} else {//If it is a file
InputStream inputStream = activity.getAssets().open(filePath);
File file = new File(activity.getFilesDir().getAbsolutePath() + File.separator + destPath + File.separator + filePath);
if (file.exists()) {
boolean delete = file.delete();
}
if (!file.exists() || file.length() == 0) {
FileOutputStream fos = new FileOutputStream(file);
int len = -1;
byte[] buffer = new byte[1024];
while ((len = inputStream.read(buffer)) != -1) {
fos.write(buffer, 0, len);
}
fos.flush();
inputStream.close();
fos.close();
}
}
} catch (IOException e) {
Log.e(TAG, "copy file failed, src:" + filePath + " dest:" + destPath);
e.printStackTrace();
}
}
d. After copying the resources and running the project on a mobile device, the directory structure may differ based on the device used. For example, on a Huawei phone, the directory returned by getFilesDir().getAbsolutePath()
is /data/data/im.zego.zegoavatarexample
.
e. To activate a feature, indicate the complete path of the resource required by the corresponding API.
6. Apply for authentication
To get the license file for the Virtual Avatar, you need to complete the online authentication process by following the steps below:
6.1 Enable the ZegoAvatar permission
Obtain your project’s AppID and AppSign by creating it in ZEGOCLOUD Admin Console. Contact ZEGOCLOUD tech support to activate relevant permissions by providing your project’s package name.
6.2 Obtain the reference code
a. Integrate the “im.zego.zegoavatarexample.licensehelper
” code from the SDK sample source code into your project.
b. Include library files as dependencies.
// To utilize the reference code, add the library files as dependencies.
implementation "com.google.code.gson:gson:2.8.8"
implementation 'com.squareup.okhttp3:okhttp:4.9.0'
c. Ensure to correctly input the AppID
and AppSign
that you obtained into the ZegoAvatarConfig.java
file to enable successful execution of the sample source code.
public class ZegoAvatarConfig {
// The address of the authentication server.
public final static String BACKEND_API_URL = "https://aieffects-api.zego.im?Action=DescribeAvatarLicense";
// ZEGOCLOUD provides an AppID which is linked to the package name of the application. To use it, update the package name submitted during AppID application in app/build.gradle with the ApplicationId provided by ZEGOCLOUD.
public final static long APP_ID = YOUR_APP_ID;
// The AppSign is from ZEGOCLOUD.
public final static String APP_SIGN = YOUR_APP_SIGN;
}
d. You need to modify the application in app/build.gradle
to match the package name used during the AppID
application.
6.3 Obtain the license
You can obtain the authentication license by calling the getLicense
API in ZegoLicenseHelper
and making a network request.
ZegoLicenseHelper.getLicense(this, (code, message, response) -> {
// License obtained.
if (code == 0) {
String license = response.getLicense();
// Invalid license will render ZegoAvatar SDK's related features unavailable during initialization.
ZegoServiceConfig config = new ZegoServiceConfig(license,
getFilesDir().getAbsolutePath() + "/assets/AIModel.bundle/");
// Call the ZegoAvatarService SDK's init method before using the SDK since it's asynchronous. Use addServiceObserver to check the SDK's status.
ZegoAvatarService.init(MainActivity.this.getApplication(), config);
} else {
// Failed to obtain the license.
Toast.makeText(MainActivity.this, "Failed to obtain the license. code: " + code, Toast.LENGTH_LONG).show();
}
});
7. Initialize ZegoAvatarService
a. Prior to initializing the AvatarService, import the following codes:
import com.zego.avatar.OnRecordStartCallback;
import com.zego.avatar.OnRecordStopCallback;
import com.zego.avatar.ZegoAvatarService;
import com.zego.avatar.ZegoAvatarView;
import com.zego.avatar.bean.ZegoGenderType;
import com.zego.avatar.bean.ZegoAvatarQualityLevel;
import com.zego.avatar.bean.ZegoAvatarServiceState;
import com.zego.avatar.bean.ZegoExpressionDetectMode;
import com.zego.avatar.bean.ZegoModelType;
import com.zego.avatar.bean.ZegoServiceConfig;
b. Invoke the init function after importing the codes and passing the authentication license to initialize the AvatarService
.
// Prior to usage, copy resources to an SD card to avoid redundant copying. It's also possible to download resources from the internet.
AssetsFileTransfer.copyAssetsDir2Phone(this.getApplication(),
"AIModel.bundle"/*assets root directory in apk*/, "assets"/* Directory in the SD card. The value is getFilesDir().getAbsolutePath() + File.separator + destPath. */);
AssetsFileTransfer.copyAssetsDir2Phone(this.getApplication(),
"base.bundle", "assets");
AssetsFileTransfer.copyAssetsDir2Phone(this.getApplication(),
"Packages", "assets");
String license = "xxxxxxx"; // The license obtained from the authentication server.
String AIPath = getFilesDir().getAbsolutePath() + "/assets/AIModel.bundle"; // The absolute path of the AI model.
ZegoServiceConfig config = new ZegoServiceConfig(license, AIPath);
ZegoAvatarService.init(AvatarApplication.this, config);
c. Listen for the onStateChange callback to receive initialization status event notifications.
ZegoAvatarService.addServiceObserver(new ZegoAvatarServiceDelegate(){
@Override
public void onError(ZegoAvatarErrorCode code, String desc) {
mMainHandler.post(() ->{
ZALog.e("errorcode : " + code.getErrorCode() + ",desc : " + desc);
});
}
@Override
public void onStateChange(ZegoAvatarServiceState state) {
// init status callback.
}
});
8. Create a virtual avatar
Initialize a ZegoCharacterHelper
object with appearance data such as facial features, clothing materials, and makeup, as well as view parameters such as width, height, and position to create a virtual avatar after AvatarService
initialization.
public class AvatarMainActivity extends BaseActivity implements ZegoAvatarServiceDelegate {
private ZegoAvatarView mZegoAvatarView;
private IZegoInteractEngine mZegoInteractEngine;
private ZegoCharacterHelper mCharacterHelper;
@Override
protected void onCreate(Bundle savedInstanceState) {
// Please hold on until the initialization process of ZegoAvatarService has been fully executed.
ZegoAvatarService.addServiceObserver(this);
mZegoAvatarView = findViewById(R.id.zego_avatar_view);
}
@Override
public void onStateChange(ZegoAvatarServiceState state) {
if (state == ZegoAvatarServiceState.InitSucceed) {
AvatarMainActivity.this.runOnUiThread(() -> {
// Simplify API calls by implementing a ZegoCharacterHelper class.
mCharacterHelper = new ZegoCharacterHelper(getFilesDir().getAbsolutePath() + "/assets/base.bundle"); // Absolute path for essential resources.
mCharacterHelper.setExtendPackagePath(getFilesDir().getAbsolutePath() + "/assets/Packages"); // Set the directory where the makeup, hair, glass, and other resource packages are stored.
// Set the default avatar. The options include "male" and "female".
mCharacterHelper.setDefaultAvatar("female");
// Display the avatar on the screen and call the API on a UI thread.
mCharacterHelper.setCharacterView(mZegoAvatarView);
// Create the facial expression mirroring model.
// !!! Note: Obtain the camera or voice permission from users if required.
mZegoInteractEngine = ZegoAvatarService.getInteractEngine();
if (mZegoInteractEngine != null) {
// Enable facial expression mirroring.
mZegoInteractEngine.startDetectExpression(ZegoExpressionDetectMode.Camera,expression -> {
zegoCharacter.setExpression(expression);
});
}
});
ZegoAvatarService.removeServiceObserver(this);
}
}
}
For further avatar customization options, refer to ZegoCharacterHelper Instructions and Virtual Avatar documentation.
Run a Demo
Explore the ZEGOCLOUD Virtual Avatar SDK’s features by trying out the avatar demo sample.
Conclusion
Creating realistic avatars online has never been easier with the help of the 7 best avatar creators available today. However, for more advanced customization options, ZEGOCLOUD’s Avatar Service offers a powerful solution for developers to create virtual avatars with a wide range of appearance and view parameters. Sign up to get started with ZEGOCLOUD’s Virtual Avatar.
Talk to Expert
Learn more about our solutions and get your question answered.