Talk to us
Talk to us
menu

How to Make An Avatar With ZEGOCLOUD

How to Make An Avatar With ZEGOCLOUD

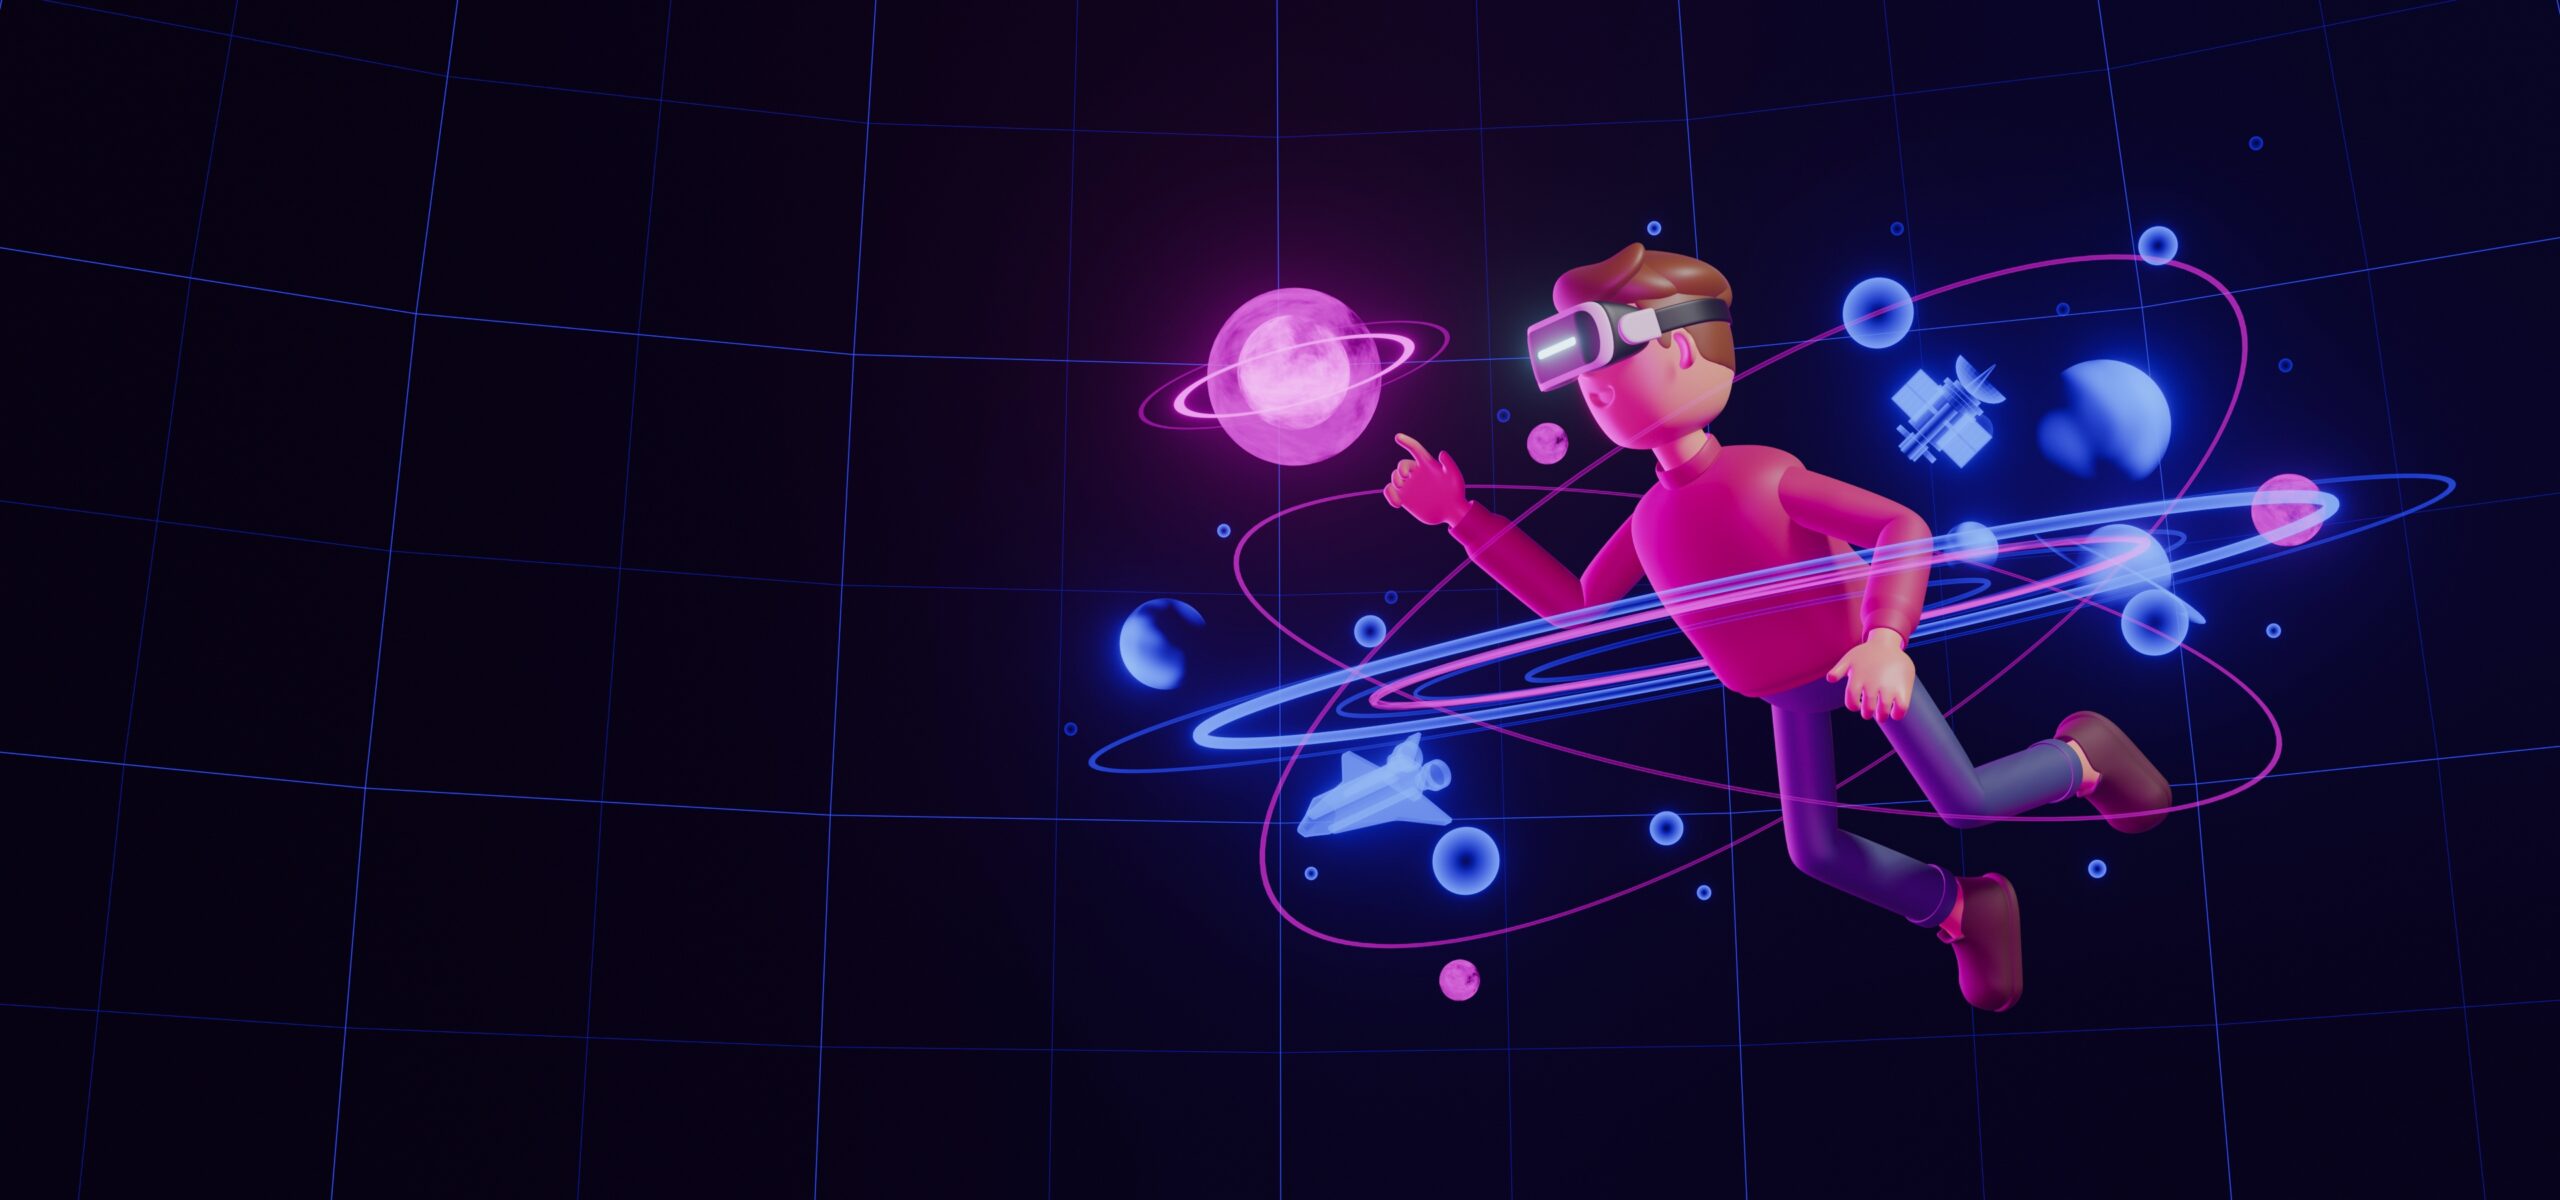
Until not long ago, talk of cyberspace recalled abstract images inspired by science fiction movies. Yet, nowadays, reality has surpassed fantasy. We can create an Avatar to experiment with digital versions of ourselves, crossing the vast Web horizons. This technology immersively recreates our existence on a computer with almost natural scenes and realistic objects.

What is Metaverse?

The Metaverse is a virtual world that allows users to design reality as they wish. It opens up new forms of freedom that begin when you create an Avatar.

The Metaverse represents a new means of communication, radically evolving social interactions between Internet users. The term became popular and widespread when the founder of Facebook almost appropriated it, renaming his giant digital empire Meta. His disruptive vision of our existence in hologram form envisions more than a billion people using the Metaverse in the next decade.

Overcoming the limitations of 2D technology, it offers the possibility of relating in an innovative and immersive way. The imperative is to have our digital version possible through the generation of an Avatar, a term with esoteric origins.

create an avatar

What is an AVATAR?

We can define avatars as our digital selves occupying a three-dimensional virtual world space.

Avatar comes from the Sanskrit word avatāra, meaning ‘descent.’ In Hinduism, it represents embodiment or ‘manifestation of a person or idea.’

In the West, the term refers to everyday use related to digital space. Avatar is like the little cartoon character we choose to represent in video games, social media, or web forums.

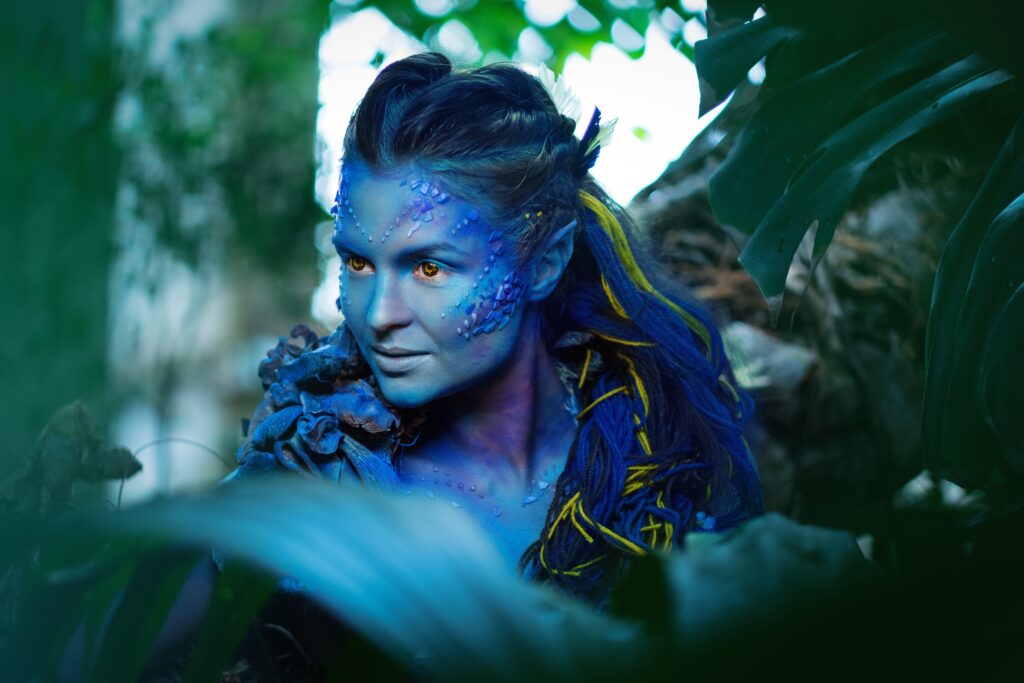
We cannot help but mention what springs to many minds when the term avatar is uttered: a mystical blue feline creature hurtling across an enchanting landscape. In James Cameron’s epic 2009 movie, the avatars are sentient extraterrestrial humanoids who inhabit the universe and are a mediator between humans and spirits. Just like how digital selves mediate between the real and the virtual realm.

make avatar
An Avatar character from the popular movie Avatars

Personalization, the key Feature to Make an Avatar

Making the Avatar is a crucial moment for users from a technical point of view and beyond. You can freely choose your digital identity and instantaneously travel across time, cultures, and distances. There are no rules in the virtual world, and that’s precisely one of the drives of Avatar’s success.

We can make an avatar for social relationships and one for business relationships. It can differ based on our activity or the person we meet. Therefore, versatility is what characterizes avatars.

Each platform or context requires a congruous digital self. The custom avatars will have different features: some are realistic, others very imaginative and cartoonish.

Let us briefly dive into how and where avatars have been adopted.

Gaming, the seedbed of Avatars

Avatars in video games represent players. The practice of modeling a role-playing character according to one’s preferences has been widespread since the first tabletop games were released in the 1970s.

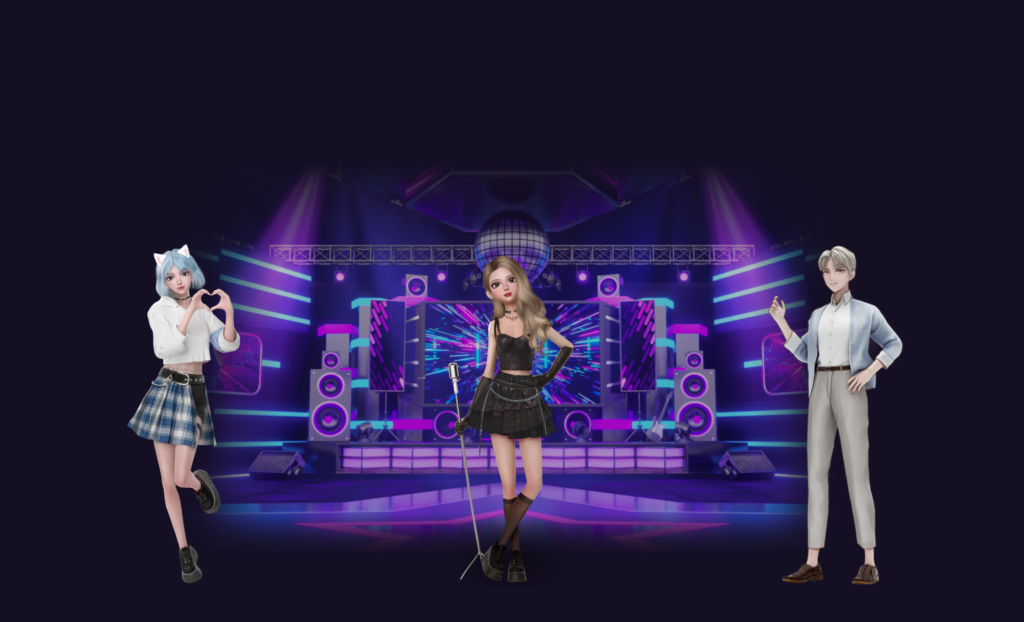
Modern games developed with Internet technology have given players endless options for customizing avatars. Famous games like Second Life, The Sims, and World of Warcraft popularized and normalized personal avatars.

In 1985, the game Ultima IV: Quest of the Avatar required users to think of the player as themselves; creator Richard Garriot sensed that the stakes would be high if the user saw themselves in the game. From there on, avatars became much more sophisticated. In video games, avatars tend to come to life in 3D, where the metaverse doors will further push barriers to innovation.

Avatars on Social Media

Those who use social media have certainly experienced avatars on Snapchat, Facebook, Instagram, and TikTok. Even instant messaging platforms like Whatsapp or Apple Messages are seeing infiltrations of 3D and 2D avatars in digital communications.

Evolution of Avatar creation

In the early days of blogs and virtual communities, we represented ourselves with usernames. The breakthrough came 25 years ago with the launch of AOL Instant Messenger introducing “buddies,” figures inspired by video games that could represent us on the chat screen. Next came Yahoo!, which named its version “Yahoo! Avatars” in 2004. With the arrival of Myspace and even more so with Facebook, things changed, and we started using photos as profile pictures instead of avatars.

Today, however, using animated versions of ourselves in digital interactions is back in vogue, with custom avatar features to show off in comments, posts, stories, and games.

Metaverse breakthroughs

Metaverse perspectives push the boundaries between representation and actual reincarnation of ourselves. Meta is experimenting with codex avatars that mirror human appearance and anatomy, enabled by wearable devices. Meta has also launched an avatar fashion store intending to allow digital creators to launch their avatar fashion items in the future.

Outside the Metaverse, AVATAR creation meets the use of photography, bringing together these two ways of representing users online.

A Detailed Guide for Creating an Avatar

There are many ways to create an avatar. Users can let their imagination run wild and create a novel version that 100% represents them. It does not necessarily have to match one’s perception of reality.

Social media and video games have an avatar-making built-in functionality. To integrate the avatar creation feature on existing apps or platforms, developers can use tools such as the ZEGO Avatar SDK, available for both iOS and Android. It offers a cutting-edge avatar-making solution to best suit the metaverse opportunities.

Otherwise, one can use an avatar maker app to create a custom cartoon avatar.

With manual creation, one can choose everything from gender to skin color, the shape of one’s face and eye color, and hairstyle. One can create one’s outfit or follow an avatar template with a ready-made look.

The alternative very much in vogue in recent times is to make a digital self through facial recognition technology. This option allows one to use facial scanning by taking a photo or selecting an image from the phone.

How to Create an Avatar from Photos

Once you have chosen your favorite free online avatar creation app or website:

– navigate to find the initialization button

– we go to the page where we need to choose our body type and gender

– Take a selfie or upload a photo

– Use the photo and adapt the avatar image: hairstyle, skin tone, neck, face shape, and eye color are already faithful reflections of your actual image!

For the innovative ZEGO Avatar, check out the detailed tutorial on creating your Avatar from a photo in three easy steps!

How to Create an Avatar with ZEGOCLOUD

ZEGOCLOUD is a user-friendly online platform that allows you to create personalized avatars with ease. With its intuitive interface and diverse customization options, you can create a unique and captivating avatar that perfectly represents you or your brand. In this article, we’ll explore step-by-step how to create an avatar with ZEGOCLOUD and unleash your creativity.

Based on powerful artificial intelligence algorithms, ZEGOCLOUD Avatar SDK allows users to make and customize digital selves with various options. You can use it in voice chat apps, social media, live streaming, games, virtual events, and many other scenarios.

ZEGOCLOUD’s avatar solution offers countless styles, including Cute, Anime, Comics, Games, Realistic, and more, with related outfits, virtual makeup, and many more. Ideal to fit any context according to your needs.

Features of Virtual Avatar SDK

Here are the key features of the ZEGOCLOUD Virtual Avatar SDK:

1. Customizable Avatars

The SDK allows you to create personalized avatars with a wide range of customization options. You can customize everything from the avatar’s appearance to their behavior, ensuring that your avatar stands out from the crowd.

2. Real-time Animation

With real-time animation, you can make your avatar come to life. The SDK provides real-time animation tools that enable you to create smooth and natural animations for your avatar, enhancing user engagement.

3. Multi-platform Support

The ZEGOCLOUD Virtual Avatar SDK supports multiple platforms, including Android, iOS, and web browsers. This makes it easy to integrate your avatar into different applications and websites, expanding your reach and engagement.

4. Analytics and Reporting

With the SDK’s built-in analytics and reporting tools, you can track your avatar’s performance and engagement metrics. This allows you to optimize your avatar and improve engagement with your audience.

Preparation

  • A ZEGOCLOUD developer account – Sign up
  • Recent version of Android Studio
  • Android device or emulator
  • Basic knowledge of Android app dev.

Steps to Make an Avatar with ZEGOCLOUD SDK

To produce customized avatars of excellent quality, follow the steps outlined below:

1. Create a project

  1. To commence creating your project, launch the Android Studio and click on the “File” menu, then choose “New” and finally “New Project.”
  1. Next, input the name of your project and choose a storage location for the project files.
  1. You can leave the other fields as default, then hit “Next” and “Finish” buttons to finalize your project creation.

2. Import the SDK

  1. Access the SDK Downloads section to get the most recent version of the SDK.
  2. Unpack the SDK package, then transfer the ZegoAvatar.aar file from the package to a project directory like app/libs.
  3. To reference the SDK, navigate to the app folder and open the build.gradle file. Then, add all the JAR files located in the libs folder to the dependencies section.

3. Set permissions

Customize the necessary permissions according to your application’s requirements. Open the AndroidManifest.xml file located in the app/src/main directory, then add the required permissions.

<!-- Permissions required by the SDK -->

<uses-permission android:name="android.permission.CAMERA" />
<uses-permission android:name="android.permission.WRITE_EXTERNAL_STORAGE" />
<uses-permission android:name="android.permission.RECORD_AUDIO" />

<!-- Some permissions required by the app -->
<uses-permission android:name="android.permission.INTERNET" />
<uses-permission android:name="android.permission.READ_PHONE_STATE" />

<uses-feature
    android:glEsVersion="0x00020000"
    android:required="true" />

<uses-feature android:name="android.hardware.camera" />
<uses-feature android:name="android.hardware.camera.autofocus" />
String[] permissionNeeded = {
    "android.permission.CAMERA"};

if (Build.VERSION.SDK_INT >= Build.VERSION_CODES.M) {
    if (ContextCompat.checkSelfPermission(this, "android.permission.CAMERA") != PackageManager.PERMISSION_GRANTED) {
        requestPermissions(permissionNeeded, 101);
    }
}

4. Prevent code obfuscation

To prevent the obfuscation of the SDK public class names, append the -keep class configuration for the SDK in the proguard-rules.pro file.

-keep class **.zego.**{*;}

5. Import resource packages

To utilize the AI capabilities offered by the ZegoAvatar SDK, you must first import the appropriate resource packages. These resource packages can be obtained by downloading them from the Download section. Once obtained, you can import the resource packages either by using the dynamic downloading method or by adding them from the local storage.

Added from local

  1. Access the SDK Downloads section to get the corresponding resource packages.
  2. Extract the acquired resource packages, locate the assets folder, and transfer it to the assets directory of your project.
  3. While running the project, utilize the following code to copy the AIModel.bundle, base.bundle, and Packages files to the private directory (/data/data/package_name/files) of the device. It’s worth noting that the assets folder of the Android system is read-only.
AssetsFileTransfer.copyAssetsDir2Phone(this.getApplication(),
            "AIModel.bundle"/*The assets root directory in APK.*/, "assets"/* Directory in the SD card. The value is: getFilesDir().getAbsolutePath() + File.separator + destPath. */);
AssetsFileTransfer.copyAssetsDir2Phone(this.getApplication(),
            "base.bundle", "assets");
AssetsFileTransfer.copyAssetsDir2Phone(this.getApplication(),
            "Packages", "assets");


/*Copy the entire contents of the assets/${filePath} directory to ${destPath}/ in the mobile phone's storage directory. This method requires an activity parameter and accepts file paths for the source (e.g., AIModel.bundle) and destination directories (e.g., /data/data/package_name/files/assets/).

*/
    public static void copyAssetsDir2Phone(Context activity, String filePath, String destPath) {
        try {
            String[] fileList = activity.getAssets().list(filePath);
            if (fileList.length > 0) {//If it is a directory
                File file = new File(activity.getFilesDir().getAbsolutePath() + File.separator + destPath + File.separator + filePath);
                if (file.exists()) {
                    deleteAllFiles(file);
                }
                file.mkdirs();//If the folder does not exist, recursion is performed.
                for (String fileName : fileList) {
                    filePath = filePath + File.separator + fileName;

                    copyAssetsDir2Phone(activity, filePath, destPath);

                    filePath = filePath.substring(0, filePath.lastIndexOf(File.separator));
                    Log.i(TAG, filePath);
                }
            } else {//If it is a file
                InputStream inputStream = activity.getAssets().open(filePath);
                File file = new File(activity.getFilesDir().getAbsolutePath() + File.separator + destPath + File.separator + filePath);
                if (file.exists()) {
                    boolean delete = file.delete();
                }
                if (!file.exists() || file.length() == 0) {
                    FileOutputStream fos = new FileOutputStream(file);
                    int len = -1;
                    byte[] buffer = new byte[1024];
                    while ((len = inputStream.read(buffer)) != -1) {
                        fos.write(buffer, 0, len);
                    }
                    fos.flush();
                    inputStream.close();
                    fos.close();
                }
            }
        } catch (IOException e) {
            Log.e(TAG, "copy file faild, src:" + filePath + " dest:" + destPath);
            e.printStackTrace();
        }
    }
  1. Once the resources are successfully copied and the project is running on a mobile device, the resulting structure will resemble the following. Please note that the directory returned by getFilesDir().getAbsolutePath() may differ based on the mobile device being used. For instance, on a Huawei phone, the returned directory is /data/data/im.zego.zegoavatarexample.
  2. To enable a feature, specify the absolute path of the resource required by the relevant API.

6. Apply for authentication

To obtain the license file, the Virtual Avatar undergoes online authentication. Follow these steps to complete the process:

1. Enable the ZegoAvatar permission

Generate your project’s AppID and AppSign by creating it in ZEGOCLOUD Admin Console. To activate relevant permissions, contact ZEGOCLOUD tech support and provide your project’s package name.

2. Obtain the reference code

  1. Add the code from im.zego.zegoavatarexample.licensehelper in the SDK sample source code to your project.
  2. Incorporate library files as dependencies.
// To use the reference code, these library files must be included as dependencies.

implementation "com.google.code.gson:gson:2.8.8"
implementation 'com.squareup.okhttp3:okhttp:4.9.0'
  1. Correctly enter the obtained AppID and AppSign in the ZegoAvatarConfig.java file, or the sample source code will fail to run.
public class ZegoAvatarConfig {
    // The address of the authentication server.
    public final static String BACKEND_API_URL = "https://aieffects-api.zego.im?Action=DescribeAvatarLicense";

// ZEGOCLOUD provides the AppID, which is linked to the ApplicationId. To use it, update the ApplicationId in app/build.gradle with the package name submitted during AppID application.

    public final static long APP_ID = YOUR_APP_ID;
    // The AppSign is from ZEGOCLOUD.
    public final static String APP_SIGN = YOUR_APP_SIGN;
}
  1. Update the applicationId in app/build.gradle to the package name provided during the AppID application.

3. Obtain the license

Retrieve the authentication license by initiating a network request through the getLicense API in ZegoLicenseHelper.

ZegoLicenseHelper.getLicense(this, (code, message, response) -> {
    // License obtained.
    if (code == 0) {
        String license = response.getLicense();

        // The license is required during ZegoAvatarService initialization. If the license is incorrect, related features of the ZegoAvatar SDK are unavailable.

        ZegoServiceConfig config = new ZegoServiceConfig(license,
                    getFilesDir().getAbsolutePath() + "/assets/AIModel.bundle/");

        // ZegoAvatarService SDK's init method is asynchronous, so it's essential to call it before using the SDK. To check the SDK's status, addServiceObserver can be used.

        ZegoAvatarService.init(MainActivity.this.getApplication(), config);
    } else {
        // Failed to obtain the license.
        Toast.makeText(MainActivity.this, "Failed to obtain the license. code: " + code, Toast.LENGTH_LONG).show();
    }
});

7. Initialize ZegoAvatarService

  1. Import the following codes prior to initializing the AvatarService:
import com.zego.avatar.OnRecordStartCallback;
import com.zego.avatar.OnRecordStopCallback;
import com.zego.avatar.ZegoAvatarService;
import com.zego.avatar.ZegoAvatarView;
import com.zego.avatar.bean.ZegoGenderType;
import com.zego.avatar.bean.ZegoAvatarQualityLevel;
import com.zego.avatar.bean.ZegoAvatarServiceState;
import com.zego.avatar.bean.ZegoExpressionDetectMode;
import com.zego.avatar.bean.ZegoModelType;
import com.zego.avatar.bean.ZegoServiceConfig;
  1. Call the init method and provide the obtained authentication license to initialize the AvatarService after importing the codes.
// Copy resources to an SD card first. Note: When you use the resources, determine whether the resources are already copied to prevent repeated copies. Resources can also be downloaded from the Internet.
AssetsFileTransfer.copyAssetsDir2Phone(this.getApplication(),
            "AIModel.bundle"/*assets root directory in apk*/, "assets"/* Directory in the SD card. The value is getFilesDir().getAbsolutePath() + File.separator + destPath. */);
AssetsFileTransfer.copyAssetsDir2Phone(this.getApplication(),
            "base.bundle", "assets");
AssetsFileTransfer.copyAssetsDir2Phone(this.getApplication(),
            "Packages", "assets");
String license = "xxxxxxx"; // The license obtained from the authentication server.
String AIPath = getFilesDir().getAbsolutePath() + "/assets/AIModel.bundle"; // The absolute path of the AI model.
ZegoServiceConfig config = new ZegoServiceConfig(license, AIPath);
ZegoAvatarService.init(AvatarApplication.this, config);
  1. Receive initialization status event notifications by listening for the onStateChange callback.
ZegoAvatarService.addServiceObserver(new ZegoAvatarServiceDelegate(){
    @Override
    public void onError(ZegoAvatarErrorCode code, String desc) {
        mMainHandler.post(() ->{
            ZALog.e("errorcode : " + code.getErrorCode() + ",desc : " + desc);
        });
    }
    @Override
    public void onStateChange(ZegoAvatarServiceState state) {
        // init status callback.
    }
});

8. Create a virtual avatar

To create a virtual avatar, initialize a ZegoCharacterHelper object after initializing the AvatarService, and provide appearance data such as facial features, clothing materials, and makeup, as well as view parameters such as width, height, and position.

public class AvatarMainActivity extends BaseActivity implements ZegoAvatarServiceDelegate {
    private ZegoAvatarView mZegoAvatarView;
    private IZegoInteractEngine mZegoInteractEngine;
    private ZegoCharacterHelper mCharacterHelper;
    @Override
    protected void onCreate(Bundle savedInstanceState) {
        // Wait for ZegoAvatarService initialization to complete.
        ZegoAvatarService.addServiceObserver(this);
        mZegoAvatarView = findViewById(R.id.zego_avatar_view);
    }
    @Override
    public void onStateChange(ZegoAvatarServiceState state) {
    if (state == ZegoAvatarServiceState.InitSucceed) {
            AvatarMainActivity.this.runOnUiThread(() -> {
                // Create a ZegoCharacterHelper class to simplify the implementation process for API calls.
                mCharacterHelper = new ZegoCharacterHelper(getFilesDir().getAbsolutePath() + "/assets/base.bundle"); // The absolute path of basic resources.

                mCharacterHelper.setExtendPackagePath(getFilesDir().getAbsolutePath() + "/assets/Packages"); // Set the directory where the makeup, hair, glass, and other resource packages are stored.
                // Set the default avatar. The options include "male" and "female".
                mCharacterHelper.setDefaultAvatar("female");
                // Display the avatar on the screen and call the API on a UI thread.
                mCharacterHelper.setCharacterView(mZegoAvatarView);
                // Create the facial expression mirroring model.
                // !!! Note: Obtain the camera or voice permission from users if required.
                mZegoInteractEngine = ZegoAvatarService.getInteractEngine();
                if (mZegoInteractEngine != null) {
                    // Enable facial expression mirroring.
                    mZegoInteractEngine.startDetectExpression(ZegoExpressionDetectMode.Camera,expression -> {
                        zegoCharacter.setExpression(expression);
                    });
                }
            });
            ZegoAvatarService.removeServiceObserver(this);
        }
    }
}

If you need more avatar customization options, you can visit ZegoCharacterHelper Instructions and Virtual Avatar documentation to learn more.

Final thoughts

Creating a virtual avatar with ZEGOCLOUD is a fun and straightforward process. With the provided appearance data and view parameters, you can customize your avatar’s facial features, clothing, and makeup, making it unique to you. ZEGOCLOUD’s efficient authentication and license retrieval process make avatar creation a breeze. Sign up to get started on your virtual persona today!

You can check out the Virtual Avatar demo sample to explore the features of this wonderful SDK.

Talk to Expert

Learn more about our solutions and get your question answered.

Talk to us

Take your apps to the next level with our voice, video and chat APIs

Free Trial
  • 10,000 minutes for free
  • 4,000+ corporate clients
  • 3 Billion daily call minutes

Stay updated with us by signing up for our newsletter!

Don't miss out on important news and updates from ZEGOCLOUD!

* You may unsubscribe at any time using the unsubscribe link in the digest email. See our privacy policy for more information.