Message component
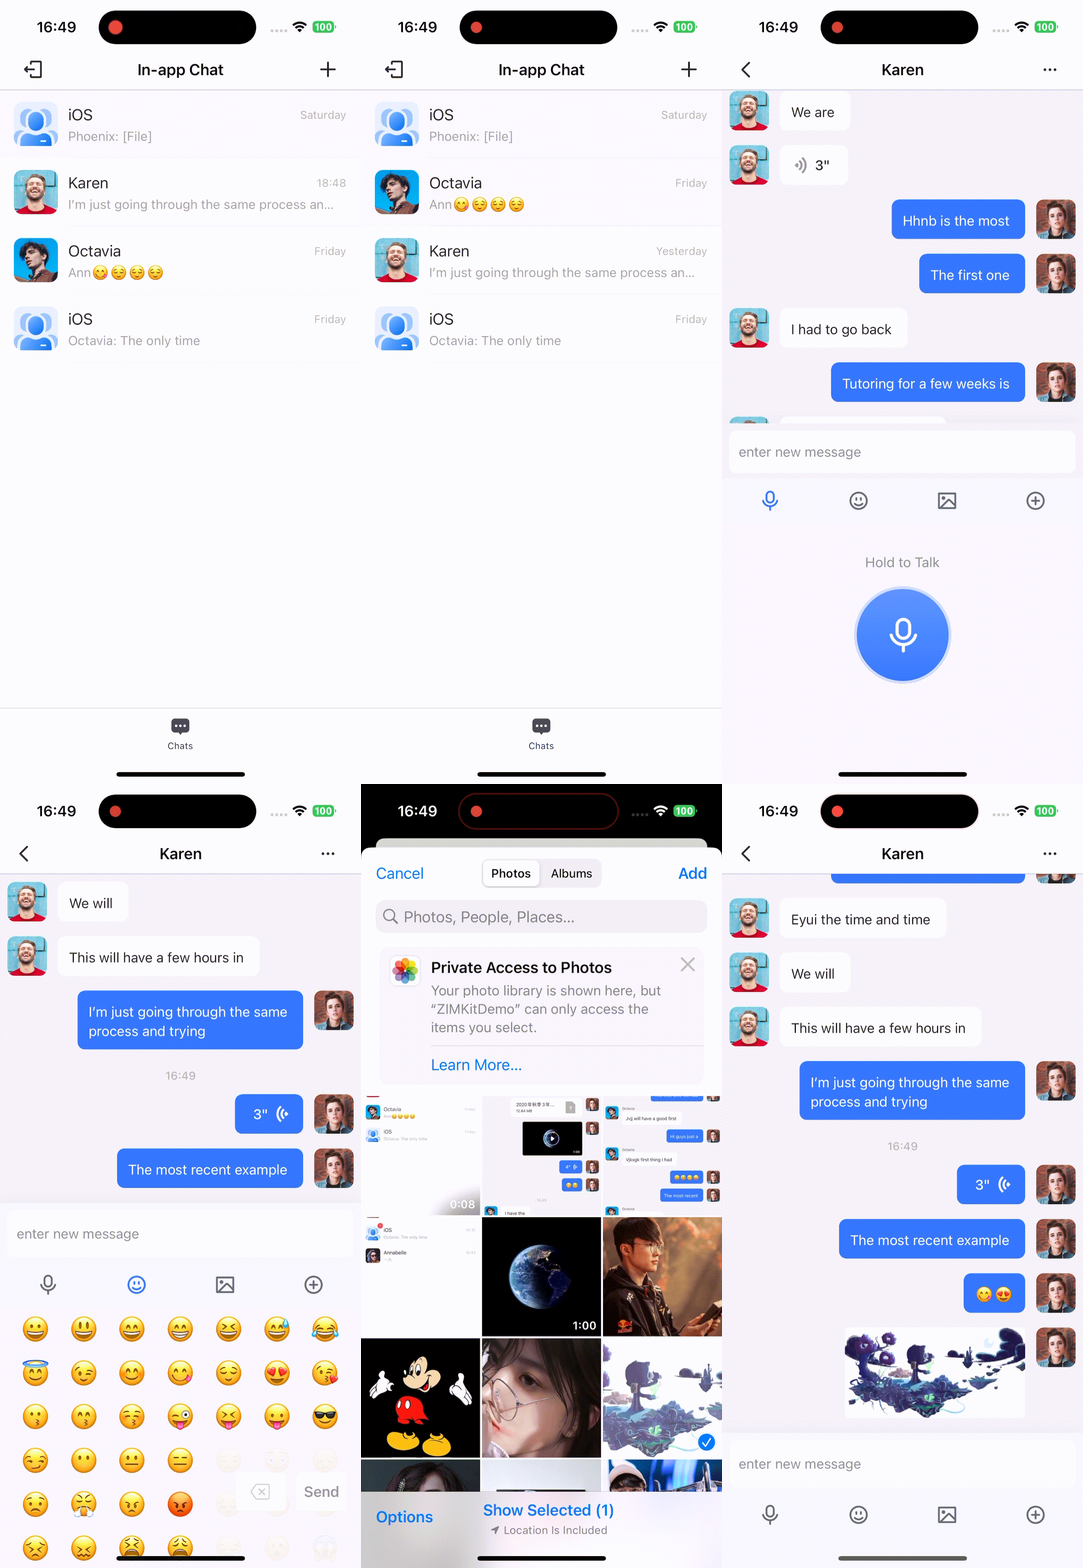
The message component of the In-app Chat Kit provides the message list and message transmission features.
- Message list: Allow you to view the message history of a chat.
- Message transmission: Allow you to send or receive one-to-one messages and group messages.
Integrate the message component into your project
Prerequisites
Integrate the In-app Chat Kit SDK into your project (finished the initialization and login are required). For more information, see Quick start.
Show the message component
// !mark(1:2)
import UIKit
import ZIMKit

/// your ViewController.swift
class ViewController: UIViewController {

    override func viewDidLoad() {
        super.viewDidLoad()

    }

    /// Call the following method to display the message component after login succeeded.
// !mark(1:6)
    func showMessageListVC() {
        let conversationID = "xxx"  // Conversation ID. For one-on-one chats, it refers to the peer's userID. For group chats, it refers to the GroupID.
        let type: ConversationType = .peer // Conversation type (one-on-one chats or group chats).
        let messageVC = ZIMKitMessagesListVC(conversationID: conversationID, type: type)
        navigationController?.pushViewController(messageVC, animated: true)
    }
}Customize features
If the default message-relevant features and behaviors don't fully meet your needs, we allow you to flexibly customize those through the config we mentioned in this section.
For example, when you want to add audio and video call buttons in the bottom toolbar. To know more details, please refer toUsed with Audio and Video Call UIKit.
import UIKit
import ZIMKit

class ViewController: UIViewController {

    override func viewDidLoad() {
        super.viewDidLoad()

        // init ZIMKit
        let config = ZIMKitConfig()
        let call:ZegoUIKitPrebuiltCallInvitationConfig = ZegoUIKitPrebuiltCallInvitationConfig(notifyWhenAppRunningInBackgroundOrQuit: true, isSandboxEnvironment: true, certificateIndex: .firstCertificate)
        let callConfig: ZegoCallPluginConfig = ZegoCallPluginConfig(invitationConfig: call, resourceID: "zegouikit_call")

        config.callPluginConfig = callConfig
        config.bottomConfig.expandButtons.append(.voiceCall)
        config.bottomConfig.expandButtons.append(.videoCall)
        ZIMKit.initWith(appID: KeyCenter.appID(), appSign: KeyCenter.appSign(), config: config)


        // After loading the view, perform other additional settings.
        let messageVC = ZIMKitMessagesListVC(conversationID: "conversationID", type: .peer)

        // If you integrate ZimkitConVersationListvc, you can set and listen to delegate to receive notifications related to message -related notifications.
        let conversationVC = ZIMKitConversationListVC()
        conversationVC.delegate = self
    }
}To customize the button on the bottom toolbar, you can use the smallButtons and expandButtons configuration:
The following is the reference code:
// smallButtons The bottom toolbar button configuration
config.bottomConfig.smallButtons.append(.takePhoto)
// smallButtons by default includes .expand. If you modify smallButtons and also want to display the configuration UI for expandButtons, please make sure that .expand is included in smallButtons.
// config.bottomConfig.smallButtons.append(.expand)
config.bottomConfig.expandButtons.append(.voiceCall) Upon long-pressing a message, a message action menu is displayed, offering options such as copying, replying, and forwarding the message, along with other actions. To modify this menu, you can use the ZIMKitMessageConfig. This configuration allows for the customization of the action menu for different message types (text, image, video, voice, and combined message):

| Available actions | Text | Image | Video | File | Voice | Combined messages |
|---|---|---|---|---|---|---|
| copy | ✔️ | ✖ | ✖ | ✖ | ✖ | ✖ |
| reply | ✔️ | ✔️ | ✔️ | ✔️ | ✔️ | ✔️ |
| forward | ✔️ | ✔️ | ✔️ | ✔️ | ✖ | ✔️ |
| multipleChoice | ✔️ | ✔️ | ✔️ | ✔️ | ✔️ | ✔️ |
| delete | ✔️ | ✔️ | ✔️ | ✔️ | ✔️ | ✔️ |
| revoke | ✔️ | ✔️ | ✔️ | ✔️ | ✔️ | ✔️ |
| speaker | ✖ | ✖ | ✖ | ✖ | ✔️ | ✖ |
| reaction | ✔️ | ✔️ | ✔️ | ✔️ | ✔️ | ✔️ |
Here is the reference code:
let config = ZIMKitConfig()

// Text message
config.messageConfig.textMessageConfig.operations = [
    .copy,
    .reply,
    .forward,
    .multipleChoice,
    .delete,
    .revoke,
    .reaction
]

// Image message
config.messageConfig.imageMessageConfig.operations = [
    .reply,
    .forward,
    .multipleChoice,
    .delete,
    .reaction,
    .revoke
]

// Video message
config.messageConfig.videoMessageConfig.operations = [
    .reply,
    .forward,
    .multipleChoice,
    .delete,
    .reaction,
    .revoke
]

// File message
config.messageConfig.fileMessageConfig.operations = [
    .reply,
    .forward,
    .multipleChoice,
    .delete,
    .reaction,
    .revoke
]

// Audio message
config.messageConfig.audioMessageConfig.operations = [
    .speaker,
    .reply,
    .multipleChoice,
    .delete,
    .reaction,
    .revoke
]

// Combined message
config.messageConfig.combineMessageConfig.operations = [
    .reply,
    .forward,
    .multipleChoice,
    .delete,
    .reaction,
    .revoke
]To change the default prompt text for the bottom input box, you can configure it using 'inputPlaceholder'
Here is the reference code:
let config = ZIMKitConfig()
config.inputPlaceholder =  NSAttributedString(string: "Enter", attributes: [NSAttributedString.Key.foregroundColor: UIColor.black,
NSAttributedString.Key.font: UIFont.systemFont(ofSize: 15)])To customize the top navigation bar of the conversation page, please register the delegate ZIMKitMessagesListVCDelegate first.
let vc = ZIMKitConversationListVC()
vc.messageDelegate = selfLater, if you want to completely change the top navigation bar, you can call the getMessageListHeaderCustomerview method.
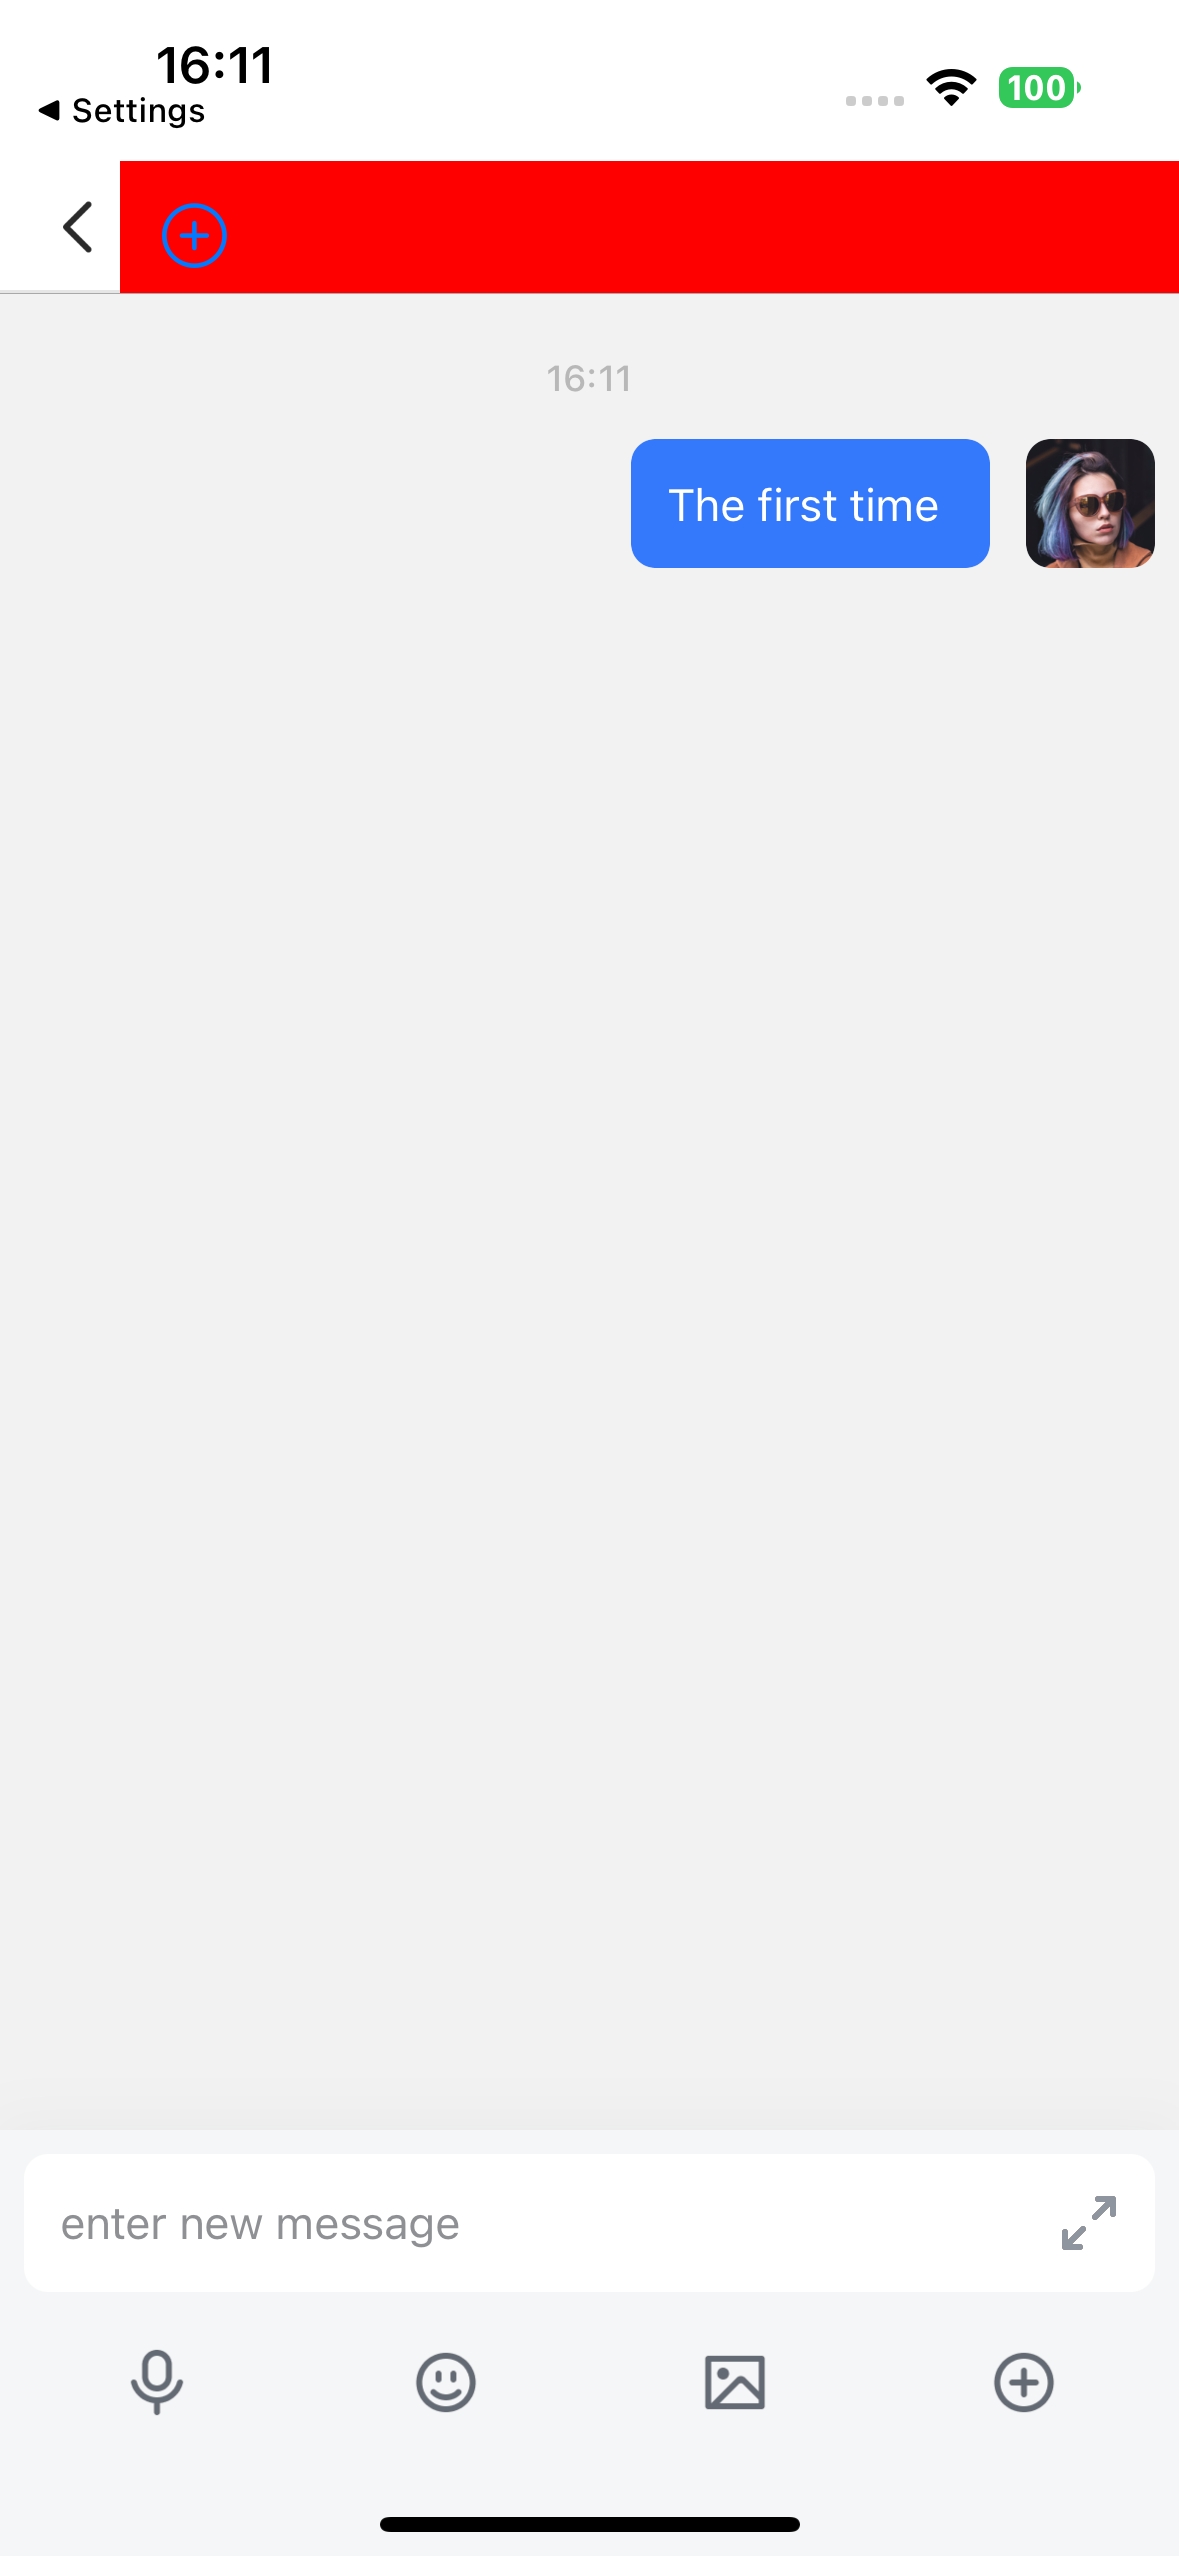
func getMessageListHeaderCustomerview(_ messageListVC: ZIMKitMessagesListVC) -> UIView?
let view = UIView().withoutAutoresizingMaskConstraints
let button = UIButton(type: .contactAdd)
button.frame = CGRect(x: 10, y: 10, width: 30, height: 30)
button.addTarget(self, action: #selector(customerButtonClick(_:)), for: .touchUpInside)
view.addSubview(button)
return viewIf you only need to modify the title of the top navigation bar or add buttons on the left or right side of the title, you can call the getMessageListHeaderBar method.
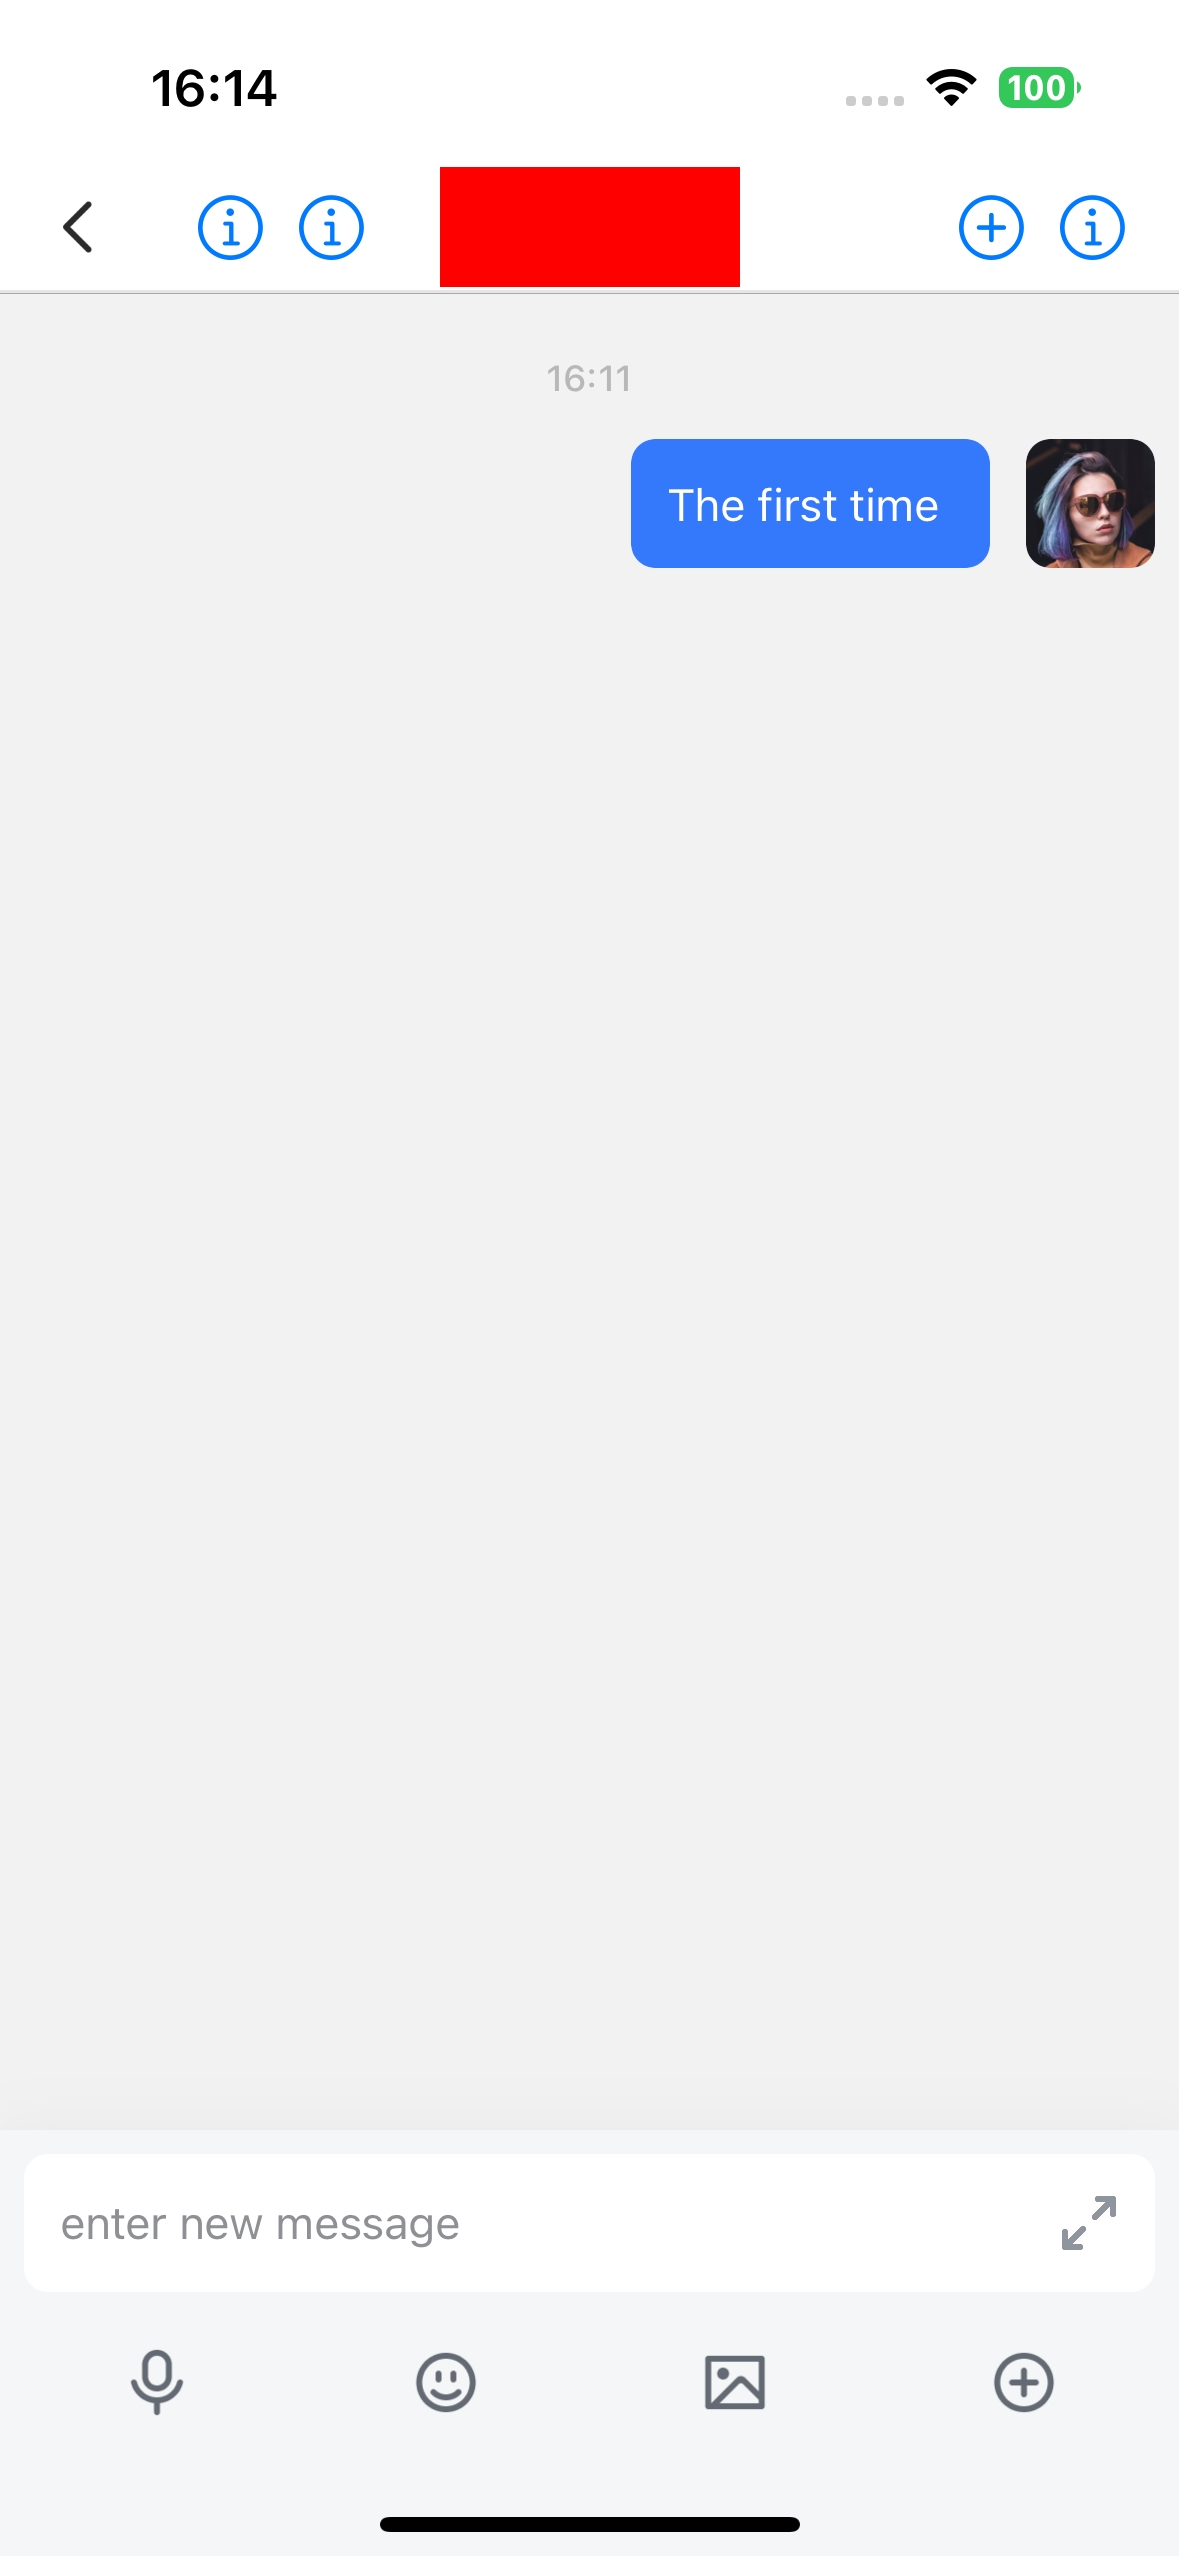
func getMessageListHeaderBar(_ messageListVC: ZIMKitMessagesListVC) -> ZIMKitHeaderBar? {
let header = ZIMKitHeaderBar()
let button1:UIBarButtonItem = UIBarButtonItem(customView:UIButton(type: .detailDisclosure))
let button2:UIBarButtonItem = UIBarButtonItem(customView:UIButton(type: .contactAdd))
let button3:UIBarButtonItem = UIBarButtonItem(customView:UIButton(type: .infoDark))
let button4:UIBarButtonItem = UIBarButtonItem(customView:UIButton(type: .infoLight))
header.rightItems = [button1,button2]
header.leftItems = [button3,button4]
let titleView = UIView()
titleView.backgroundColor = UIColor.red
titleView.frame = CGRectMake(0, 0, 100, 40)
header.titleView = titleView
return header
}To listen for the destruction of the conversation page and implement your business logic, please register the delegate ZIMKitMessagesListVCDelegate first.
let vc = ZIMKitConversationListVC()
vc.messageDelegate = selfThen, listen for the destruction event of the conversation page through messageListViewWillDisappear and implement your business logic at the same time.
func messageListViewWillDisappear() {
    // Your logic
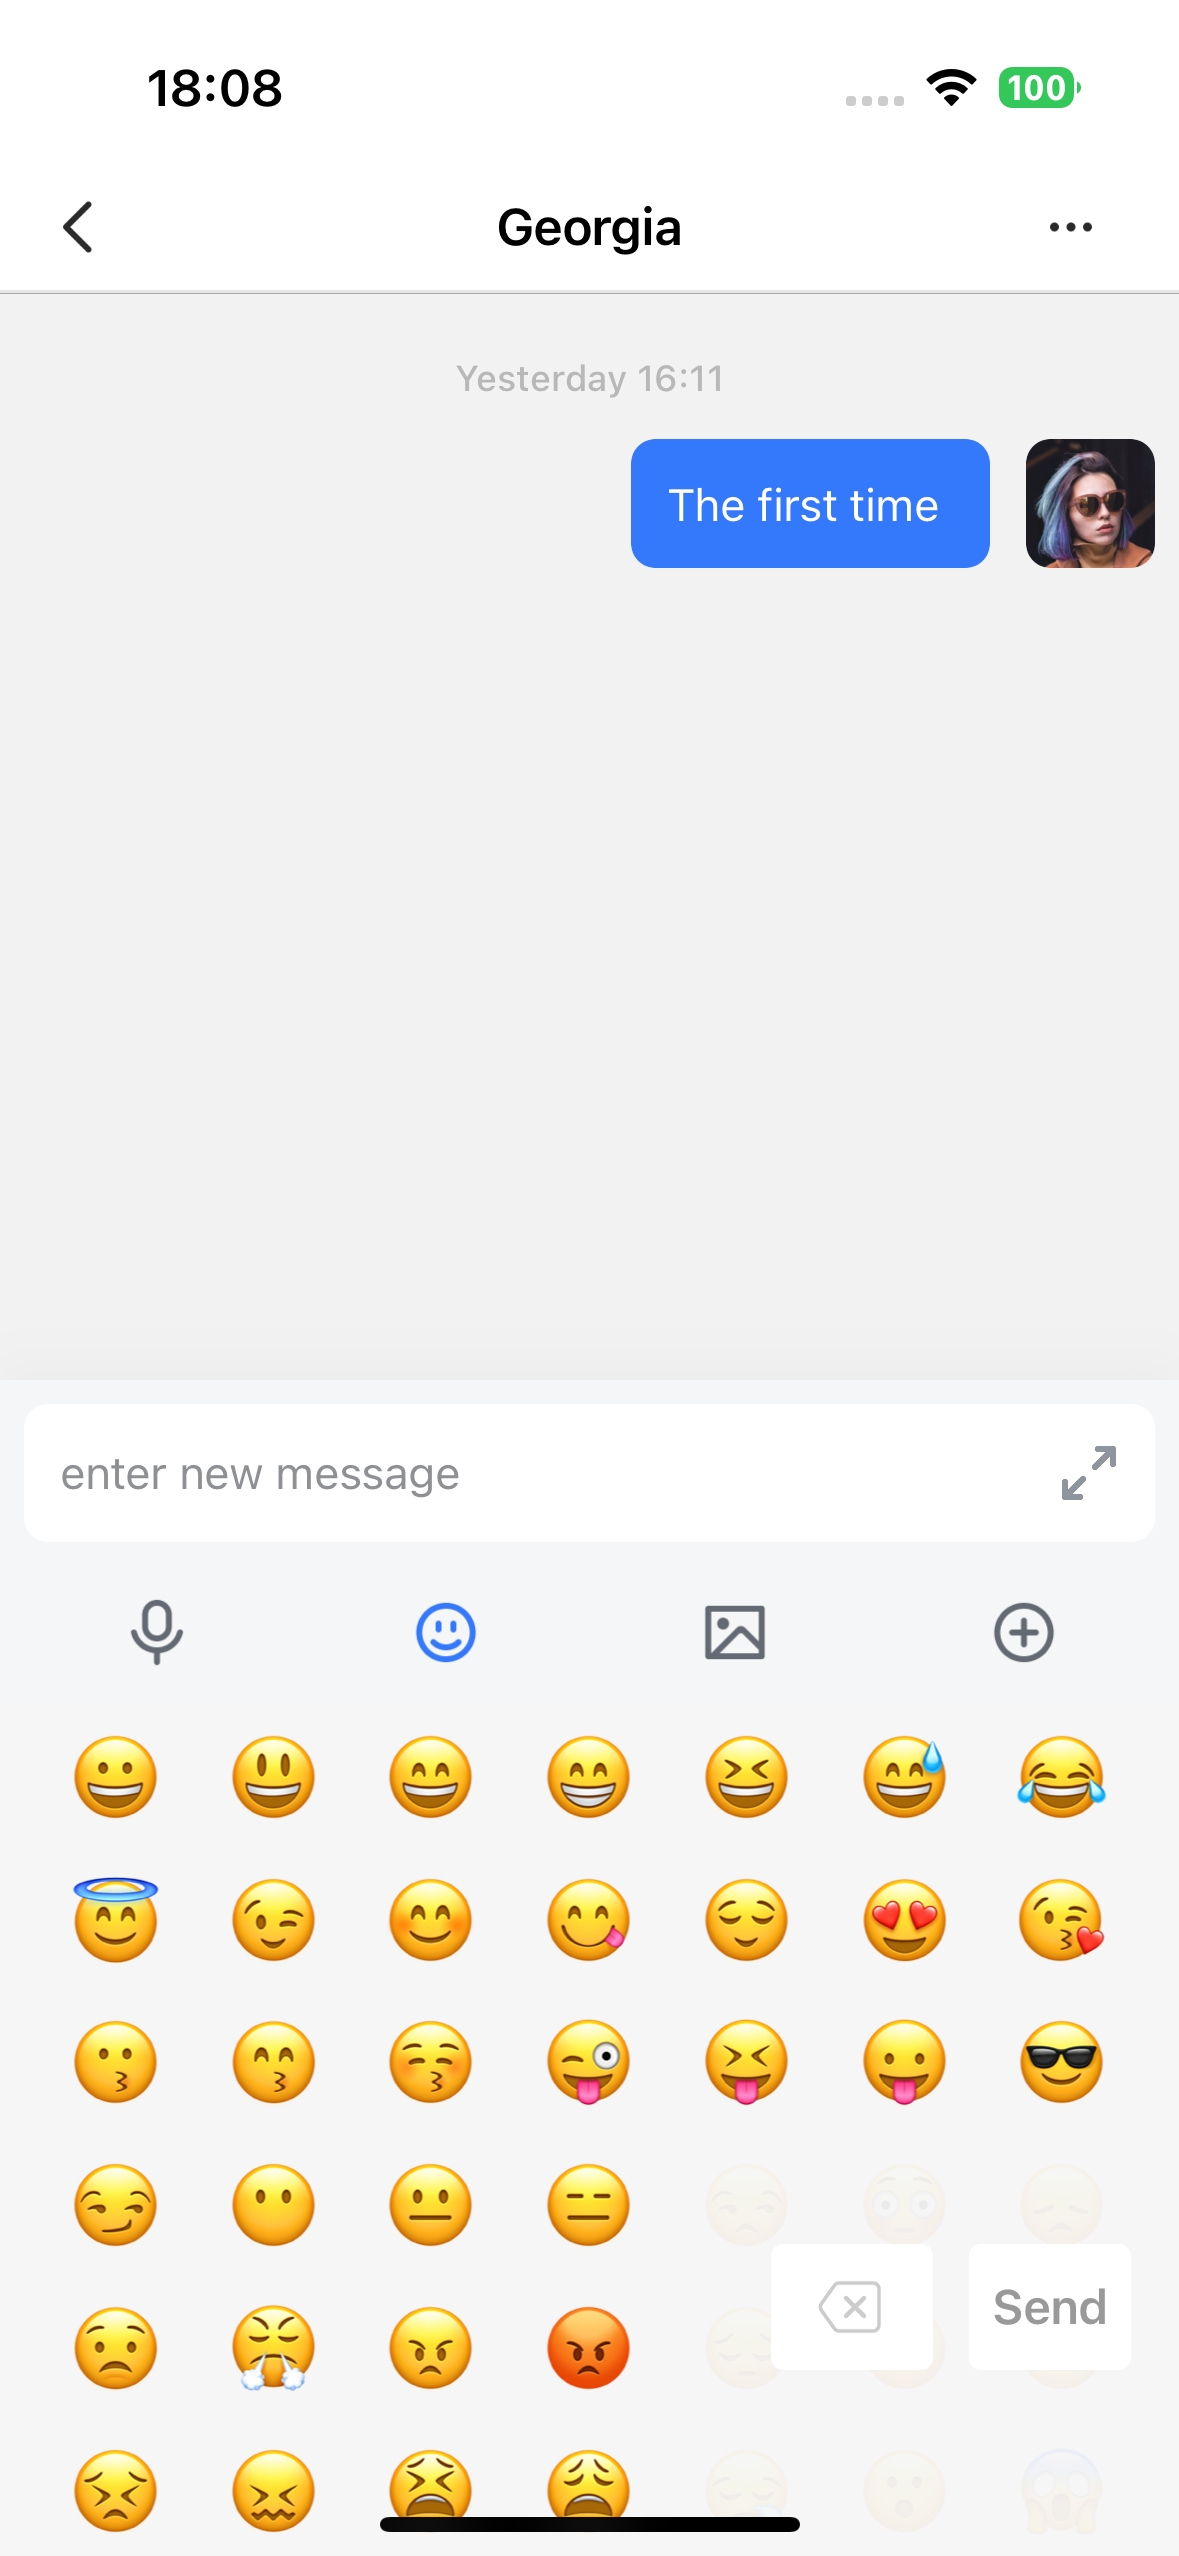
}In-app Chat Kit provides a set of default emojis for sending expressions in conversations and reacting to messages. If you are not satisfied with the default emojis provided, you can pass in all the emojis you need through bottomConfig.emojis.
| Expression Messages | Message Reactions |
|---|---|
 | 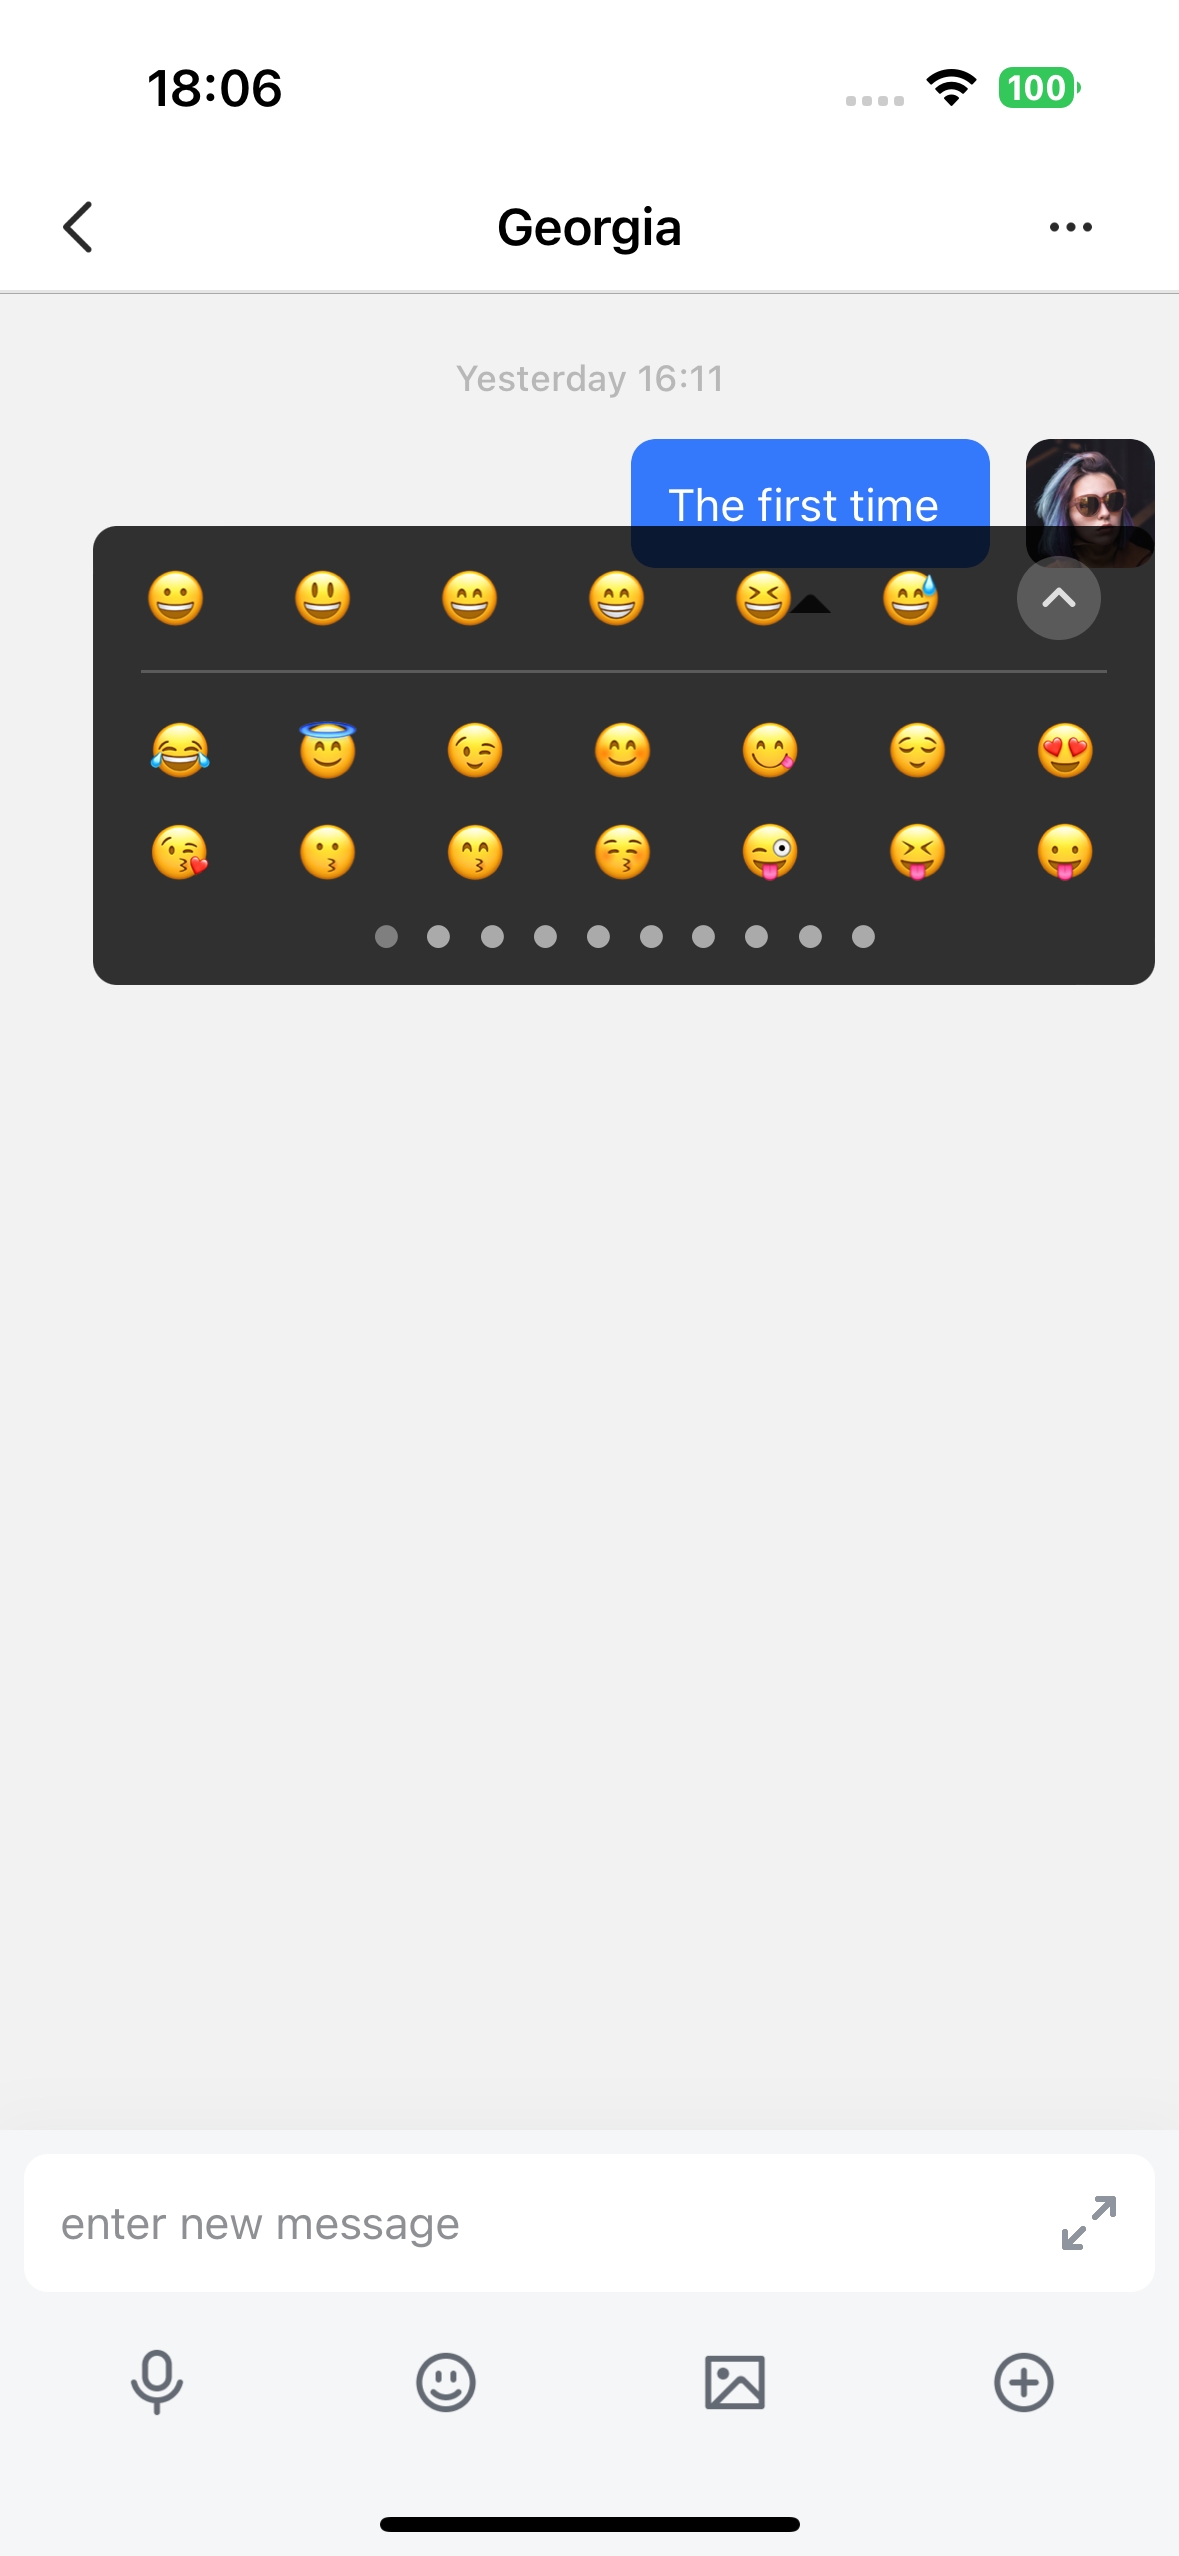 |
Here is the reference code:
let config = ZIMKitConfig()
config.bottomConfig.emojis = ["😀", "😃", "😄", "😁", "😆", "😅", "😂"]